Saltar al contenido principal

Lenovo IdeaPad Flex 5 Chrome 13ITL6 SSD Replacement

Qué necesitas

  1. Lenovo IdeaPad Flex 5 Chrome 13ITL6 SSD Replacement, SSD: paso 1, imagen 1 de 3 Lenovo IdeaPad Flex 5 Chrome 13ITL6 SSD Replacement, SSD: paso 1, imagen 2 de 3 Lenovo IdeaPad Flex 5 Chrome 13ITL6 SSD Replacement, SSD: paso 1, imagen 3 de 3
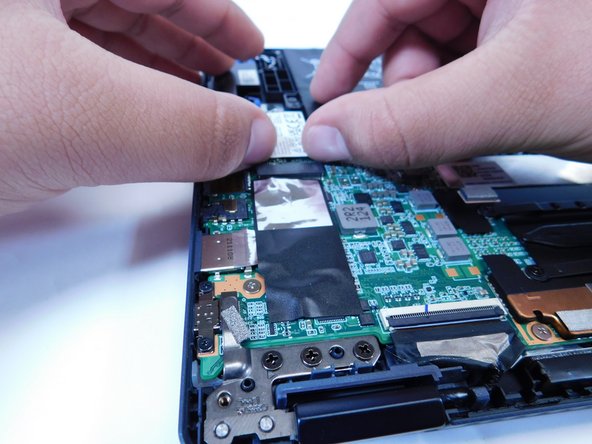
    • Flip the computer over to have access to the bottom.

    • Remove the 9 screws on the back with the T5 screwdriver.

  2. Lenovo IdeaPad Flex 5 Chrome 13ITL6 SSD Replacement: paso 2, imagen 1 de 2 Lenovo IdeaPad Flex 5 Chrome 13ITL6 SSD Replacement: paso 2, imagen 2 de 2
    • Use a plastic opening tool to open up the back of the device, which will require some pressure.

    • Locate the SSD on the right side of the computer.

  3. Lenovo IdeaPad Flex 5 Chrome 13ITL6 SSD Replacement: paso 3, imagen 1 de 3 Lenovo IdeaPad Flex 5 Chrome 13ITL6 SSD Replacement: paso 3, imagen 2 de 3 Lenovo IdeaPad Flex 5 Chrome 13ITL6 SSD Replacement: paso 3, imagen 3 de 3
    • Remove the Phillips #00 screw.

    • To remove the SSD, lift where it was screwed in and gently pull it free.

Conclusión

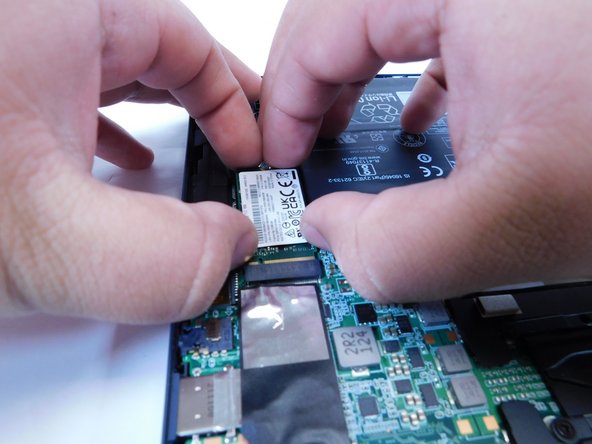
To reassemble your device, follow these instructions in reverse order.

Una persona más ha completado esta guía.

Rigoberto

Miembro Desde 02/06/24

312 Reputación

2 Guías creadas

Equipo

Gateway, Team 99-99, Gonzalez Spring 2024 Miembro de Gateway, Team 99-99, Gonzalez Spring 2024

GCC-GONZALEZ-S24S99G99

2 Miembros

3 Guías creadas

0 comentarios

Agregar Comentario

Ver Estadísticas:

Ultimas 24 horas: 0

Ultimos 7 días: 1

Ultimos 30 días: 8

Todo El Tiempo: 30