Saltar al contenido principal

Lenovo IdeaPad 3-15ADA05 Heat Sink Replacement

Qué necesitas

  1. Lenovo IdeaPad 3-15ADA05 Heat Sink Replacement, Heat Sink: paso 1, imagen 1 de 2 Lenovo IdeaPad 3-15ADA05 Heat Sink Replacement, Heat Sink: paso 1, imagen 2 de 2
    • Remove the six M2 x 5mm screws located at the top half of the laptop using a #0 Phillips head, then remove the four M2 x 2.5mm screws located at the bottom of the laptop using a #0 Phillips head.

  2. Lenovo IdeaPad 3-15ADA05 Heat Sink Replacement: paso 2, imagen 1 de 2 Lenovo IdeaPad 3-15ADA05 Heat Sink Replacement: paso 2, imagen 2 de 2
    • Insert the opening pick between the base plate and the bottom of the laptop, and pry the clips loose around the edge until the base pops off.

  3. Lenovo IdeaPad 3-15ADA05 Heat Sink Replacement: paso 3, imagen 1 de 3 Lenovo IdeaPad 3-15ADA05 Heat Sink Replacement: paso 3, imagen 2 de 3 Lenovo IdeaPad 3-15ADA05 Heat Sink Replacement: paso 3, imagen 3 de 3
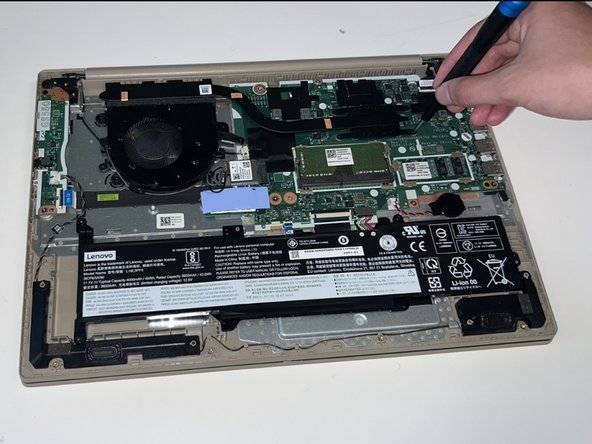
    • Locate the heat sink above the fan, then using a #0 Phillips head, remove the four M2 x 3mm screws holding the heat sink in place.

    • The screws are captive and should stay attached to the heat sink.

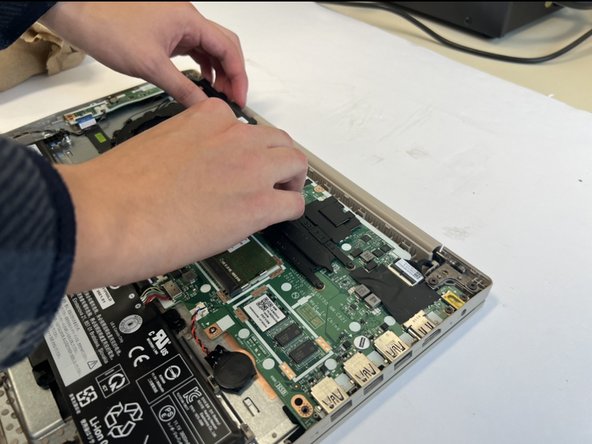
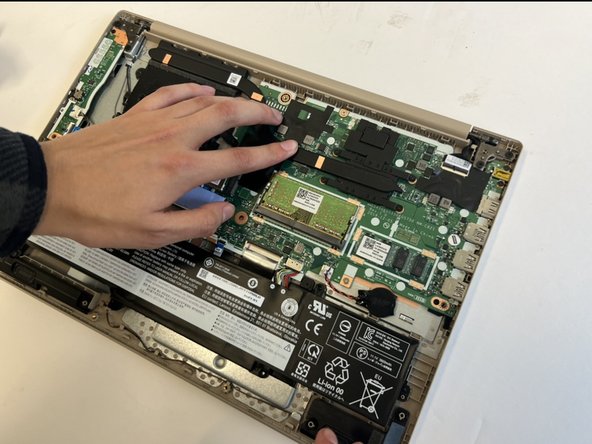
  4. Lenovo IdeaPad 3-15ADA05 Heat Sink Replacement: paso 4, imagen 1 de 2 Lenovo IdeaPad 3-15ADA05 Heat Sink Replacement: paso 4, imagen 2 de 2
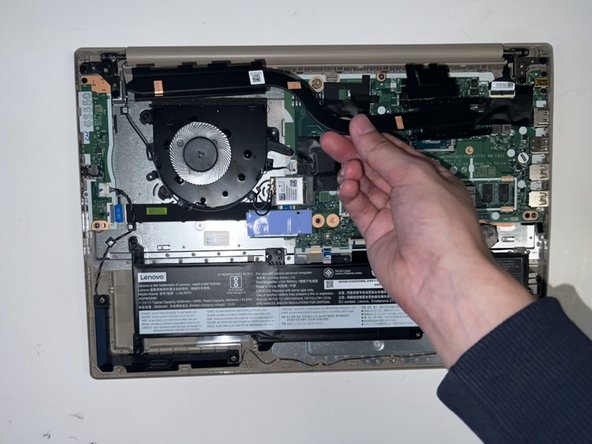
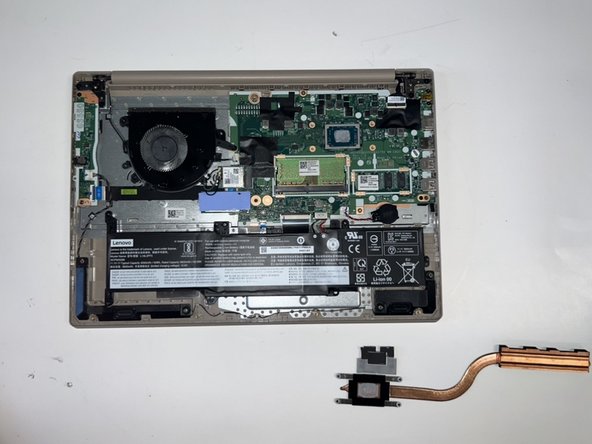
    • Remove the heat sink.

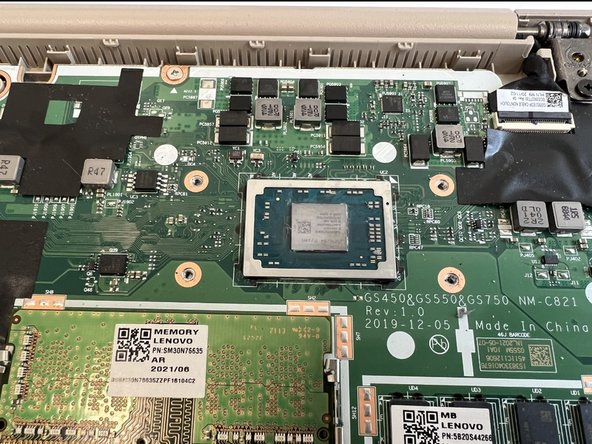
    • Be careful not to damage the processor.

  5. Lenovo IdeaPad 3-15ADA05 Heat Sink Replacement: paso 5, imagen 1 de 2 Lenovo IdeaPad 3-15ADA05 Heat Sink Replacement: paso 5, imagen 2 de 2
    • Using a paper towel and rubbing alcohol. Apply a small amount to the paper towel, then remove the remaining thermal paste until none is left.

  6. Lenovo IdeaPad 3-15ADA05 Heat Sink Replacement: paso 6, imagen 1 de 3 Lenovo IdeaPad 3-15ADA05 Heat Sink Replacement: paso 6, imagen 2 de 3 Lenovo IdeaPad 3-15ADA05 Heat Sink Replacement: paso 6, imagen 3 de 3
    • Evenly apply a very small amount of thermal paste to the processor (around the size of a grain of rice), then replace the new Heat sink and press down gently.

    • Be careful when reattaching the cooler so as not to damage the processor.

    • Tighten the screws in a diagonal pattern to ensure even pressure and spread of the thermal paste.

Conclusión

To reassemble your device, follow these instructions in reverse order.

Dylan Torres

Miembro Desde 02/08/24

133 Reputación

1 Guía escrita

0 comentarios

Agregar Comentario

Ver Estadísticas:

Ultimas 24 horas: 0

Ultimos 7 días: 2

Ultimos 30 días: 21

Todo El Tiempo: 58