Esta versión puede contener ediciones incorrectas. Cambie a la última instantánea verificada.
Qué necesitas
-
-
Da la vuelta la computadora, tiene que estar pantalla abajo.
-
Usando un destornillador Phillips #1 (Cruz), remover los dos tornillos de 6.0mm marcados, estos sostienen el teclado en su lugar.
-
Dar la vuelta la computadora.
-
-
Este paso está sin traducir. Ayuda a traducirlo
-
Unlock the ZIF conector before pulling the cable out
-
-
-
-
Usa un destornillador Phillips #1 para destornillar el tornillo de 5 mm del panel trasero.
-
-
-
Pon la parte inferior de la laptop boca arriba.
-
Usa un destornillador Phillips #1 para remover los diez tornillos de 6 mm en el panel trasero.
-
Vuelve a colocar la computadora en la parte superior.
-
-
-
Pon la laptop al revés y saca suavemente el maletín superior del maletín inferior.
-
-
Este paso está sin traducir. Ayuda a traducirlo
-
Using a Phillips #1 screwdriver, remove the four 4.0mm corner screws securing the hard drive assembly to the body.
-
Disconnect the hard drive from the back panel by sliding it to the left until loosened.
-
Remove it completely by lifting the hard drive out of the back panel.
-
-
Este paso está sin traducir. Ayuda a traducirlo
-
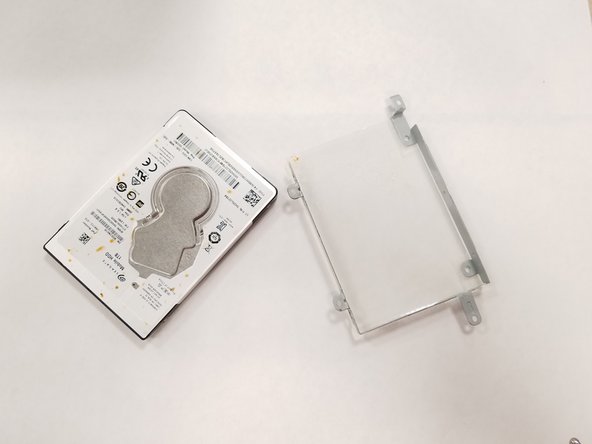
Using the Phillips #1 screwdriver, remove the four 3.0mm corner screws from the caddy of the hard drive.
-
Separate the plastic caddy from the hard drive.
-


Cancelar: No complete esta guía.
6 personas más completaron esta guía.

Equipo

UW Tacoma, Team S1-G5, Rose Fall 2018 Miembro de UW Tacoma, Team S1-G5, Rose Fall 2018
UWT-ROSE-F18S1G5
4 Miembros
39 Guías creadas
4 comentarios
I found that two of the screws on the bottom hold down the keyboard, so they need to be unscrewed before the keyboard will come up. Also, there are two “shallow” screws (that become visible after the DVD drive is removed) which need to be removed, and the battery doesn’t really need to be removed to replace the hard drive.
I’ve posted these comments on their associated steps, but it doesn’t hurt to repeat them here: There are 3 screws on the bottom of the laptop holding certain parts in place (keyboard & optical drive). These will need to be removed before doing anything else in this guide, so it’s best to just remove all 11 screws (yes, there are 11, not 10 as stated) from the bottom of the laptop. After removing the optical drive, there will be 2 more screws to remove. The screw underneath the keyboard holds the fan assembly in place, not the optical drive, as they are on opposite sides of the laptop.
Cannot remove optical hard drive following instructions. Does not appear to be removable on my Lenovo Ideapad 110.