Saltar al contenido principal

Lenovo IdeaPad 1 14IGL7 Touchpad Replacement

Qué necesitas

  1. Lenovo IdeaPad 1 14IGL7 Touchpad Replacement, Back Panel: paso 1, imagen 1 de 1
    • Power off your laptop before beginning disassembly.

    • Place the computer upside down on a flat surface.

  2. Lenovo IdeaPad 1 14IGL7 Touchpad Replacement: paso 2, imagen 1 de 2 Lenovo IdeaPad 1 14IGL7 Touchpad Replacement: paso 2, imagen 2 de 2
    • Remove the nine 7 mm screws from the back panel using a Phillips #00 screwdriver.

  3. Lenovo IdeaPad 1 14IGL7 Touchpad Replacement: paso 3, imagen 1 de 1
    • Insert an opening pick between the back panel and the body of the laptop.

    • Pry up the latches around the back panel and remove the panel from the laptop.

  4. Lenovo IdeaPad 1 14IGL7 Touchpad Replacement, Battery: paso 4, imagen 1 de 2 Lenovo IdeaPad 1 14IGL7 Touchpad Replacement, Battery: paso 4, imagen 2 de 2
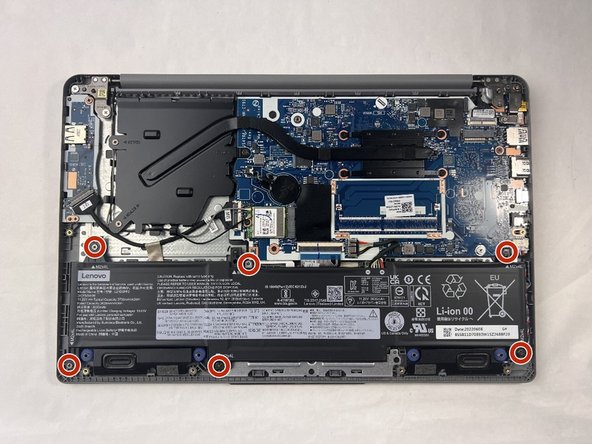
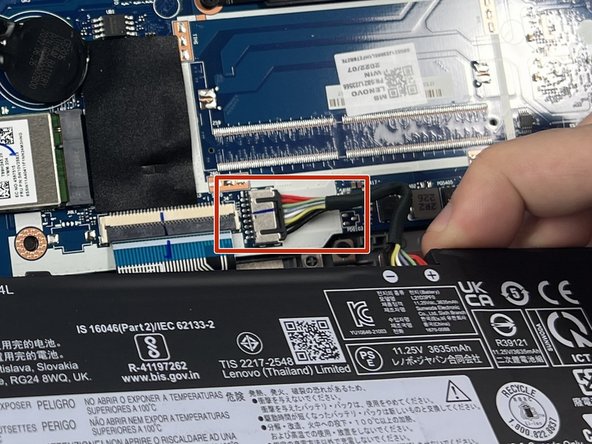
    • Remove the six 5.5 mm screws that secure the battery using a Phillips #00 screwdriver.

  5. Lenovo IdeaPad 1 14IGL7 Touchpad Replacement: paso 5, imagen 1 de 2 Lenovo IdeaPad 1 14IGL7 Touchpad Replacement: paso 5, imagen 2 de 2
    • Gently pull on the cable attached to the motherboard in the same direction as the individual wires are running.

    • Be sure to ground yourself by wearing the anti-shock wristband to prevent damage to the components.

    • Pull evenly on the full width of the cable so that no individual wires are overly strained.

  6. Lenovo IdeaPad 1 14IGL7 Touchpad Replacement: paso 6, imagen 1 de 1
    • Remove the battery.

  7. Lenovo IdeaPad 1 14IGL7 Touchpad Replacement, Touchpad: paso 7, imagen 1 de 1
    • Remove the three 3 mm screws that hold the metal bracket in place using a Phillips #00 screwdriver.

  8. Lenovo IdeaPad 1 14IGL7 Touchpad Replacement: paso 8, imagen 1 de 1
    • Carefully lift the metal bracket from the device and set it aside.

  9. Lenovo IdeaPad 1 14IGL7 Touchpad Replacement: paso 9, imagen 1 de 1
    • Lift the touchpad's cover and remove the touchpad from the laptop.

Conclusión

To reassemble your device, follow these instructions in reverse order.

Nathan Costa

Miembro Desde 03/18/24

339 Reputación

3 Guías creadas

Equipo

0 comentarios

Agregar Comentario

Ver Estadísticas:

Ultimas 24 horas: 0

Ultimos 7 días: 5

Ultimos 30 días: 5

Todo El Tiempo: 22