Saltar al contenido principal

Lenovo IdeaCentre K410 Motherboard Replacement

Qué necesitas

  1. Lenovo IdeaCentre K410 Motherboard Replacement, Side Panel: paso 1, imagen 1 de 1
    • Lay the computer down on its side as shown.

    • Remove the two 14mm screws shown. The screws are loose enough to unscrew with your hands.

  2. Lenovo IdeaCentre K410 Motherboard Replacement: paso 2, imagen 1 de 1
    • Gently slide the side panel straight back and remove from the computer.

  3. Lenovo IdeaCentre K410 Motherboard Replacement, USB 3.0 Expansion Card: paso 3, imagen 1 de 1
    • With your hands remove the 14mm screw that holds the cover on the back panel.

    • Gently pull the flap back to expose the expansion card retaining screw.

  4. Lenovo IdeaCentre K410 Motherboard Replacement: paso 4, imagen 1 de 1
    • Use the Phillips #2 to remove the 8mm screw that holds the USB 3.0 Expansion Card in place.

  5. Lenovo IdeaCentre K410 Motherboard Replacement: paso 5, imagen 1 de 1
    • With moderate force, pull straight up on the expansion card to remove it from the computer.

  6. Lenovo IdeaCentre K410 Motherboard Replacement, RAM Module: paso 6, imagen 1 de 1
    • Push down on the white clips on both sides of the memory module to release it.

    • Gently pull up on the memory module to remove it from the unit.

  7. Lenovo IdeaCentre K410 Motherboard Replacement, CPU Fan: paso 7, imagen 1 de 1
    • Using the Phillips #00 Precision screwdriver, unscrew the four 12mm screws that hold the fan in place.

    • Be careful not to strip the screws.

  8. Lenovo IdeaCentre K410 Motherboard Replacement: paso 8, imagen 1 de 1
    • Unplug the fan from the motherboard by gently pulling out the single plug. Then lift the fan up and out of the computer.

  9. Lenovo IdeaCentre K410 Motherboard Replacement, Heat Sink: paso 9, imagen 1 de 1
    • Loosen the four screws that hold the heat sink in place using a Phillips #2 screwdriver.

    • The screws do not come all the way out of the heat sink

    • Pull the heat sink straight up to remove it.

  10. Lenovo IdeaCentre K410 Motherboard Replacement, CPU: paso 10, imagen 1 de 2 Lenovo IdeaCentre K410 Motherboard Replacement, CPU: paso 10, imagen 2 de 2
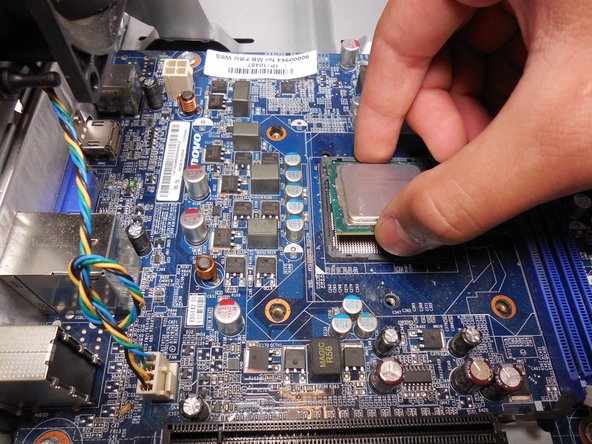
    • Remove the 2 8mm screws holding the CPU cover using a Torx #20 screwdriver.

    • Remove the 11 mm screw using a Torx #20 screwdriver.

    • Remove the cover and remove the CPU by gently pulling upward.

  11. Lenovo IdeaCentre K410 Motherboard Replacement, Motherboard: paso 11, imagen 1 de 3 Lenovo IdeaCentre K410 Motherboard Replacement, Motherboard: paso 11, imagen 2 de 3 Lenovo IdeaCentre K410 Motherboard Replacement, Motherboard: paso 11, imagen 3 de 3
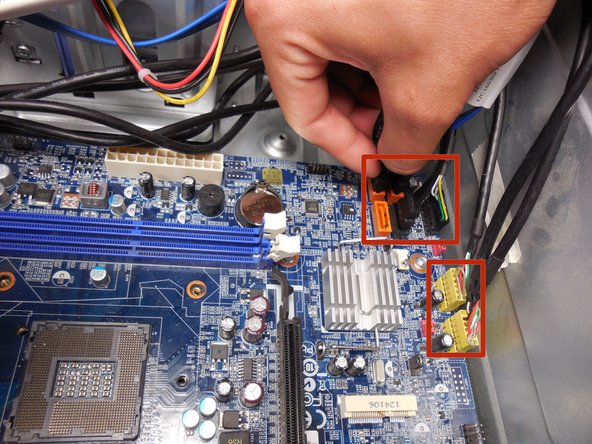
    • Unplug all cords attached to the motherboard.

    • The largest connection requires a significant amount of force to be removed.

  12. Lenovo IdeaCentre K410 Motherboard Replacement: paso 12, imagen 1 de 2 Lenovo IdeaCentre K410 Motherboard Replacement: paso 12, imagen 2 de 2
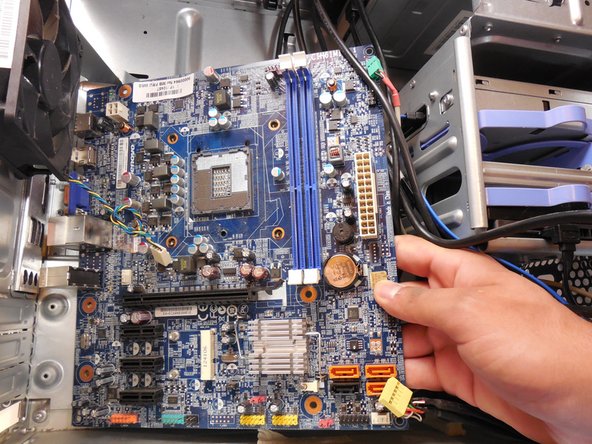
    • Remove all 6 8mm screws attaching the motherboard to the base of the tower using a Phillips #2 screwdriver.

    • Gently pull the motherboard from the unit.

Conclusión

To reassemble your device, follow these instructions in reverse order.

11 personas más completaron esta guía.

Timothy Grebe

Miembro Desde 10/19/14

1,619 Reputación

9 Guías creadas

Equipo

Cal Poly, Team 10-39, Amido Fall 2014 Miembro de Cal Poly, Team 10-39, Amido Fall 2014

CPSU-AMIDO-F14S10G39

4 Miembros

18 Guías creadas

0 comentarios

Agregar Comentario

Ver Estadísticas:

Ultimas 24 horas: 3

Ultimos 7 días: 8

Ultimos 30 días: 35

Todo El Tiempo: 5,312