Saltar al contenido principal
Lenovo G780 Heat Sink Replacement

Lenovo G780 Heat Sink Replacement

Riley Griffin

Riley Griffin y 3 otros contribuidores

Última actualización: May 9, 2019

10 - 15 minutos
Moderado

Introducción

Ir al paso 1

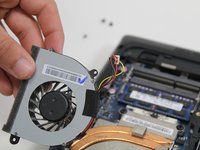
The heatsink of your laptop may be faulty if you notice your fan is running more than normal, or if your laptop is getting excessively hot during normal use.

Qué necesitas

Herramientas

  1. Lenovo G780 Heat Sink Replacement, Battery: paso 1, imagen 1 de 2 Lenovo G780 Heat Sink Replacement, Battery: paso 1, imagen 2 de 2
    • Turn off the computer.

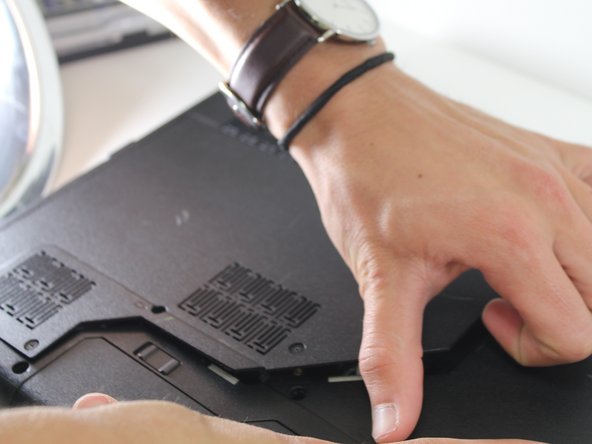
    • Slide the battery-lock switch on the bottom of the laptop to the unlocked position.

  2. Lenovo G780 Heat Sink Replacement: paso 2, imagen 1 de 1
    • Hold the battery release switch in the unlocked position and remove the battery.

  3. Lenovo G780 Heat Sink Replacement, Fan: paso 3, imagen 1 de 3 Lenovo G780 Heat Sink Replacement, Fan: paso 3, imagen 2 de 3 Lenovo G780 Heat Sink Replacement, Fan: paso 3, imagen 3 de 3
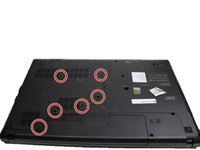
    • Remove the six 9 mm screws from the back panel with a Phillips #0 screwdriver.

    • Save these screws.

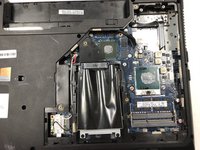
    • Remove the back plate.

  4. Lenovo G780 Heat Sink Replacement: paso 4, imagen 1 de 1
    • Use a Phillips #0 screwdriver to detach the fan by removing the two black 9 mm screws and the single silver 4 mm screw that is securing it to the motherboard.

    • Save these screws.

  5. Lenovo G780 Heat Sink Replacement: paso 5, imagen 1 de 2 Lenovo G780 Heat Sink Replacement: paso 5, imagen 2 de 2
    • Carefully disconnect the fan cable from its socket on the motherboard.

    • The fan should now be completely free from the laptop motherboard and chassis.

  6. Lenovo G780 Heat Sink Replacement, Heat Sink: paso 6, imagen 1 de 3 Lenovo G780 Heat Sink Replacement, Heat Sink: paso 6, imagen 2 de 3 Lenovo G780 Heat Sink Replacement, Heat Sink: paso 6, imagen 3 de 3
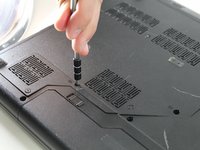
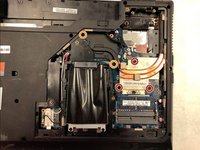
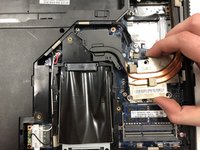
    • Remove three 7mm spring loaded screws using a Phillips #1 screwdriver.

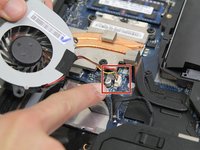
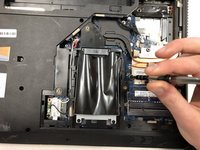
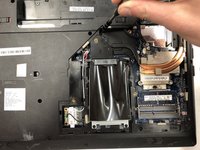
    • Remove these two 4 mm screws using a Phillips #1 screwdriver.

  7. Lenovo G780 Heat Sink Replacement: paso 7, imagen 1 de 2 Lenovo G780 Heat Sink Replacement: paso 7, imagen 2 de 2
    • The heat sink needs to be rotated counter-clockwise slightly to allow space for removal.

Conclusión

To reassemble your device, follow these instructions in reverse order.

Riley Griffin

Miembro Desde 03/25/19

316 Reputación

3 Guías creadas

Equipo

IUPUI, Team S2-G4, Henning Spring 2019 Miembro de IUPUI, Team S2-G4, Henning Spring 2019

IUPUI-HENNING-S19S2G4

3 Miembros

3 Guías creadas

0 comentarios

Agregar Comentario

Ver Estadísticas:

Ultimas 24 horas: 0

Ultimos 7 días: 0

Ultimos 30 días: 1

Todo El Tiempo: 633