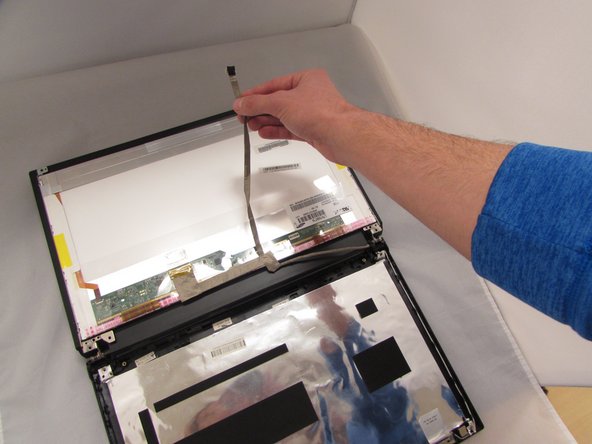
Saltar al contenido principal

Lenovo B575-1450 Display Panel Replacement

Qué necesitas

  1. Lenovo B575-1450 Display Panel  Replacement, Battery: paso 1, imagen 1 de 1
    • Turn off the computer.

    • Disconnect the charger from the computer.

    • Flip the computer upside down.

  2. Lenovo B575-1450 Display Panel  Replacement: paso 2, imagen 1 de 2 Lenovo B575-1450 Display Panel  Replacement: paso 2, imagen 2 de 2
    • Push the right-hand switch outward into the "unlocked" position.

  3. Lenovo B575-1450 Display Panel  Replacement: paso 3, imagen 1 de 3 Lenovo B575-1450 Display Panel  Replacement: paso 3, imagen 2 de 3 Lenovo B575-1450 Display Panel  Replacement: paso 3, imagen 3 de 3
    • While holding the battery, use your other hand to push the left clip to the left and pull the battery out.

  4. Lenovo B575-1450 Display Panel  Replacement, Display Panel: paso 4, imagen 1 de 2 Lenovo B575-1450 Display Panel  Replacement, Display Panel: paso 4, imagen 2 de 2
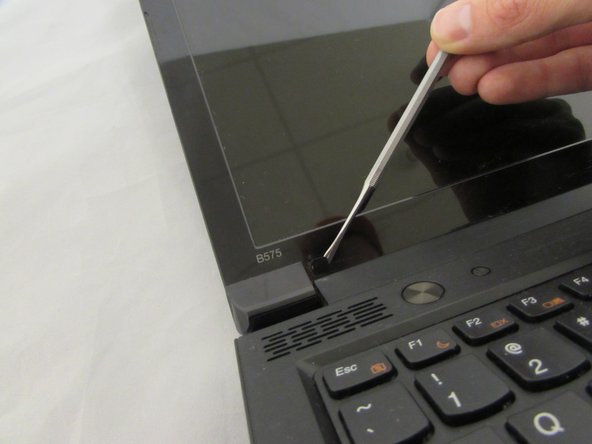
    • Remove both screw covers from the bottom of screen bezel using a plastic spudger. The screws underneath will now be exposed

  5. Lenovo B575-1450 Display Panel  Replacement: paso 5, imagen 1 de 1
    • Using the Phillips #0 Screwdriver, remove the two 4.3 mm screws holding the display to the front bezel.

  6. Lenovo B575-1450 Display Panel  Replacement: paso 6, imagen 1 de 2 Lenovo B575-1450 Display Panel  Replacement: paso 6, imagen 2 de 2
    • Separate the front bezel from the display panel using the plastic opening tool by gently prying around the edges and removing it.

  7. Lenovo B575-1450 Display Panel  Replacement: paso 7, imagen 1 de 1
    • Using the tweezers carefully disconnect the ZIF connector by pulling cable away from front facing camera that is attached to the back bezel.

  8. Lenovo B575-1450 Display Panel  Replacement: paso 8, imagen 1 de 3 Lenovo B575-1450 Display Panel  Replacement: paso 8, imagen 2 de 3 Lenovo B575-1450 Display Panel  Replacement: paso 8, imagen 3 de 3
    • Using the Phillips #0 Screwdriver, remove the six 4.3 mm screws that connect display screen to the rear bezel.

    • There are two screws in the bottom left and right corners of the frame.

  9. Lenovo B575-1450 Display Panel  Replacement: paso 9, imagen 1 de 2 Lenovo B575-1450 Display Panel  Replacement: paso 9, imagen 2 de 2
    • Using the Phillips #0 Screwdriver, remove the four 2.9 mm screws from each side of the bracket that holds the display panel in place.

  10. Lenovo B575-1450 Display Panel  Replacement: paso 10, imagen 1 de 2 Lenovo B575-1450 Display Panel  Replacement: paso 10, imagen 2 de 2
    • Lay display panel face down on the keyboard.

    • Peel back the flat wire that has the camera's ZIF connector until it is loose from the back of the display.

    • Carefully peel of the clear adhesive tape attached to the primary display ZIF connector using a plastic spudger.

  11. Lenovo B575-1450 Display Panel  Replacement: paso 11, imagen 1 de 2 Lenovo B575-1450 Display Panel  Replacement: paso 11, imagen 2 de 2
    • Place the metal tweezer tips between the ZIF connector and the wire-to-board connection.

    • Carefully separate ZIF wire-to-board connection by pulling metal tweezers in a downward motion.

    • Pull up on flat wire until display is completely disconnected.

    • Be very careful when separating ZIF connections . The ends of the ZIF wire connectors are delicate and can break easily.

Conclusión

To reassemble your device, follow these instructions in reverse order.

Una persona más ha completado esta guía.

0 comentarios

Agregar Comentario

Ver Estadísticas:

Ultimas 24 horas: 0

Ultimos 7 días: 0

Ultimos 30 días: 6

Todo El Tiempo: 1,396