Saltar al contenido principal

Lenovo 11e ThinkPad Chromebook Write-Protect Screw Removal

  1. Lenovo 11e ThinkPad Chromebook Write-Protect Screw Removal, Remove Backplate: paso 1, imagen 1 de 3 Lenovo 11e ThinkPad Chromebook Write-Protect Screw Removal, Remove Backplate: paso 1, imagen 2 de 3 Lenovo 11e ThinkPad Chromebook Write-Protect Screw Removal, Remove Backplate: paso 1, imagen 3 de 3
    • Turn off your computer.

    • Flip the Chromebook over and unscrew the screws securing the backplate.

  2. Lenovo 11e ThinkPad Chromebook Write-Protect Screw Removal, Removing Screws from under laptop: paso 2, imagen 1 de 3 Lenovo 11e ThinkPad Chromebook Write-Protect Screw Removal, Removing Screws from under laptop: paso 2, imagen 2 de 3 Lenovo 11e ThinkPad Chromebook Write-Protect Screw Removal, Removing Screws from under laptop: paso 2, imagen 3 de 3
    • Unplug the Battery

    • Unscrew battery and remove

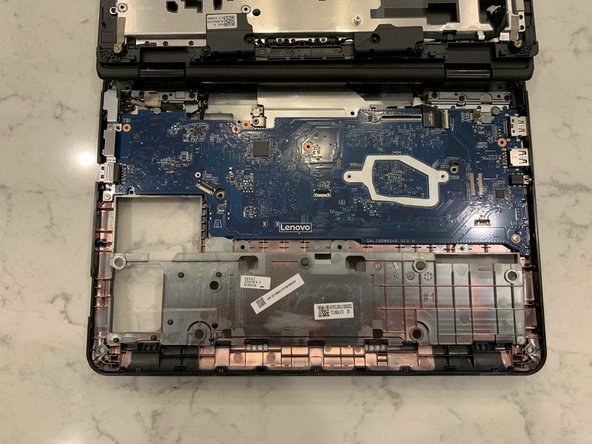
    • Remove all all circled screws

    • I removed the wireless card. I don't know if it's required.
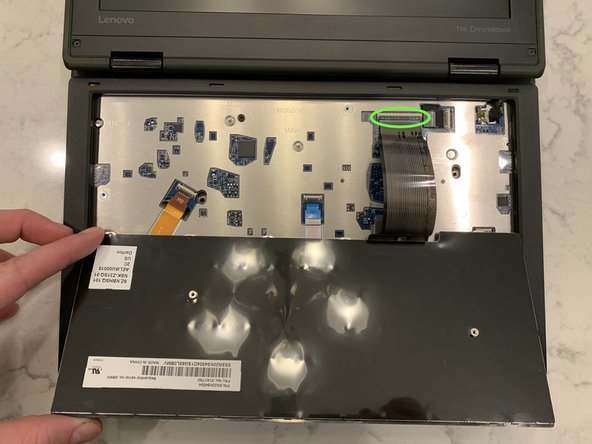
  3. Lenovo 11e ThinkPad Chromebook Write-Protect Screw Removal, Remove the Keyboard: paso 3, imagen 1 de 3 Lenovo 11e ThinkPad Chromebook Write-Protect Screw Removal, Remove the Keyboard: paso 3, imagen 2 de 3 Lenovo 11e ThinkPad Chromebook Write-Protect Screw Removal, Remove the Keyboard: paso 3, imagen 3 de 3
    • Slide Keyboard up

    • Wedge something under the keyboard

    • flip the keyboard over

    • carefully remove the keyboard ribbon cable

  4. Lenovo 11e ThinkPad Chromebook Write-Protect Screw Removal, Removing the Bezel: paso 4, imagen 1 de 3 Lenovo 11e ThinkPad Chromebook Write-Protect Screw Removal, Removing the Bezel: paso 4, imagen 2 de 3 Lenovo 11e ThinkPad Chromebook Write-Protect Screw Removal, Removing the Bezel: paso 4, imagen 3 de 3
    • Unscrew and disconnect ribbon cables

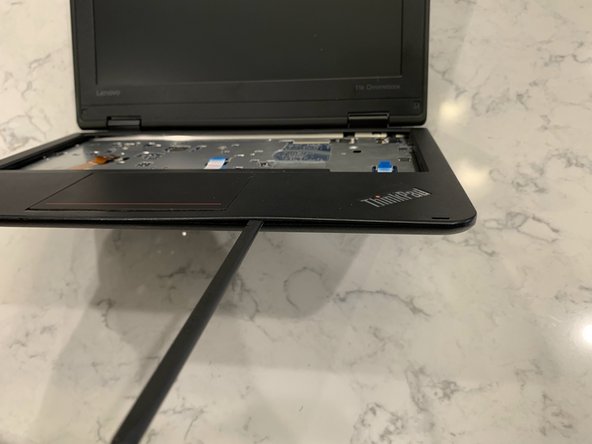
    • wedge something between the bezel and slide across the edge until the bezel is lifted (like taking off a bike tire)

  5. Lenovo 11e ThinkPad Chromebook Write-Protect Screw Removal, Remove the write-protect screw: paso 5, imagen 1 de 2 Lenovo 11e ThinkPad Chromebook Write-Protect Screw Removal, Remove the write-protect screw: paso 5, imagen 2 de 2
    • The write-protect screw is clearly conducting electricity (compare it to other screws on the board).

    • Leave the WP screw out of the laptop.

Conclusión

To reassemble your device, follow these instructions in reverse order.

3 personas más completaron esta guía.

Dean Gadberry

Miembro Desde 02/27/21

176 Reputación

1 Guía escrita

2 comentarios

Le système software this chromebook

boubker bouchagra - Contestar

This chromebook runs ChromeOS. Removing the write-protect screw and running MrChromeBox's Firmware Utility Script allows any linux distribution to run on this chromebook.

Dean Gadberry -

Agregar Comentario

Ver Estadísticas:

Ultimas 24 horas: 4

Ultimos 7 días: 63

Ultimos 30 días: 277

Todo El Tiempo: 4,433