Saltar al contenido principal

LG WM3050CW Rotor Position Sensor Replacement

Qué necesitas

  1. LG WM3050CW Rotor Position Sensor Replacement, Safety Precautions: paso 1, imagen 1 de 2 LG WM3050CW Rotor Position Sensor Replacement, Safety Precautions: paso 1, imagen 2 de 2
    • Before you begin your repair, perform the following:

    • Turn off the main water supply

    • Unplug your washer

    • Disconnect all water connections at the rear of your washer

  2. LG WM3050CW Rotor Position Sensor Replacement, Unfasten the rear panel: paso 2, imagen 1 de 3 LG WM3050CW Rotor Position Sensor Replacement, Unfasten the rear panel: paso 2, imagen 2 de 3 LG WM3050CW Rotor Position Sensor Replacement, Unfasten the rear panel: paso 2, imagen 3 de 3
    • Use a Phillips driver to remove the four 10.7 mm‑long screws securing the rear panel.

  3. LG WM3050CW Rotor Position Sensor Replacement, Remove the rear panel: paso 3, imagen 1 de 3 LG WM3050CW Rotor Position Sensor Replacement, Remove the rear panel: paso 3, imagen 2 de 3 LG WM3050CW Rotor Position Sensor Replacement, Remove the rear panel: paso 3, imagen 3 de 3
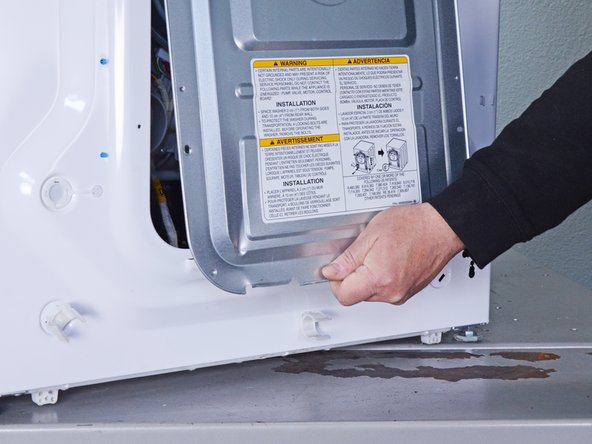
    • Lift the rear panel upward to release its bottom clips.

    • Pull the rear panel away from the chassis to release the remaining clips.

  4. LG WM3050CW Rotor Position Sensor Replacement: paso 4, imagen 1 de 1
    • Remove the rear panel.

  5. LG WM3050CW Rotor Position Sensor Replacement, Unfasten the rotor: paso 5, imagen 1 de 2 LG WM3050CW Rotor Position Sensor Replacement, Unfasten the rotor: paso 5, imagen 2 de 2
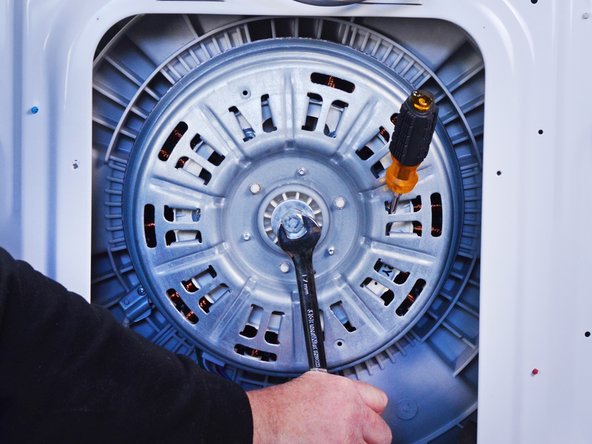
    • Use an impact driver to remove the 17 mm nut securing the rotor.

    • Alternatively, you can use a wrench and a hammer to loosen the nut.

    • To secure the rotor, you can insert a screwdriver, or a similar tool, between the rotor and the stator. Make sure to brace the tool against one of the screw bosses on the stator.

  6. LG WM3050CW Rotor Position Sensor Replacement, Remove the rotor: paso 6, imagen 1 de 2 LG WM3050CW Rotor Position Sensor Replacement, Remove the rotor: paso 6, imagen 2 de 2
    • The rotor is magnetically attracted to the stator.

    • Pull the rotor straight off the stator and drive shaft splines to remove it.

    • Wiggle the rotor as you pull to help disconnect it.

    • This may require significant force.

    • During reassembly, watch your fingers when aligning the rotor over the stator, as the rotor gets sucked in easily.

  7. LG WM3050CW Rotor Position Sensor Replacement, Unfasten the motor harness clamps: paso 7, imagen 1 de 1
    • Use a Phillips driver to remove the three 16.6 mm‑long screws securing the motor harness clamps.

  8. LG WM3050CW Rotor Position Sensor Replacement, Unfasten the stator: paso 8, imagen 1 de 2 LG WM3050CW Rotor Position Sensor Replacement, Unfasten the stator: paso 8, imagen 2 de 2
    • Hold the stator up as you unfasten the last few bolts, as it can fall over unexpectedly.

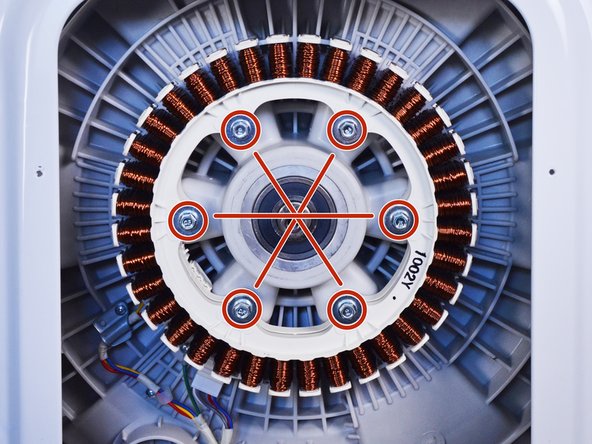
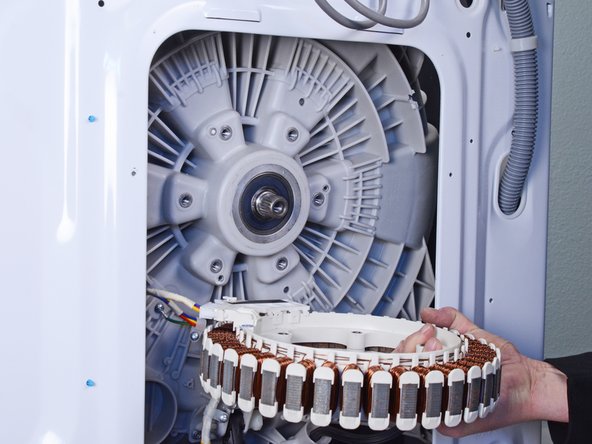
    • Use a 10 mm socket wrench to remove the six 68 mm-long bolts securing the stator.

    • During reassembly, refasten the screws in a "star" pattern.

  9. LG WM3050CW Rotor Position Sensor Replacement, Reposition the stator: paso 9, imagen 1 de 3 LG WM3050CW Rotor Position Sensor Replacement, Reposition the stator: paso 9, imagen 2 de 3 LG WM3050CW Rotor Position Sensor Replacement, Reposition the stator: paso 9, imagen 3 de 3
    • Don't pull the stator too far away from the device, as it's still connected by wires.

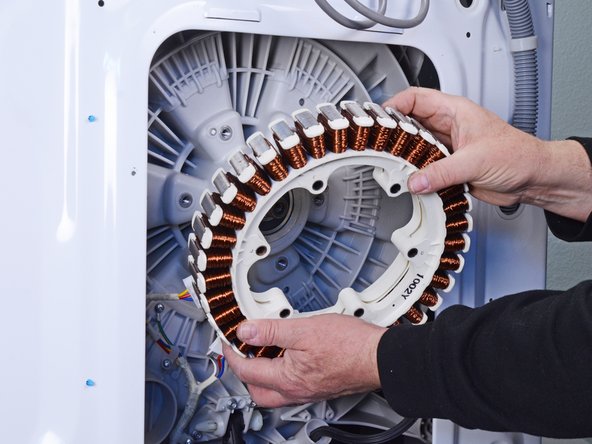
    • Pull the stator off of the drum and flip it so its rear is facing upward.

    • Note the position of the stator before continuing, as you will need it face the proper direction during reassembly.

  10. LG WM3050CW Rotor Position Sensor Replacement, Disconnect the rotor position sensor: paso 10, imagen 1 de 2 LG WM3050CW Rotor Position Sensor Replacement, Disconnect the rotor position sensor: paso 10, imagen 2 de 2
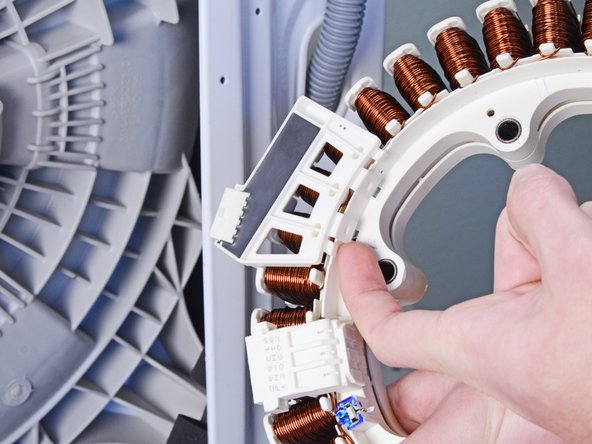
    • Pull the rotor position sensor harness connector straight out of its socket to disconnect it.

  11. LG WM3050CW Rotor Position Sensor Replacement, Remove the rotor position sensor: paso 11, imagen 1 de 3 LG WM3050CW Rotor Position Sensor Replacement, Remove the rotor position sensor: paso 11, imagen 2 de 3 LG WM3050CW Rotor Position Sensor Replacement, Remove the rotor position sensor: paso 11, imagen 3 de 3
    • Use your fingers to unclip the rotor position sensor from the stator.

    • Pull the sensor away from the stator to completely unclip it.

Conclusión

To reassemble your device, follow these instructions in reverse order.

Take your e-waste to an R2 or e-Stewards certified recycler.

Repair didn’t go as planned? Ask our Answers community for help.

Una persona más ha completado esta guía.

Bill Gilbert

Miembro Desde 06/30/22

30,088 Reputación

213 Guías creadas

Equipo

iFixit Miembro de iFixit

Staff

136 Miembros

17,432 Guías creadas

0 comentarios

Agregar Comentario

Ver Estadísticas:

Ultimas 24 horas: 0

Ultimos 7 días: 2

Ultimos 30 días: 17

Todo El Tiempo: 234