Saltar al contenido principal

LG Tribute HD Motherboard Replacement

Qué necesitas

  1. LG Tribute HD Motherboard Replacement, Battery and SD Card: paso 1, imagen 1 de 2 LG Tribute HD Motherboard Replacement, Battery and SD Card: paso 1, imagen 2 de 2
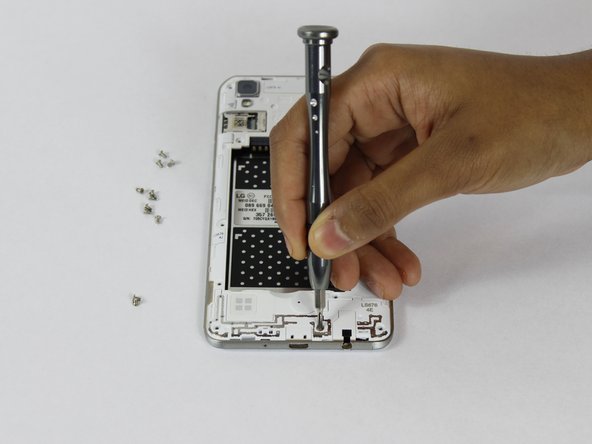
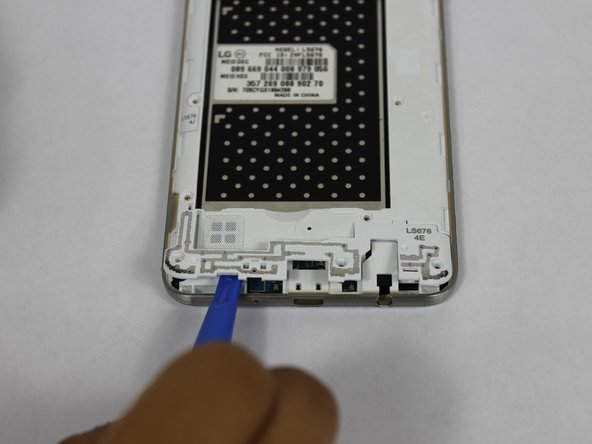
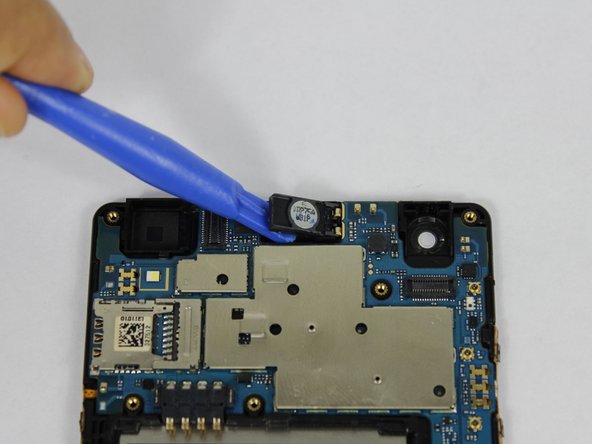
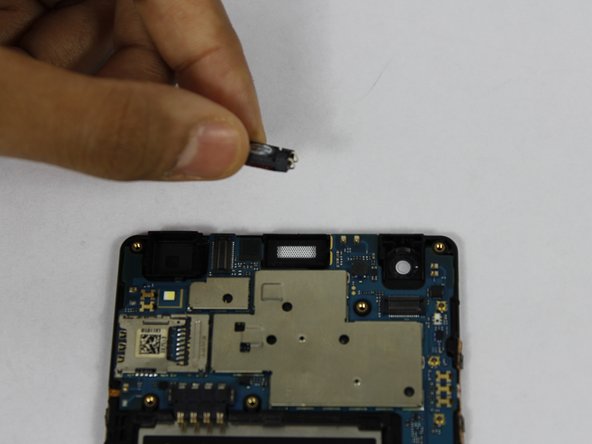
    • Insert a fingernail, or plastic opening tool, into the cutout on the back cover and pry outward to remove.

  2. LG Tribute HD Motherboard Replacement: paso 2, imagen 1 de 2 LG Tribute HD Motherboard Replacement: paso 2, imagen 2 de 2
    • Pull the battery out of the phone.

    • Remove the SD Card by sliding the card out as shown.

  3. LG Tribute HD Motherboard Replacement, Motherboard: paso 3, imagen 1 de 2 LG Tribute HD Motherboard Replacement, Motherboard: paso 3, imagen 2 de 2
    • Remove the twelve 2mm JIS #00 screws from the mid-frame.

  4. LG Tribute HD Motherboard Replacement: paso 4, imagen 1 de 3 LG Tribute HD Motherboard Replacement: paso 4, imagen 2 de 3 LG Tribute HD Motherboard Replacement: paso 4, imagen 3 de 3
    • Using a plastic opening tool, remove the antenna extender from the mid-frame.

  5. LG Tribute HD Motherboard Replacement: paso 5, imagen 1 de 2 LG Tribute HD Motherboard Replacement: paso 5, imagen 2 de 2
    • Using your fingers, remove the mid-frame.

  6. LG Tribute HD Motherboard Replacement: paso 6, imagen 1 de 3 LG Tribute HD Motherboard Replacement: paso 6, imagen 2 de 3 LG Tribute HD Motherboard Replacement: paso 6, imagen 3 de 3
    • Use a plastic opening tool to disconnect the front and rear cameras from the motherboard and pull out to remove.

  7. LG Tribute HD Motherboard Replacement: paso 7, imagen 1 de 3 LG Tribute HD Motherboard Replacement: paso 7, imagen 2 de 3 LG Tribute HD Motherboard Replacement: paso 7, imagen 3 de 3
    • Using a plastic opening tool, pry up the front facing speaker and remove from the phone.

  8. LG Tribute HD Motherboard Replacement: paso 8, imagen 1 de 1
    • Disconnect the display from the motherboard.

  9. LG Tribute HD Motherboard Replacement: paso 9, imagen 1 de 2 LG Tribute HD Motherboard Replacement: paso 9, imagen 2 de 2
    • Use a plastic opening tool to pry up the motherboard and pull out to remove.

Conclusión

To reassemble your device, follow these instructions in reverse order.

2 personas más completaron esta guía.

Aalia Mohammed

Miembro Desde 02/14/18

448 Reputación

4 Guías creadas

Equipo

USF Tampa, Team S1-G3, Nance Spring 2018 Miembro de USF Tampa, Team S1-G3, Nance Spring 2018

USFT-NANCE-S18S1G3

4 Miembros

20 Guías creadas

Un comentario

svp ou peut-on trouver cette carte mère

Mourasilva Silva - Contestar

Agregar Comentario

Ver Estadísticas:

Ultimas 24 horas: 1

Ultimos 7 días: 11

Ultimos 30 días: 16

Todo El Tiempo: 1,011