Saltar al contenido principal

LG Risio Front Camera Replacement

Qué necesitas

  1. LG Risio Front Camera Replacement, Back Panel: paso 1, imagen 1 de 2 LG Risio Front Camera Replacement, Back Panel: paso 1, imagen 2 de 2
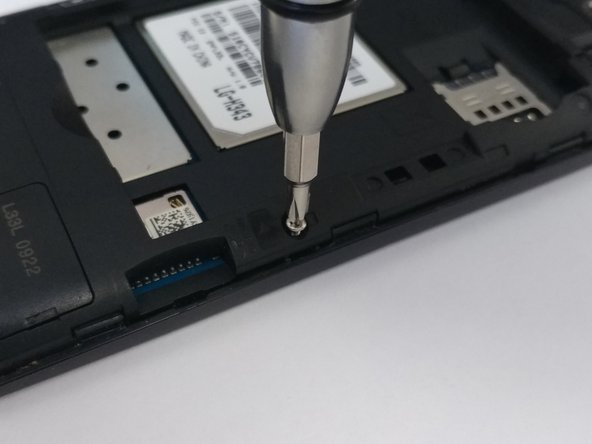
    • Use a plastic opening tool to seperate the back panel from the device.

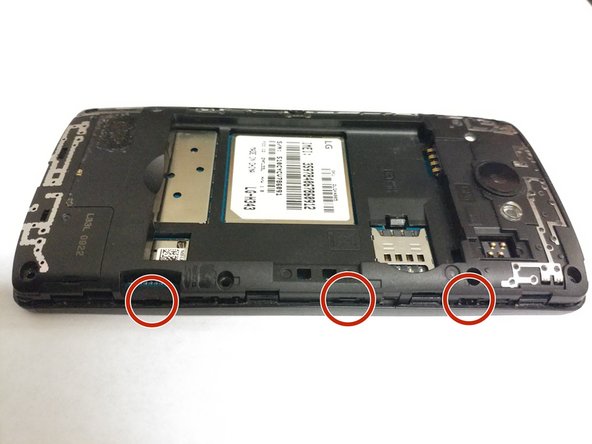
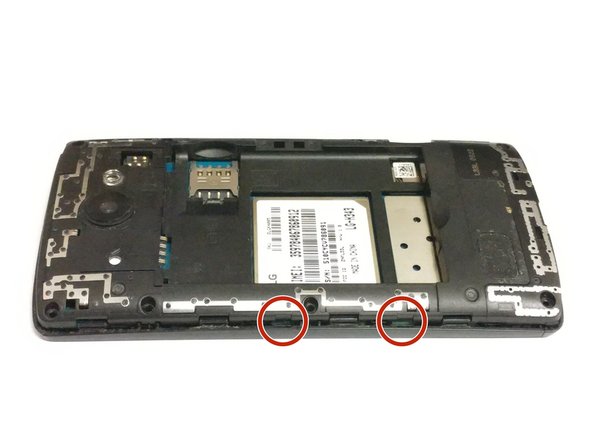
    • Remove the back panel.

  2. LG Risio Front Camera Replacement, Battery: paso 2, imagen 1 de 1
    • Place your thumb along the bottom of the battery and pry upwards to remove.

  3. LG Risio Front Camera Replacement, Midframe: paso 3, imagen 1 de 1
    • Press down on the SIM eject tab with a fingernail (or iFixit opening tool), and slide the SIM card out.

  4. LG Risio Front Camera Replacement: paso 4, imagen 1 de 2 LG Risio Front Camera Replacement: paso 4, imagen 2 de 2
    • Remove the eight Phillips #0 screws from the internal support frame.

  5. LG Risio Front Camera Replacement: paso 5, imagen 1 de 3 LG Risio Front Camera Replacement: paso 5, imagen 2 de 3 LG Risio Front Camera Replacement: paso 5, imagen 3 de 3
    • Use an opening tool on the marked locations to lift the edges up. There should be a small click when lifting these edges up.

  6. LG Risio Front Camera Replacement: paso 6, imagen 1 de 1
    • Using your hand, pick up the midframe to separate it from the phone.

  7. LG Risio Front Camera Replacement, Front-Facing Camera: paso 7, imagen 1 de 2 LG Risio Front Camera Replacement, Front-Facing Camera: paso 7, imagen 2 de 2
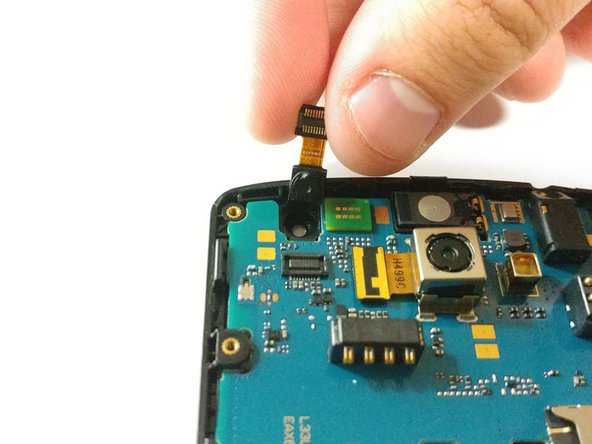
    • Unclip the front camera connector from the motherboard and lift it from the frame.

Conclusión

To reassemble your device, follow these instructions in reverse order.

Amina

Miembro Desde 02/21/18

73 Reputación

1 Guía escrita

0 comentarios

Agregar Comentario

Ver Estadísticas:

Ultimas 24 horas: 0

Ultimos 7 días: 0

Ultimos 30 días: 0

Todo El Tiempo: 163