Saltar al contenido principal

LG Optimus Exceed 2 Rear Camera Replacement

Guía Archivada
Esta guía se mantiene únicamente para fines históricos. Utiliza la última versión de la guía para llevar a cabo tu reparación.

Qué necesitas

  1. LG Optimus Exceed 2 Rear Camera Replacement, Battery: paso 1, imagen 1 de 2 LG Optimus Exceed 2 Rear Camera Replacement, Battery: paso 1, imagen 2 de 2
    • Flip the device over and remove the back covering.

  2. LG Optimus Exceed 2 Rear Camera Replacement: paso 2, imagen 1 de 1
    • Push on the top of the battery downward and pull the battery off of the device.

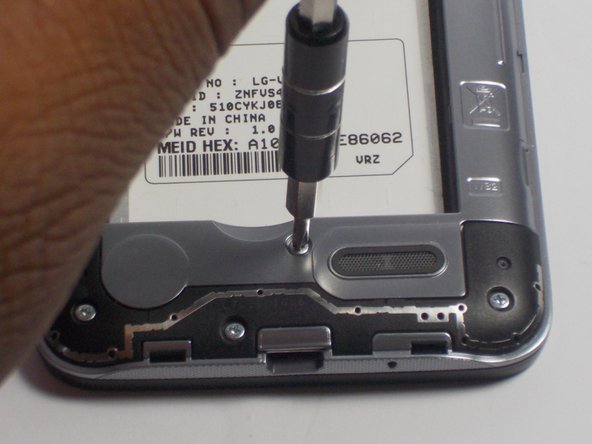
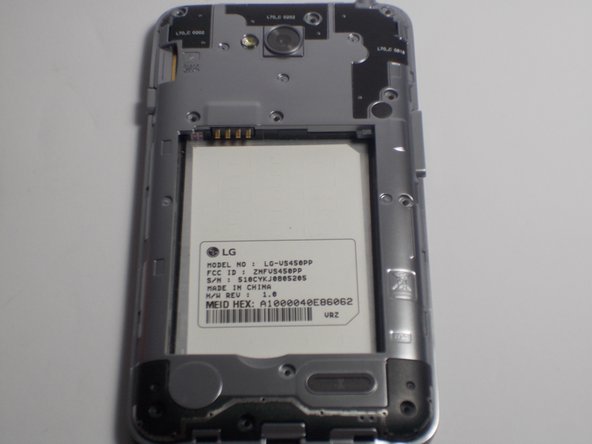
  3. LG Optimus Exceed 2 Rear Camera Replacement, Rear Camera: paso 3, imagen 1 de 3 LG Optimus Exceed 2 Rear Camera Replacement, Rear Camera: paso 3, imagen 2 de 3 LG Optimus Exceed 2 Rear Camera Replacement, Rear Camera: paso 3, imagen 3 de 3
    • Remove the eleven 4mm screws using a Philips head screw driver.

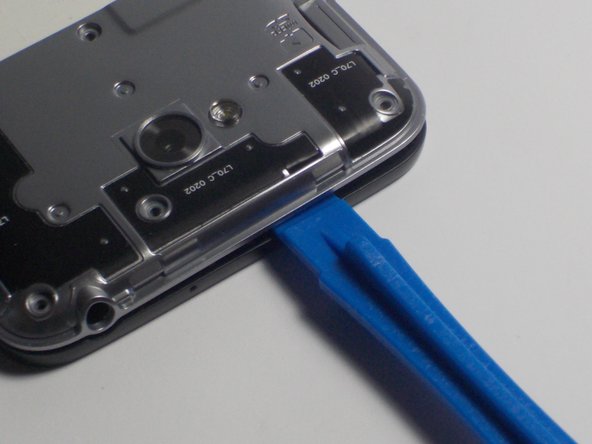
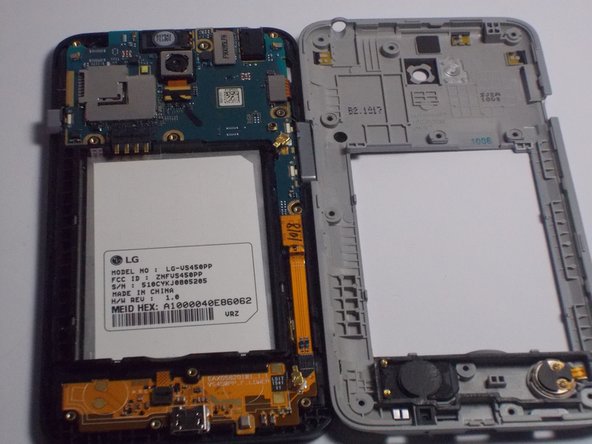
  4. LG Optimus Exceed 2 Rear Camera Replacement: paso 4, imagen 1 de 3 LG Optimus Exceed 2 Rear Camera Replacement: paso 4, imagen 2 de 3 LG Optimus Exceed 2 Rear Camera Replacement: paso 4, imagen 3 de 3
    • Insert the plastic opening tool into the side of the device and pry off silver covering. Push up against the back covering when the tool is inserted to detach from the phone.

    • Make sure to detach all sides of silver covering before lifting it off the phone.

  5. LG Optimus Exceed 2 Rear Camera Replacement: paso 5, imagen 1 de 2 LG Optimus Exceed 2 Rear Camera Replacement: paso 5, imagen 2 de 2
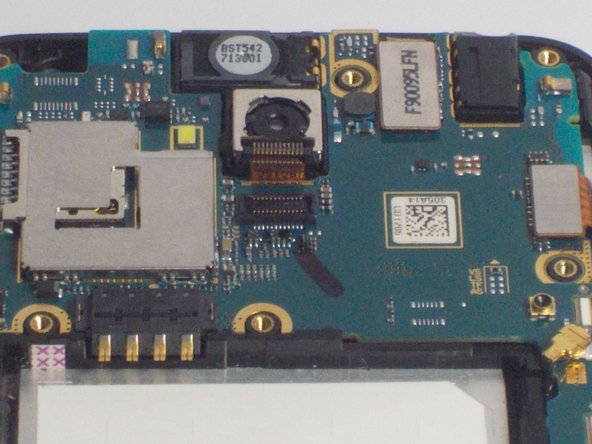
    • Using the prying tool detach the connector on the device.

    • Insert the plastic opening tool underneath the connector and push tool down to lift the connector from the device.

  6. LG Optimus Exceed 2 Rear Camera Replacement: paso 6, imagen 1 de 2 LG Optimus Exceed 2 Rear Camera Replacement: paso 6, imagen 2 de 2
    Herramienta utilizada en este paso:
    Tweezers
    $4.99
    Comprar
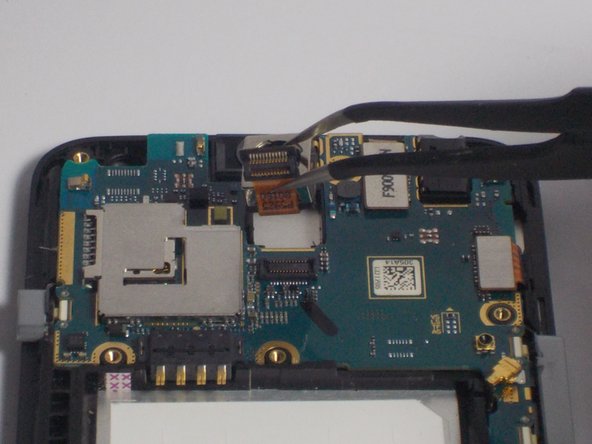
    • Using tweezers lift the camera off of the device.

    • To do so grasp the camera gently with the tweezers and pull the camera up out of the device.

Conclusión

To reassemble your device, follow these instructions in reverse order.

Una persona más ha completado esta guía.

Carl Dorvilus

Miembro Desde 03/10/16

708 Reputación

6 Guías creadas

Equipo

0 comentarios

Agregar Comentario

Ver Estadísticas:

Ultimas 24 horas: 1

Ultimos 7 días: 1

Ultimos 30 días: 5

Todo El Tiempo: 183