Esta versión puede contener ediciones incorrectas. Cambie a la última instantánea verificada.
Qué necesitas
-
Este paso está sin traducir. Ayuda a traducirlo
-
Remove the cover of the SD card. Find it on the right side of the back of the tablet.
-
Press the SD card in to make it pop out.
-
-
Este paso está sin traducir. Ayuda a traducirlo
-
Slide the stylus out from the bottom left corner of the back panel.
-
-
Este paso está sin traducir. Ayuda a traducirlo
-
Start at a corner and pry the screen up with a plastic opening tool.
-
Slide the tool in the seam at the edge of the screen.
-
Wedge additional plastic opening tools in the seam to help lift the screen.
-
Slide both wedged plastic opening tools towards the bottom to pop the screen loose.
-
-
Este paso está sin traducir. Ayuda a traducirlo
-
With a Phillips #000 screwdriver, unscrew the six 4.0 mm screws that hold down the battery.
-
With the Phillips #000 screwdriver, unscrew the two 4.0 mm screws that hold down the battery ribbon connector.
-
Use a magnetic mat to keep track of these tiny screws for later reassembly.
-
-
-
Este paso está sin traducir. Ayuda a traducirlo
-
Lift the battery with your fingers and remove it from the device.
-
-
Este paso está sin traducir. Ayuda a traducirlo
-
With a Phillips #000 screwdriver, unscrew the one 4.0 mm screw that is holding down the speaker.
-
Use the magnetic mat to keep track of the tiny screw(s).
-
-
Este paso está sin traducir. Ayuda a traducirlo
-
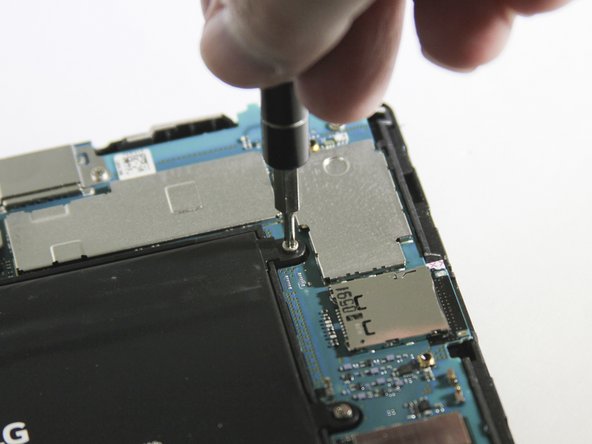
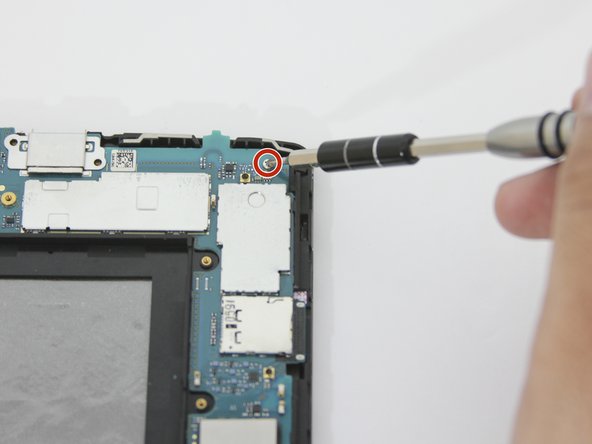
With the Phillips #000 screwdriver, unscrew the four 4.0 mm screw that are holding down the motherboard.
-
-
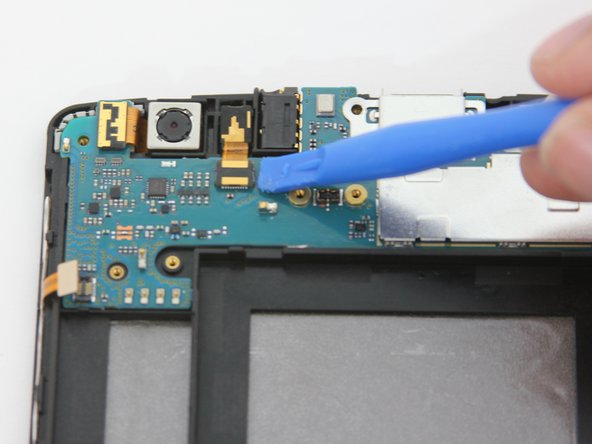
Este paso está sin traducir. Ayuda a traducirlo
-
Use a plastic opening tool to lift up the ribbon connector at the bottom of the motherboard.
-
-
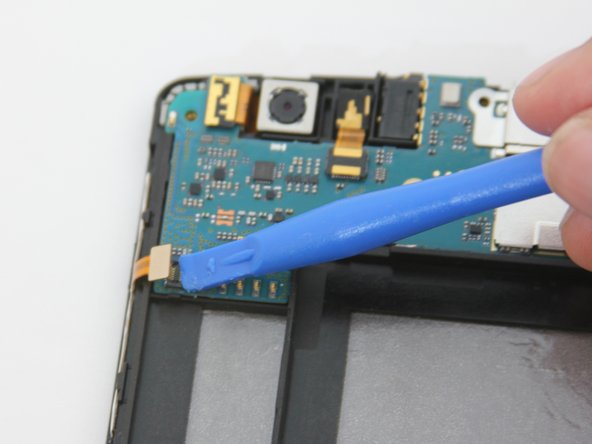
Este paso está sin traducir. Ayuda a traducirlo
-
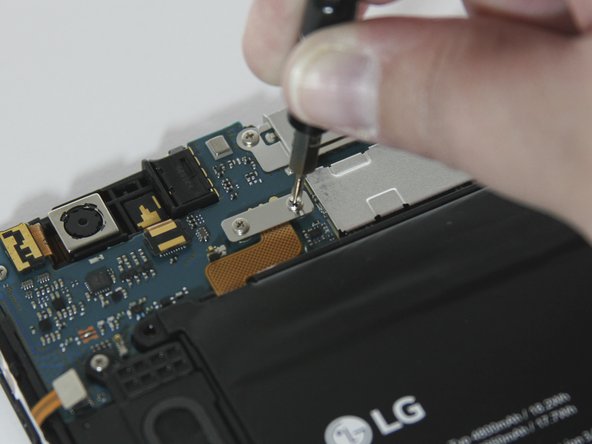
Lift and release the remaining ribbon connectors in the upper left corner of the motherboard with a plastic opening tool.
-
-
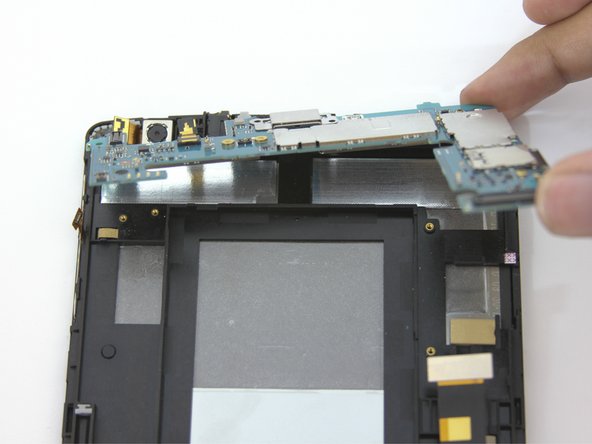
Este paso está sin traducir. Ayuda a traducirlo
-
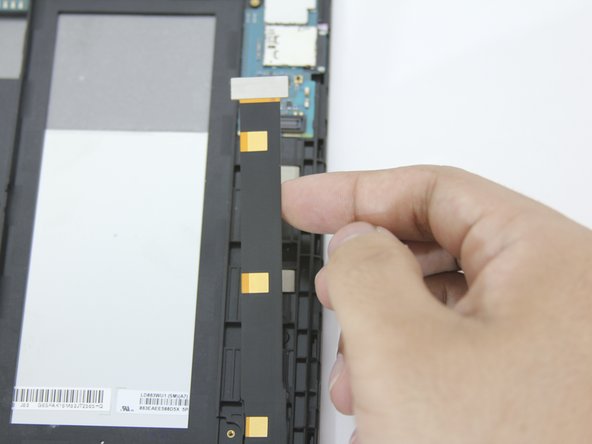
With your fingers, lift up the motherboard from the upper right corner.
-
Carefully remove the fragile motherboard from the device.
-


Equipo

Eastern Washington University, Team S3-G4, Rowley Spring 2018 Miembro de Eastern Washington University, Team S3-G4, Rowley Spring 2018
EWU-ROWLEY-S18S3G4
4 Miembros
10 Guías creadas