Saltar al contenido principal

LG G Pad X 8.3 Motherboard Replacement

Qué necesitas

  1. LG G Pad X 8.3 Motherboard Replacement, Battery: paso 1, imagen 1 de 1
    • Remove the cover of the SD card. Find it on the right side of the back of the tablet.

    • Press the SD card in to make it pop out.

  2. LG G Pad X 8.3 Motherboard Replacement: paso 2, imagen 1 de 1
    • Slide the stylus out from the bottom left corner of the back panel.

  3. LG G Pad X 8.3 Motherboard Replacement: paso 3, imagen 1 de 1
    • Start at a corner and pry the screen up with a plastic opening tool.

    • You can also use a plastic spudger for this task, but do not use metal tools. They can be dangerous to you and the device.

    • Slide the tool in the seam at the edge of the screen.

    • Wedge additional plastic opening tools in the seam to help lift the screen.

    • Slide both wedged plastic opening tools towards the bottom to pop the screen loose.

    • If your screen is cracked, work slowly to avoid flinging glass shards when prying.

  4. LG G Pad X 8.3 Motherboard Replacement: paso 4, imagen 1 de 3 LG G Pad X 8.3 Motherboard Replacement: paso 4, imagen 2 de 3 LG G Pad X 8.3 Motherboard Replacement: paso 4, imagen 3 de 3
    • With a Phillips #000 screwdriver, unscrew the six 4.0 mm screws that hold down the battery.

    • With the Phillips #000 screwdriver, unscrew the two 4.0 mm screws that hold down the battery ribbon connector.

    • Use a magnetic mat to keep track of these tiny screws for later reassembly.

  5. LG G Pad X 8.3 Motherboard Replacement: paso 5, imagen 1 de 1
    • Lift the battery ribbon connector with your finger.

  6. LG G Pad X 8.3 Motherboard Replacement: paso 6, imagen 1 de 1
    • Lift the battery with your fingers and remove it from the device.

  7. LG G Pad X 8.3 Motherboard Replacement, Speaker: paso 7, imagen 1 de 1
    • With a Phillips #000 screwdriver, unscrew the one 4.0 mm screw that is holding down the speaker.

    • Use the magnetic mat to keep track of the tiny screw(s).

  8. LG G Pad X 8.3 Motherboard Replacement: paso 8, imagen 1 de 1
    • Lift and remove the speaker with your finger.

  9. LG G Pad X 8.3 Motherboard Replacement, Motherboard: paso 9, imagen 1 de 2 LG G Pad X 8.3 Motherboard Replacement, Motherboard: paso 9, imagen 2 de 2
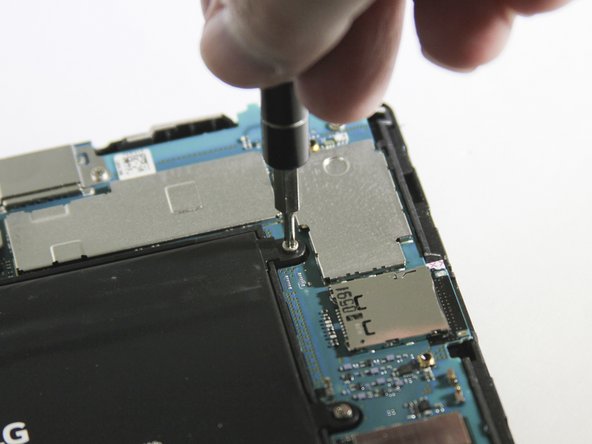
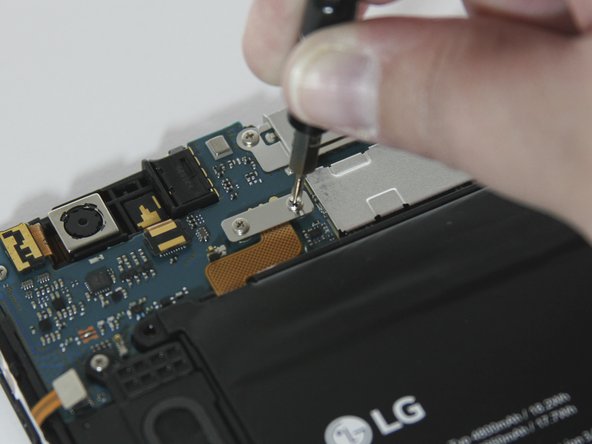
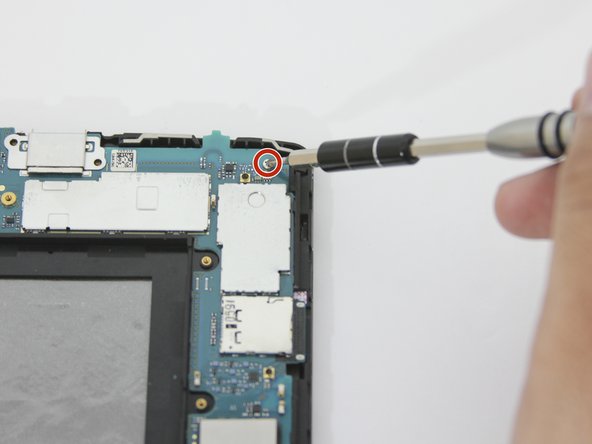
    • With the Phillips #000 screwdriver, unscrew the four 4.0 mm screw that are holding down the motherboard.

  10. LG G Pad X 8.3 Motherboard Replacement: paso 10, imagen 1 de 2 LG G Pad X 8.3 Motherboard Replacement: paso 10, imagen 2 de 2
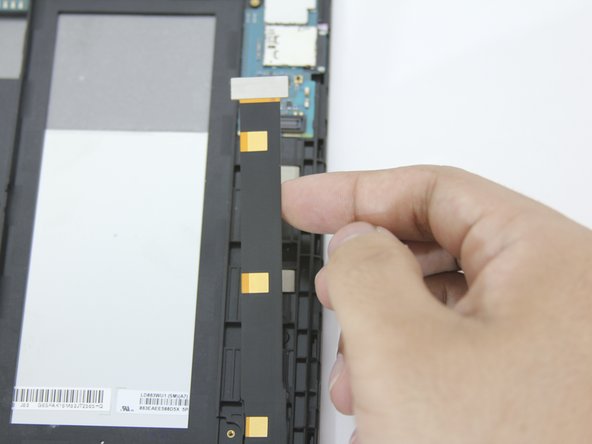
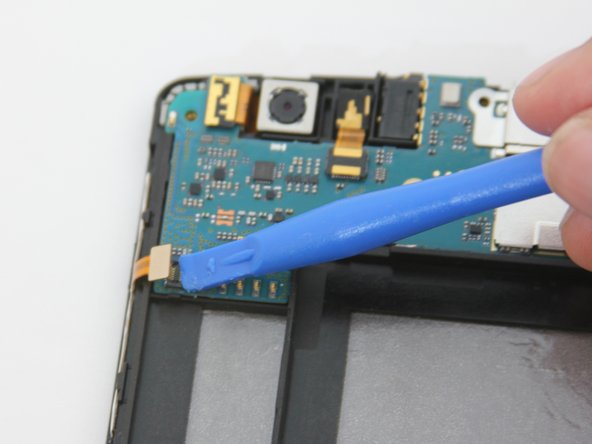
    • Use a plastic opening tool to lift up the ribbon connector at the bottom of the motherboard.

    • Only lift up the end of the ribbon connector that is attached to the motherboard. The end at the base of the tablet should stay attached.

    The end of this flex is a small connector that is hidden under a piece of adhesive. Carefully pull this up or the end will tear off.

    John Murphy - Contestar

  11. LG G Pad X 8.3 Motherboard Replacement: paso 11, imagen 1 de 3 LG G Pad X 8.3 Motherboard Replacement: paso 11, imagen 2 de 3 LG G Pad X 8.3 Motherboard Replacement: paso 11, imagen 3 de 3
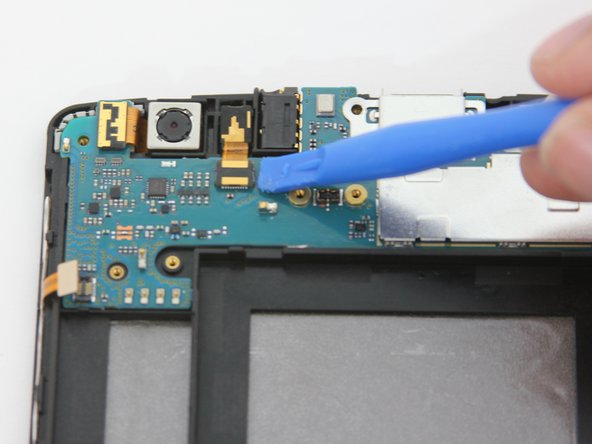
    • Lift and release the remaining ribbon connectors in the upper left corner of the motherboard with a plastic opening tool.

    • Avoid bending the tips of the ribbon connectors to prevent damage.

    Remove front camera or else it will fall out later.

    Natalie Dobson - Contestar

  12. LG G Pad X 8.3 Motherboard Replacement: paso 12, imagen 1 de 2 LG G Pad X 8.3 Motherboard Replacement: paso 12, imagen 2 de 2
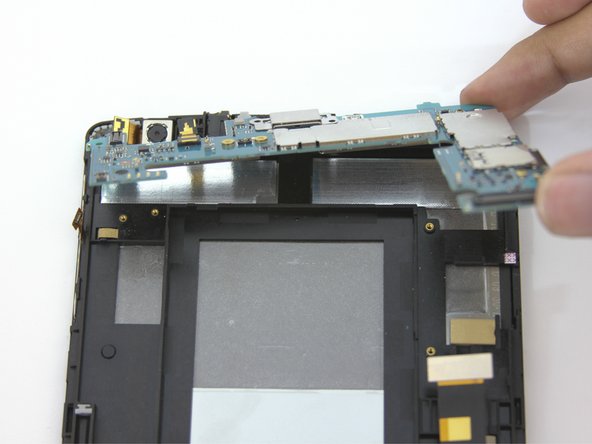
    • With your fingers, lift up the motherboard from the upper right corner.

    • Carefully remove the fragile motherboard from the device.

Conclusión

To reassemble your device, follow these instructions in reverse order.

Un comentario

I think you missed the step of removing the back and accidentally put in the slide for prying off the screen instead.

Juniper - Contestar

Agregar Comentario

Ver Estadísticas:

Ultimas 24 horas: 0

Ultimos 7 días: 2

Ultimos 30 días: 5

Todo El Tiempo: 449