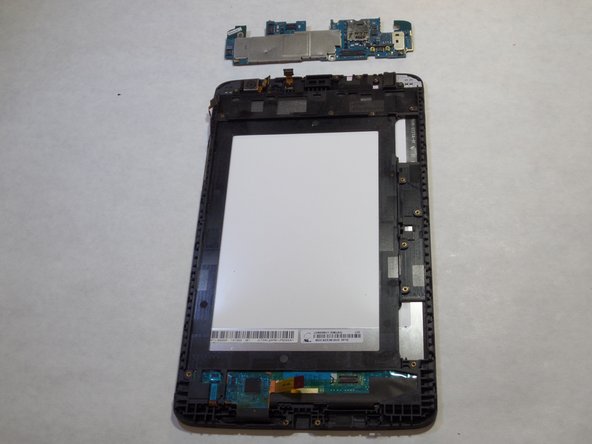
Saltar al contenido principal

LG G Pad 8.3 Front Facing Camera Replacement

Qué necesitas

  1. LG G Pad 8.3 Front Facing Camera Replacement, Back Panel: paso 1, imagen 1 de 2 LG G Pad 8.3 Front Facing Camera Replacement, Back Panel: paso 1, imagen 2 de 2
    • With the tablet face down, pull the SD card slot cover out.

    • Using a Phillips #000 screwdriver, remove the 3mm screw located in the SD card slot.

  2. LG G Pad 8.3 Front Facing Camera Replacement: paso 2, imagen 1 de 3 LG G Pad 8.3 Front Facing Camera Replacement: paso 2, imagen 2 de 3 LG G Pad 8.3 Front Facing Camera Replacement: paso 2, imagen 3 de 3
    • Insert a plastic opening tool in the small crevasse between the screen and the back panel.

    • Pry the screen away from the back panel.

    • Repeat this on each edge of the device.

    • We found it helpful to leave multiple plastic opening tools wedged in the crevasse to prevent it from closing.

    • This requires heavy force. The back of the device is attached with an adhesive. If the back panel is too hard to remove, use the iOpener.

  3. LG G Pad 8.3 Front Facing Camera Replacement: paso 3, imagen 1 de 2 LG G Pad 8.3 Front Facing Camera Replacement: paso 3, imagen 2 de 2
    • After using the plastic opening tools, pry the device open with your hands.

    • Remove the back panel from the screen.

  4. LG G Pad 8.3 Front Facing Camera Replacement, Speaker: paso 4, imagen 1 de 2 LG G Pad 8.3 Front Facing Camera Replacement, Speaker: paso 4, imagen 2 de 2
    Herramienta utilizada en este paso:
    Magnetic Project Mat
    $19.95
    Comprar
    • Remove the four 3 mm Phillips #000 screws that are attached to the speaker.

    • These screws are very small so make sure to keep track of them. You can use iFixit's Pro Magnetic Project Mat to help.

  5. LG G Pad 8.3 Front Facing Camera Replacement: paso 5, imagen 1 de 1
    • Use your fingers to remove the speaker.

  6. LG G Pad 8.3 Front Facing Camera Replacement, Battery: paso 6, imagen 1 de 2 LG G Pad 8.3 Front Facing Camera Replacement, Battery: paso 6, imagen 2 de 2
    • Remove the 3mm Phillips #000 screws from the corners of the battery.

  7. LG G Pad 8.3 Front Facing Camera Replacement: paso 7, imagen 1 de 3 LG G Pad 8.3 Front Facing Camera Replacement: paso 7, imagen 2 de 3 LG G Pad 8.3 Front Facing Camera Replacement: paso 7, imagen 3 de 3
    • Using a spudger or a plastic opening tool, disconnect the ribbon cable from the right side of the device.

    • The cable is attached with an adhesive.

    • These images use a metal spudger, which has the potential to damage the device. Use a plastic opening tool or standard spudger instead.

  8. LG G Pad 8.3 Front Facing Camera Replacement: paso 8, imagen 1 de 2 LG G Pad 8.3 Front Facing Camera Replacement: paso 8, imagen 2 de 2
    • Using the Phillips #000 screwdriver, remove the two 3mm screws located at the bottom of the ribbon cable.

    • Remove the ribbon cable from the device.

  9. LG G Pad 8.3 Front Facing Camera Replacement: paso 9, imagen 1 de 2 LG G Pad 8.3 Front Facing Camera Replacement: paso 9, imagen 2 de 2
    • Unhook the battery from the top of the device.

  10. LG G Pad 8.3 Front Facing Camera Replacement, Motherboard: paso 10, imagen 1 de 1
    • Unhook the small yellow ribbon on top of the motherboard.

  11. LG G Pad 8.3 Front Facing Camera Replacement: paso 11, imagen 1 de 1
    • Remove all the 3mm silver screws and the 2mm black screws on the motherboard and carefully lift it out of the device.

  12. LG G Pad 8.3 Front Facing Camera Replacement: paso 12, imagen 1 de 2 LG G Pad 8.3 Front Facing Camera Replacement: paso 12, imagen 2 de 2
    • Use a plastic opening tool to lift the motherboard out of the device.

    • These images use a metal spudger, which has the potential to damage the device. Use a plastic opening tool or standard spudger instead.

  13. LG G Pad 8.3 Front Facing Camera Replacement, Front Facing Camera: paso 13, imagen 1 de 2 LG G Pad 8.3 Front Facing Camera Replacement, Front Facing Camera: paso 13, imagen 2 de 2
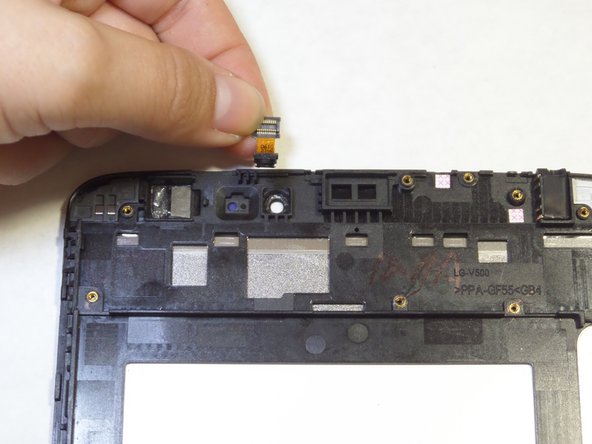
    • Use a plastic opening tool to lift the front facing camera out of the device.

    • These images use a metal spudger, which has the potential to damage the device. Use a plastic opening tool or standard spudger instead.

Conclusión

To reassemble your device, follow these instructions in reverse order.

Una persona más ha completado esta guía.

Equipo

CSU Fullerton, Team 1-6, Bruce Fall 2015 Miembro de CSU Fullerton, Team 1-6, Bruce Fall 2015

CSUF-BRUCE-F15S1G6

4 Miembros

14 Guías creadas

0 comentarios

Agregar Comentario

Ver Estadísticas:

Ultimas 24 horas: 0

Ultimos 7 días: 0

Ultimos 30 días: 2

Todo El Tiempo: 1,593