Saltar al contenido principal

LG G Pad 8.3 4G Vibrator Replacement

Qué necesitas

  1. LG G Pad 8.3 4G Vibrator Replacement, Back Panel: paso 1, imagen 1 de 1
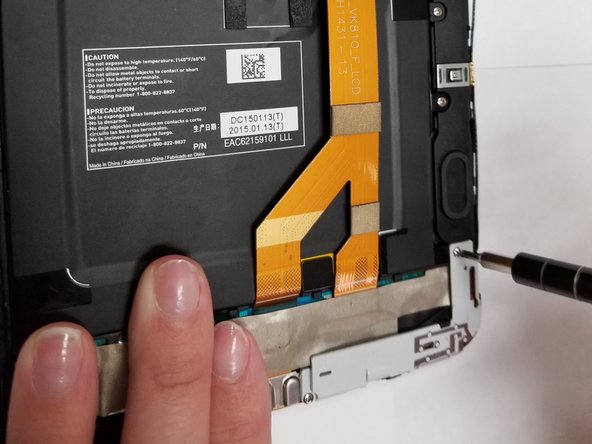
    • With the screen faced up, insert the metal spudger into the crevice so that it is sticking out between the side panel and the screen.
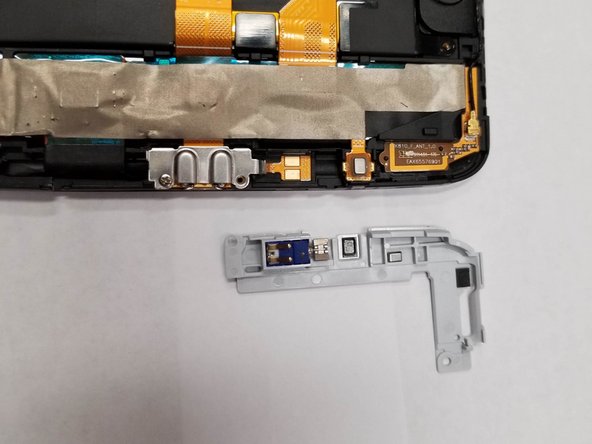
    • Be gentle when popping the panel off.

  2. LG G Pad 8.3 4G Vibrator Replacement: paso 2, imagen 1 de 3 LG G Pad 8.3 4G Vibrator Replacement: paso 2, imagen 2 de 3 LG G Pad 8.3 4G Vibrator Replacement: paso 2, imagen 3 de 3
    • Take the spudger and slide it around the perimeter of the device.

    • Pull gently on the edges to get the panel to pop up.

    • If the panel does not budge, be aware that there is adhesive on the back of the battery holding the back shut. Make sure to just move around the perimeter of the back panel until the panel is able to lift forward.

  3. LG G Pad 8.3 4G Vibrator Replacement, Vibrator: paso 3, imagen 1 de 2 LG G Pad 8.3 4G Vibrator Replacement, Vibrator: paso 3, imagen 2 de 2
    • Remove the two screws on the white panel on the bottom right side.

  4. LG G Pad 8.3 4G Vibrator Replacement: paso 4, imagen 1 de 2 LG G Pad 8.3 4G Vibrator Replacement: paso 4, imagen 2 de 2
    • Remove the white panel.

  5. LG G Pad 8.3 4G Vibrator Replacement: paso 5, imagen 1 de 1
    • Remove the vibrator from the underside of the white panel.

Conclusión

To reassemble your device, follow these instructions in reverse order.

Justice Hindenburg

Miembro Desde 09/18/18

97 Reputación

1 Guía escrita

0 comentarios

Agregar Comentario

Ver Estadísticas:

Ultimas 24 horas: 0

Ultimos 7 días: 1

Ultimos 30 días: 1

Todo El Tiempo: 142