Introducción
How to remove the back panel of the "LG Flare" and access the mainboard, microphone, and keyboard.
Qué necesitas
-
-
Remove the back cover by pressing down on the raised lines located on the top middle of the back cover and sliding the cover towards the top of the phone.
-
-
-
Use the PH000 Phillips-head screwdriver to remove the 6 small screws that were under the battery on the back of the phone. These screws are circled in yellow on the photo.
-
Make sure to hold the phone with your off hand to keep the phone from spinning while you unscrew the screws.
-
Note: You may want to place the screws in a small Ziploc bag to avoid misplacing them.
-
-
-
-
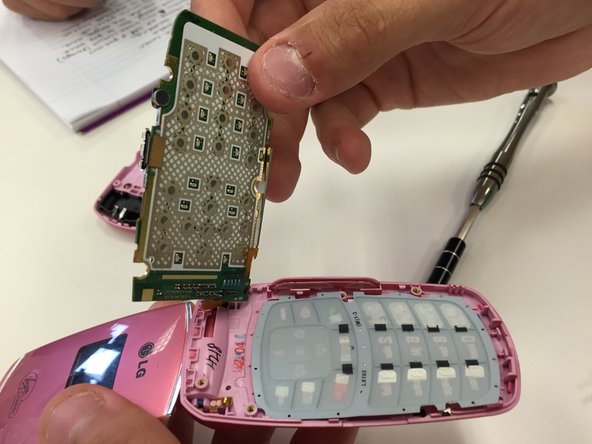
Use the blue wedge to pop the back panel off. Start by placing the blue panel between the back panel and the charging port, and work your way around the edges until the whole back piece has been pried off.
-
The small rectangular charging port cover may disconnect as well. This is okay; just set the cover aside with the screws, battery, and back cover.
-
-
-
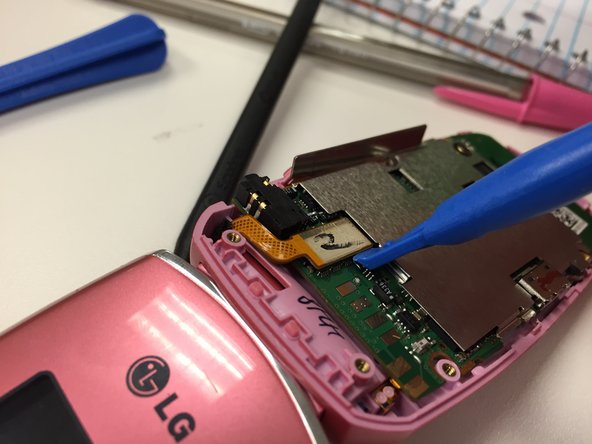
Place the blue wedge between the orange connecting strip (located at the top right of the back of the phone) and the green circuit board.
-
Carefully pry the connecting strip upward to remove it. The connecting strip and circuit board are fragile, so be sure not to apply too much pressure.
-


To reassemble your device, follow these instructions in reverse order.
To reassemble your device, follow these instructions in reverse order.
Equipo

Ohio State, Team 1-3, Garvin Fall 2015 Miembro de Ohio State, Team 1-3, Garvin Fall 2015
OSU-GARVIN-F15S1G3
4 Miembros
4 Guías creadas