Saltar al contenido principal

LG Chocolate 3 Keypad Replacement

Qué necesitas

  1. LG Chocolate 3 Keypad Replacement, Battery: paso 1, imagen 1 de 1
    • Turn the phone off before starting the replacement process.

    • Place the phone face down.

    • Press your finger down on the indentation and slide the back plate off.

  2. LG Chocolate 3 Keypad Replacement: paso 2, imagen 1 de 3 LG Chocolate 3 Keypad Replacement: paso 2, imagen 2 de 3 LG Chocolate 3 Keypad Replacement: paso 2, imagen 3 de 3
    • Using your index finger lift and remove the battery from the phone.

  3. LG Chocolate 3 Keypad Replacement, Rear Case: paso 3, imagen 1 de 1
    • Use the pointed end of the spudger to pull out the plastic inserts that are located on the left and right-hand corners.

    • If needed, use the tip of a push pin instead of the spudger to remove the plastic inserts.

  4. LG Chocolate 3 Keypad Replacement: paso 4, imagen 1 de 1
    • Using a Phillips #00 screwdriver, remove the six 3mm long screws found along the edges of the phone.

    • If needed, use tweezers to remove loose screws from the recessed holes.

    • Screws are small, therefore, they should be placed in a secure location to prevent misplacement.

  5. LG Chocolate 3 Keypad Replacement: paso 5, imagen 1 de 2 LG Chocolate 3 Keypad Replacement: paso 5, imagen 2 de 2
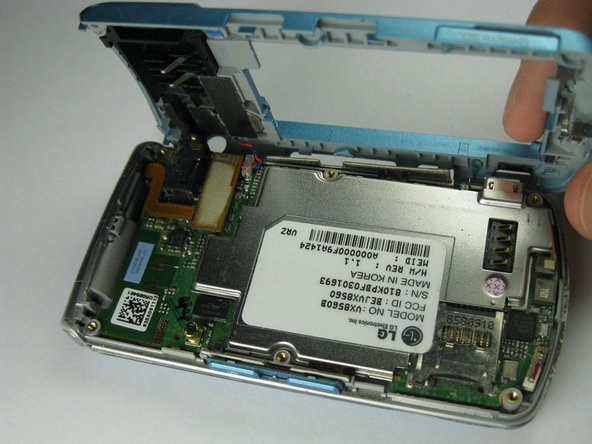
    • Pull the rear case up using the spudger.

    • The rear case is connected to the right side of the phone via red and blue cables, be careful not to pull these cables out.

    • The volume control buttons on the side might fall out of their sockets. Carefully replace them with a pair of tweezers before you reassemble the rear case.

  6. LG Chocolate 3 Keypad Replacement: paso 6, imagen 1 de 1
    • Use tweezers to pull the clear end of the red and blue speaker cables away from motherboard.

  7. LG Chocolate 3 Keypad Replacement: paso 7, imagen 1 de 2 LG Chocolate 3 Keypad Replacement: paso 7, imagen 2 de 2
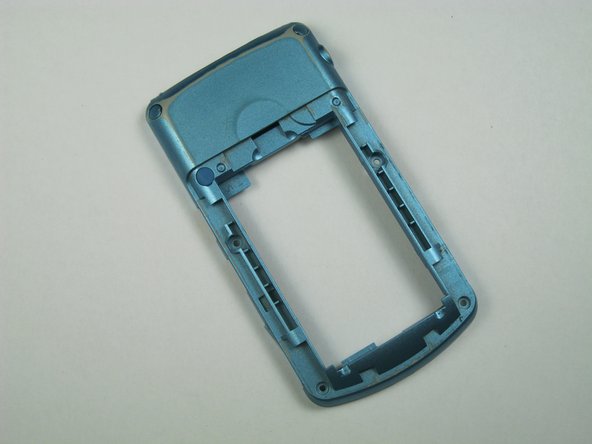
    • Carefully remove the rear case from the phone.

  8. LG Chocolate 3 Keypad Replacement, Side Buttons: paso 8, imagen 1 de 1
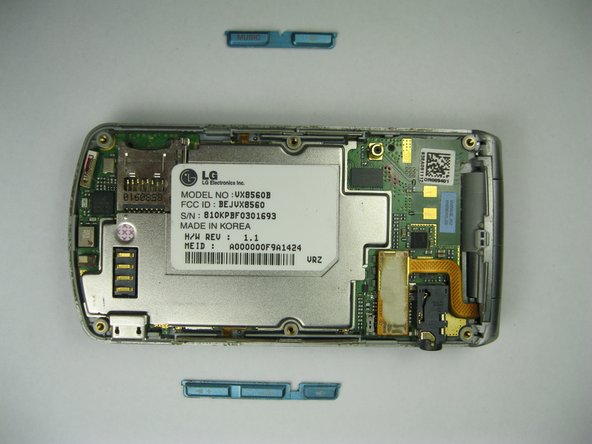
    • Use tweezers to remove the music button found on the side of the phone.

  9. LG Chocolate 3 Keypad Replacement: paso 9, imagen 1 de 2 LG Chocolate 3 Keypad Replacement: paso 9, imagen 2 de 2
    • Use tweezers to remove the volume control buttons on the opposite side of the phone.

  10. LG Chocolate 3 Keypad Replacement, Motherboard: paso 10, imagen 1 de 1
    • Use the flat end of the spudger to lift the orange display data cable.

  11. LG Chocolate 3 Keypad Replacement: paso 11, imagen 1 de 2 LG Chocolate 3 Keypad Replacement: paso 11, imagen 2 de 2
    • Carefully insert the plastic opening tool between the motherboard and the back of the phone.

  12. LG Chocolate 3 Keypad Replacement: paso 12, imagen 1 de 2 LG Chocolate 3 Keypad Replacement: paso 12, imagen 2 de 2
    • Use your thumb and index finger to carefully lift and separate the motherboard from the back of the phone.

    • Be cautious of the orange display data cable, it may stick to the motherboard.

    • To avoid this, lift the data cable away from the motherboard before removal.

  13. LG Chocolate 3 Keypad Replacement, Keypad: paso 13, imagen 1 de 1
    • Open the phone.

    • Keep the phone open by keeping a firm grip on the hinges to avoid any damages to the phone.

  14. LG Chocolate 3 Keypad Replacement: paso 14, imagen 1 de 1
    • Lift the orange data cable up so that it is elevated.

    • Gently use a finger to lift the keypad out.

  15. LG Chocolate 3 Keypad Replacement: paso 15, imagen 1 de 1
    • Insert the spudger in between the keypad and the phone.

    • Lift the keypad to seperate it from the phone.

  16. LG Chocolate 3 Keypad Replacement: paso 16, imagen 1 de 2 LG Chocolate 3 Keypad Replacement: paso 16, imagen 2 de 2
    • Remove the damaged keypad.

    • Insert the replacement keypad.

    • Reassemble the phone after the broken keypad is replaced.

Conclusión

To reassemble this device, follow these instructions in reverse order.

Una persona más ha completado esta guía.

Equipo

Cal Poly, Team 12-35, Amido Spring 2013 Miembro de Cal Poly, Team 12-35, Amido Spring 2013

CPSU-AMIDO-S13S12G35

5 Miembros

12 Guías creadas

0 comentarios

Agregar Comentario

Ver Estadísticas:

Ultimas 24 horas: 0

Ultimos 7 días: 0

Ultimos 30 días: 2

Todo El Tiempo: 508