Saltar al contenido principal

Qué necesitas

Este desmontaje no es una guía de reparación. Para reparar tu Kyocera Oystr, utiliza nuestros manuales de servicio .

  1. Kyocera Oystr Teardown, Removing the battery: paso 1, imagen 1 de 3 Kyocera Oystr Teardown, Removing the battery: paso 1, imagen 2 de 3 Kyocera Oystr Teardown, Removing the battery: paso 1, imagen 3 de 3
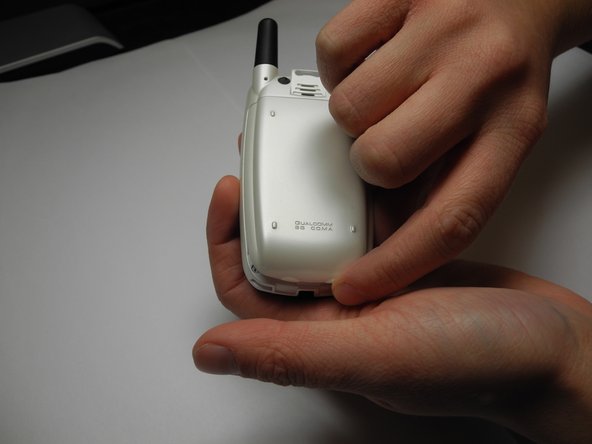
    • Make sure the phone is turned off before disassembly.

    • Lift the bottom of the phone's back cover upwards, revealing the phone's battery housing.

    • Remove the battery from the casing. This is simply a precaution.

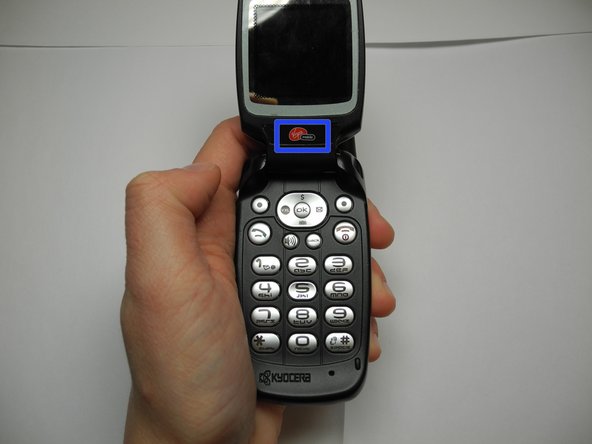
    • Turn the phone over, so that the front side is facing you. Open the device in preparation for the next step.

  2. Kyocera Oystr Teardown, Removing screws from screen: paso 2, imagen 1 de 3 Kyocera Oystr Teardown, Removing screws from screen: paso 2, imagen 2 de 3 Kyocera Oystr Teardown, Removing screws from screen: paso 2, imagen 3 de 3
    • Peel the Virgin Mobile sticker off of the phone's screen to reveal two screws beneath it.

    • Use the Tri-Wing Y0 screwdriver to remove the two screws from the screen.

  3. Kyocera Oystr Teardown, Exposing internal components: paso 3, imagen 1 de 3 Kyocera Oystr Teardown, Exposing internal components: paso 3, imagen 2 de 3 Kyocera Oystr Teardown, Exposing internal components: paso 3, imagen 3 de 3
    • Lift the plastic cover of the phone screen upwards with a plastic opening tool.

    • Remove the two screws from the metal cover.

  4. Kyocera Oystr Teardown, Removing metal cover: paso 4, imagen 1 de 1
    • Remove the metal cover by lifting up and away from the device.

  5. Kyocera Oystr Teardown, Screen removal: paso 5, imagen 1 de 3 Kyocera Oystr Teardown, Screen removal: paso 5, imagen 2 de 3 Kyocera Oystr Teardown, Screen removal: paso 5, imagen 3 de 3
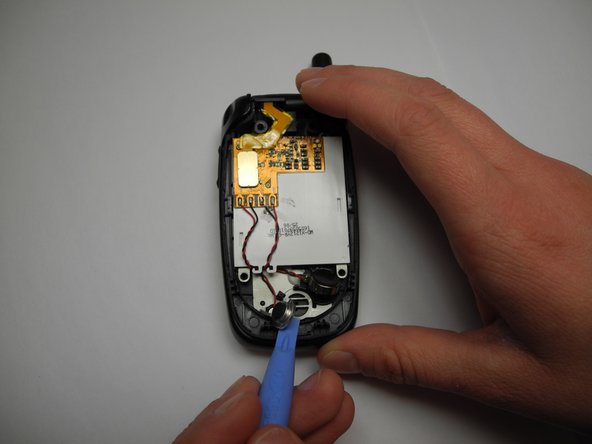
    • Use the plastic opening tool to pry the phone's speakers up and away from the device. These speakers will dangle by the wires attached to the board.

    • Use your fingernail to detach the ribbon connecting the board to the screen.

    • Remove the damaged screen from the device.

  6. Kyocera Oystr Teardown, Completing the repair: paso 6, imagen 1 de 1
    • Follow these steps in reverse order to replace Kyocera Oystr’s screen.

David

Miembro Desde 10/04/11

24 Reputación

2 Guías creadas

Equipo

UW Stout, Team 5-7, Zhou Fall 2011 Miembro de UW Stout, Team 5-7, Zhou Fall 2011

UWSTOUT-ZHOU-F11S5G7

2 Miembros

4 Guías creadas

2 comentarios

where do I get a new screen?

LARS ANDERSEN - Contestar

where do i get a new screen

thanks

LARS ANDERSEN - Contestar

Agregar Comentario

Ver Estadísticas:

Ultimas 24 horas: 2

Ultimos 7 días: 2

Ultimos 30 días: 7

Todo El Tiempo: 4,319