Saltar al contenido principal

Kurio Xtreme Battery Replacement

Qué necesitas

  1. Kurio Xtreme Battery Replacement, Back Panel: paso 1, imagen 1 de 1
    • Remove the rubber case by beginning to peel from one of the top corners and continue peeling until the cover is completely removed.

  2. Kurio Xtreme Battery Replacement: paso 2, imagen 1 de 2 Kurio Xtreme Battery Replacement: paso 2, imagen 2 de 2
    • Unscrew the four 4 mm black screws using a Phillips #000 screw driver.

    • There are two screws on each side of the device (four total).

  3. Kurio Xtreme Battery Replacement: paso 3, imagen 1 de 3 Kurio Xtreme Battery Replacement: paso 3, imagen 2 de 3 Kurio Xtreme Battery Replacement: paso 3, imagen 3 de 3
    • Insert the plastic opening tool in between the edges of the blue front casing and black back casing.

    • Slide the plastic opening tool around the perimeter of the device. This may require that you repeatedly run the opening tool up and down the edges of the device.

    • Be sure not to break any of the plastic clamps along the edges of the device when removing the back cover.

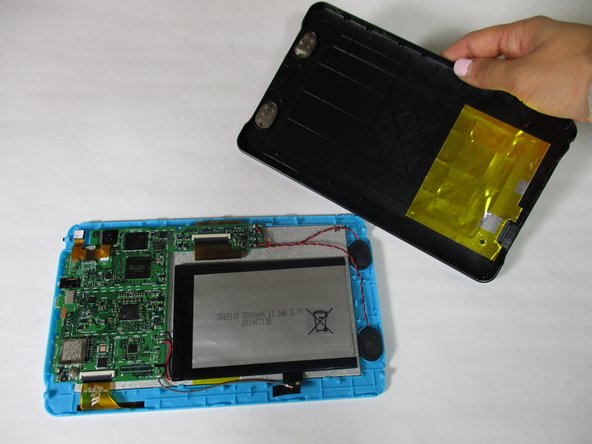
    • Carefully lift the back panel off of the rest of the device.

  4. Kurio Xtreme Battery Replacement, Battery: paso 4, imagen 1 de 2 Kurio Xtreme Battery Replacement, Battery: paso 4, imagen 2 de 2
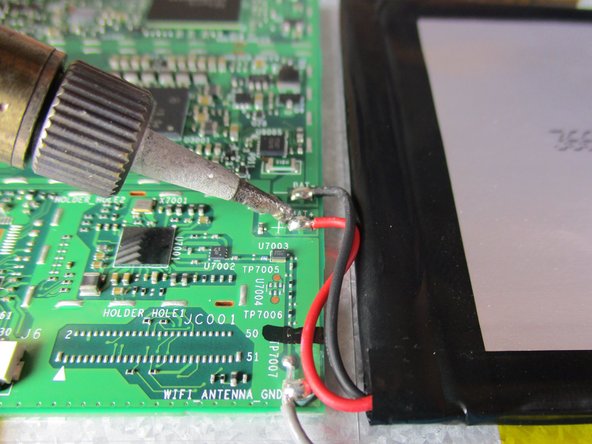
    • Disconnect the black and red wires from the motherboard by soldering the ends that are connected to the motherboard.

    • The soldering iron gets very hot and may injure you if exposed to your skin.

  5. Kurio Xtreme Battery Replacement: paso 5, imagen 1 de 2 Kurio Xtreme Battery Replacement: paso 5, imagen 2 de 2
    Herramienta utilizada en este paso:
    Plastic Cards
    $2.99
    Comprar
    • Slide iFixit's Plastic Card tool or a credit card under the battery to remove the glue that is holding it in place.

    • Be patient and gentle. The glue is strong and may take up to 30 seconds to remove.

    • Carefully lift the battery out of the device.

Conclusión

To reassemble your device, follow these instructions in reverse order.

2 personas más completaron esta guía.

Mallory Myers

Miembro Desde 09/22/15

1,190 Reputación

7 Guías creadas

Equipo

Baylor, Team 6-10, Williams Fall 2015 Miembro de Baylor, Team 6-10, Williams Fall 2015

BU-WILLIAMS-F15S6G10

3 Miembros

14 Guías creadas

2 comentarios

j ai changé de batterie mais la batterie ne charge pas. est ce que c ets parce qu un des deux fils serait mal soudé?

j-p1955 - Contestar

Does it have a certain battery or can a different battery fit?

Nikki Gilliard - Contestar

Agregar Comentario

Ver Estadísticas:

Ultimas 24 horas: 0

Ultimos 7 días: 3

Ultimos 30 días: 3

Todo El Tiempo: 3,951