Saltar al contenido principal

Kodak EasyShare Z740 Button Replacement

Qué necesitas

  1. Kodak EasyShare Z740 Button Replacement, Battery: paso 1, imagen 1 de 3 Kodak EasyShare Z740 Button Replacement, Battery: paso 1, imagen 2 de 3 Kodak EasyShare Z740 Button Replacement, Battery: paso 1, imagen 3 de 3
    • Slide the door on the bottom of the camera in the direction of the open symbol with your finger.

    • Release and the door will pop open.

  2. Kodak EasyShare Z740 Button Replacement: paso 2, imagen 1 de 2 Kodak EasyShare Z740 Button Replacement: paso 2, imagen 2 de 2
    • Slide the battery out.

  3. Kodak EasyShare Z740 Button Replacement, Lens Cover: paso 3, imagen 1 de 2 Kodak EasyShare Z740 Button Replacement, Lens Cover: paso 3, imagen 2 de 2
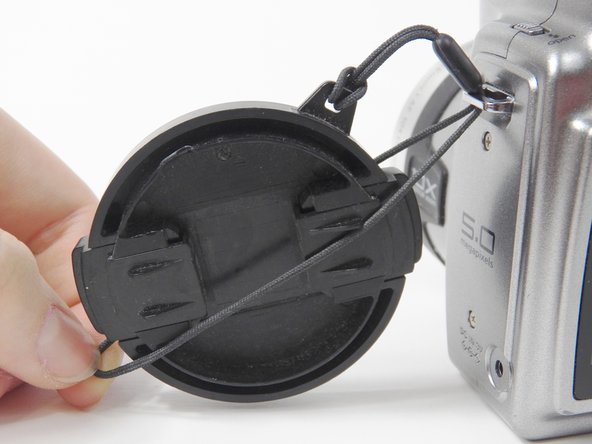
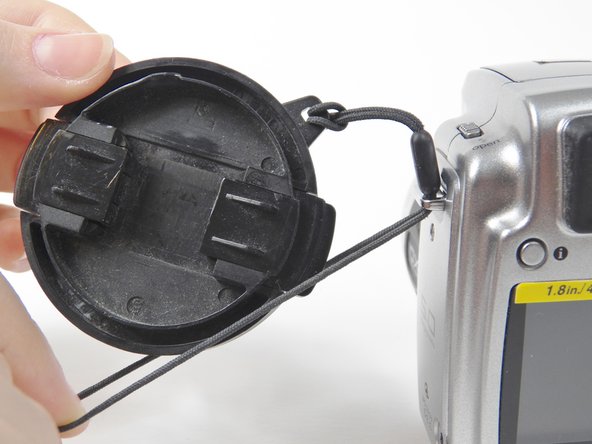
    • Remove lens cover from the camera by squeezing the protruding button on each side of the cover and pulling.

  4. Kodak EasyShare Z740 Button Replacement: paso 4, imagen 1 de 3 Kodak EasyShare Z740 Button Replacement: paso 4, imagen 2 de 3 Kodak EasyShare Z740 Button Replacement: paso 4, imagen 3 de 3
    • Pull the lens cover string toward the ground so that the loop underneath the metal slab is on top of the cover string.

    • Push up so that the string starts to come out of the top of the loop.

    • Grab the string from above the loop and pull.

  5. Kodak EasyShare Z740 Button Replacement: paso 5, imagen 1 de 2 Kodak EasyShare Z740 Button Replacement: paso 5, imagen 2 de 2
    • Feed the string on top into the metal slab while pulling the loop toward you until the plastic piece stops you from pulling any further.

  6. Kodak EasyShare Z740 Button Replacement: paso 6, imagen 1 de 3 Kodak EasyShare Z740 Button Replacement: paso 6, imagen 2 de 3 Kodak EasyShare Z740 Button Replacement: paso 6, imagen 3 de 3
    • Separate the two pieces of the loop and pull the lens cover up in between them.

  7. Kodak EasyShare Z740 Button Replacement: paso 7, imagen 1 de 3 Kodak EasyShare Z740 Button Replacement: paso 7, imagen 2 de 3 Kodak EasyShare Z740 Button Replacement: paso 7, imagen 3 de 3
    • Pull the lens cover and the sting will come out of the metal slab.

  8. Kodak EasyShare Z740 Button Replacement, SD/MMC: paso 8, imagen 1 de 3 Kodak EasyShare Z740 Button Replacement, SD/MMC: paso 8, imagen 2 de 3 Kodak EasyShare Z740 Button Replacement, SD/MMC: paso 8, imagen 3 de 3
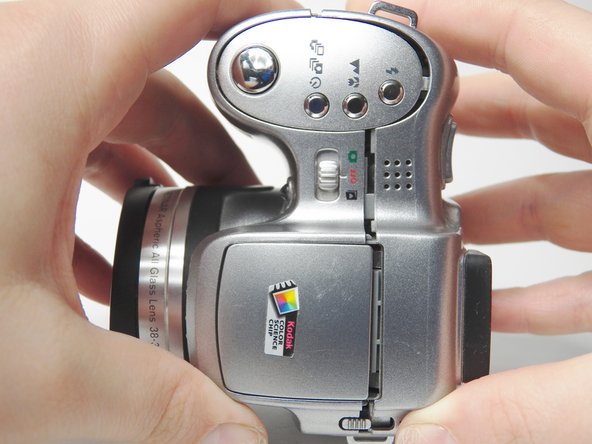
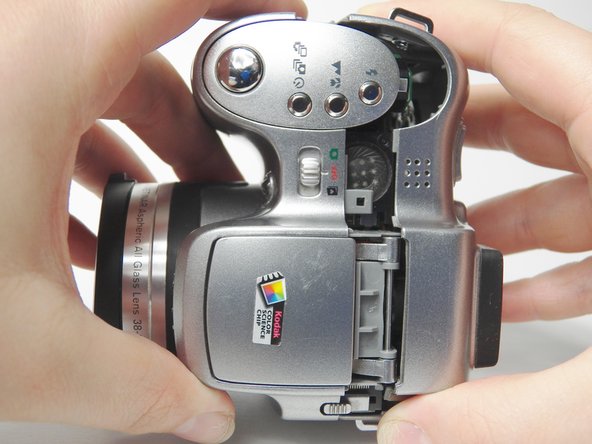
    • Flip open the door on the right side of the camera, when looking at the LCD screen.

    • This door has a memory card and A/V OUT symbol on it.

  9. Kodak EasyShare Z740 Button Replacement: paso 9, imagen 1 de 2 Kodak EasyShare Z740 Button Replacement: paso 9, imagen 2 de 2
    • Gently push SD/MMC to eject.

  10. Kodak EasyShare Z740 Button Replacement: paso 10, imagen 1 de 2 Kodak EasyShare Z740 Button Replacement: paso 10, imagen 2 de 2
    • Pull SD/MMC out of the camera.

  11. Kodak EasyShare Z740 Button Replacement, Back Cover: paso 11, imagen 1 de 3 Kodak EasyShare Z740 Button Replacement, Back Cover: paso 11, imagen 2 de 3 Kodak EasyShare Z740 Button Replacement, Back Cover: paso 11, imagen 3 de 3
    • Place lens cover back on the lens to prevent scratches or debris but leave string detached.

    • Remove a total of six 3.968mm Phillips #00 screws. Two each from the left side, bottom, and right side.

  12. Kodak EasyShare Z740 Button Replacement: paso 12, imagen 1 de 3 Kodak EasyShare Z740 Button Replacement: paso 12, imagen 2 de 3 Kodak EasyShare Z740 Button Replacement: paso 12, imagen 3 de 3
    • Pull the back cover away from the front cover.

    • You may need to use a plastic opening tool as a wedge if it does not come apart by easily.

  13. Kodak EasyShare Z740 Button Replacement: paso 13, imagen 1 de 1
    • Separate the back cover from the front cover.

  14. Kodak EasyShare Z740 Button Replacement, Button Pad: paso 14, imagen 1 de 3 Kodak EasyShare Z740 Button Replacement, Button Pad: paso 14, imagen 2 de 3 Kodak EasyShare Z740 Button Replacement, Button Pad: paso 14, imagen 3 de 3
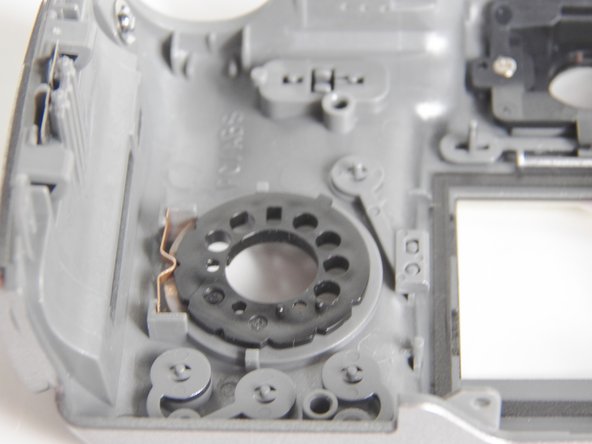
    • Remove two Phillips #00 screws from the inside of the button pad on the back cover.

  15. Kodak EasyShare Z740 Button Replacement: paso 15, imagen 1 de 2 Kodak EasyShare Z740 Button Replacement: paso 15, imagen 2 de 2
    • Remove the metal piece shown.

  16. Kodak EasyShare Z740 Button Replacement: paso 16, imagen 1 de 2 Kodak EasyShare Z740 Button Replacement: paso 16, imagen 2 de 2
    • Remove the black ring from the back and the white button pad will fall out from the front.

Conclusión

To reassemble your device, follow these instructions in reverse order.

Una persona más ha completado esta guía.

Un comentario

When repositioning the button from, say, auto to video (or any of the settings) the wheel is hard to move and when I get it to the video it goes right back to auto. I have at times been able to get it to stay on the new setting by really forcing it and it will stay but inevitably during videoing it slips out to auto again.

Would you happen to know what I need to fix it and where to get it from. I have been searching on eBay and have used many combinations of various phrases in my browser search bar, but, every button replacement kit that was ever made comes up, except, for the Z740.

So, could you direct me to a site(s) where I could get one, please ?

Thankyou

Carroll (Mr.)

Carroll Cameron - Contestar

Agregar Comentario

Ver Estadísticas:

Ultimas 24 horas: 0

Ultimos 7 días: 1

Ultimos 30 días: 7

Todo El Tiempo: 705