Saltar al contenido principal

Kodak EasyShare C713 LCD Replacement

Qué necesitas

  1. Kodak EasyShare C713 LCD Replacement, Batteries: paso 1, imagen 1 de 1
    • Use your finger tip to slide battery cover door away from the center of the camera.

    • The battery door should spring open.

    • If this does not happen, gently open the door lifting from the outer bottom side of the camera.

  2. Kodak EasyShare C713 LCD Replacement: paso 2, imagen 1 de 1
    • Remove the old batteries.

  3. Kodak EasyShare C713 LCD Replacement, Outer Case: paso 3, imagen 1 de 3 Kodak EasyShare C713 LCD Replacement, Outer Case: paso 3, imagen 2 de 3 Kodak EasyShare C713 LCD Replacement, Outer Case: paso 3, imagen 3 de 3
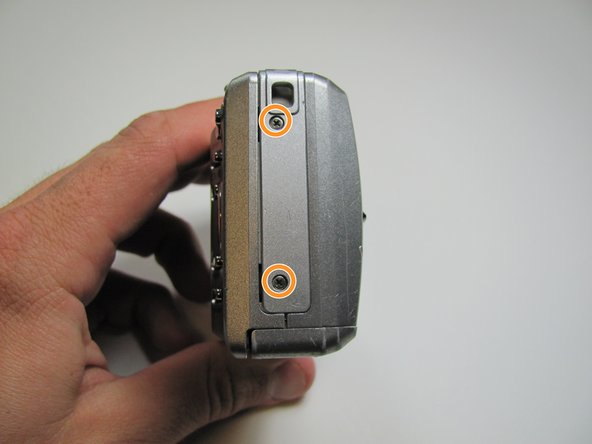
    • Remove the seven screws from the outer case with a Phillips #00.

    • All screws are 4.45mm.

    • There are 2 screws on the port side.

    • There are 2 screws on starboard side.

    • There are 3 screws on the bottom.

  4. Kodak EasyShare C713 LCD Replacement: paso 4, imagen 1 de 3 Kodak EasyShare C713 LCD Replacement: paso 4, imagen 2 de 3 Kodak EasyShare C713 LCD Replacement: paso 4, imagen 3 de 3
    • Make sure the battery cap is "up".

    • Pull the outer case off with your hands.

  5. Kodak EasyShare C713 LCD Replacement, LCD: paso 5, imagen 1 de 1
    • The LCD screen is hinged at the bottom.

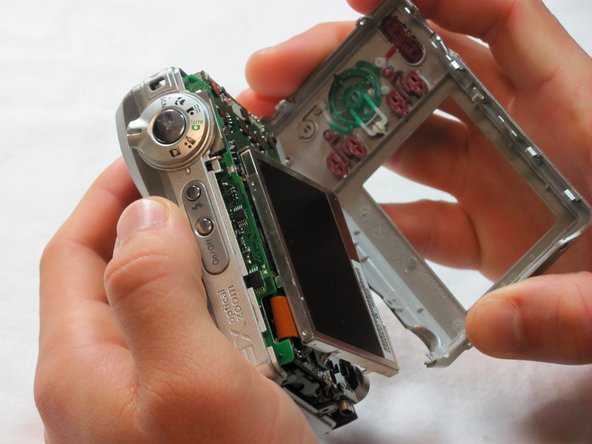
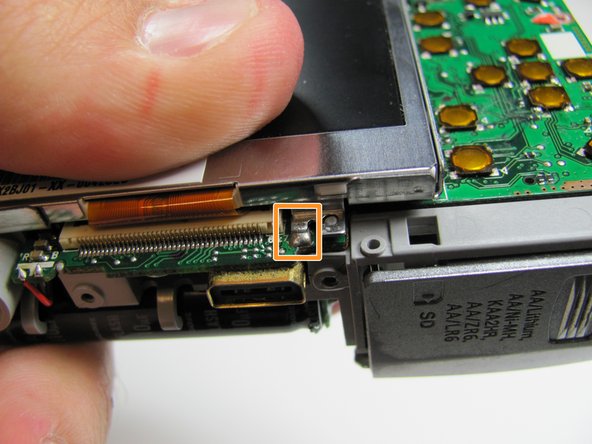
    • Put your thumb in the upper right corner of the LCD screen.

    • Pull the LCD screen out of its outer case with your thumb.

  6. Kodak EasyShare C713 LCD Replacement: paso 6, imagen 1 de 1
    • Remove the screw underneath LCD screen with the Phillips #00. The screw measures 4.1mm in length.

  7. Kodak EasyShare C713 LCD Replacement: paso 7, imagen 1 de 2 Kodak EasyShare C713 LCD Replacement: paso 7, imagen 2 de 2
    • Desolder the two points.

    • One on the port side.

    • One on the bottom.

  8. Kodak EasyShare C713 LCD Replacement: paso 8, imagen 1 de 1
    • After desoldering the LCD casing, just use your fingers to carefully remove it.

  9. Kodak EasyShare C713 LCD Replacement: paso 9, imagen 1 de 1
    • Flip up the black tab on the bottom of the LCD screen with a fingertip.

  10. Kodak EasyShare C713 LCD Replacement: paso 10, imagen 1 de 1
    • Remove the LCD ribbon cable from inside the black tab.

Conclusión

To reassemble your device, follow these instructions in reverse order.

6 personas más completaron esta guía.

Taggart Ashby

Miembro Desde 04/15/10

354 Reputación

4 Guías creadas

Equipo

Cal Poly, Team 26-19, Regan Spring 2010 Miembro de Cal Poly, Team 26-19, Regan Spring 2010

CPSU-REGAN-S10S26G19

4 Miembros

14 Guías creadas

2 comentarios

Thank you... i fixed my old camera lcd.

anthoxman - Contestar

hvor kan jeg kjøpe LCD skjermen til dette kamerat, og hva koster et sånn LCD-skjerm

fancy tassen - Contestar

Agregar Comentario

Ver Estadísticas:

Ultimas 24 horas: 0

Ultimos 7 días: 3

Ultimos 30 días: 12

Todo El Tiempo: 5,243