Introducción
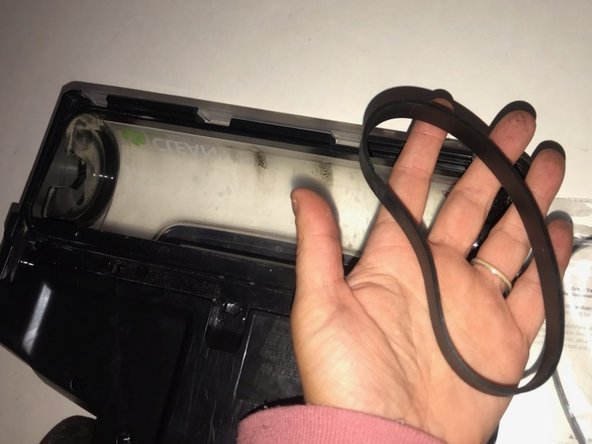
Sometimes our vacuums seem to leave messes instead of cleaning them up. This can happen due to the vacuum belt being worn down or breaking apart. With being such an easy fix, some people fail to realize this and buy a brand new vacuum instead of taking a closer look. Here, we will be slowing it down for a second to help just about anyone learn to change a belt and hopefully save some money the next time their vacuum stops doing its job. This guide will show you how to replace the belt in a Kirby G5 vacuum cleaner. Be sure to get the correct replacement belt for your vacuum.
Qué necesitas
-
-
Place the vacuum at an angle most comfortable and easy to access with the bottom facing upwards.
-
-


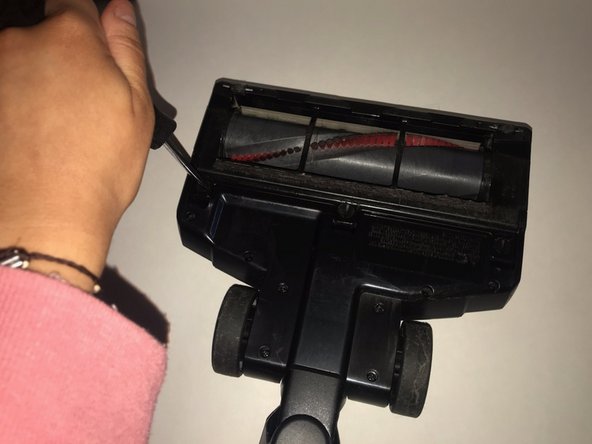
Make sure to test the vacuum and securely tighten all screws. With that, you’re good to go!
Make sure to test the vacuum and securely tighten all screws. With that, you’re good to go!
Cancelar: No complete esta guía.
Una persona más ha completado esta guía.
Equipo

UMass Dartmouth, Team S2-G23, Sinclaire Spring 2021 Miembro de UMass Dartmouth, Team S2-G23, Sinclaire Spring 2021
UMASSD-SINCLAIRE-S21S2G23
1 Miembro
1 Guía escrita