Saltar al contenido principal

Kindle Fire HDX 7" Motherboard Replacement

Qué necesitas

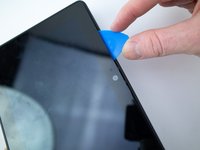
  1. Kindle Fire HDX 7" Motherboard Replacement, Speaker Bezel: paso 1, imagen 1 de 3 Kindle Fire HDX 7" Motherboard Replacement, Speaker Bezel: paso 1, imagen 2 de 3 Kindle Fire HDX 7" Motherboard Replacement, Speaker Bezel: paso 1, imagen 3 de 3
    • Insert an opening pick underneath the speaker bezel, and slide it along the perimeter to separate it from the tablet.

    • The adhesive is strong and may require an iOpener, or heat gun, to soften.

  2. Kindle Fire HDX 7" Motherboard Replacement: paso 2, imagen 1 de 1
    • Remove the speaker bezel.

  3. Kindle Fire HDX 7" Motherboard Replacement, Rear Panel: paso 3, imagen 1 de 1
    • Remove the six pink 3mm T3 Torx screws from the back case.

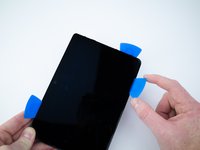
  4. Kindle Fire HDX 7" Motherboard Replacement: paso 4, imagen 1 de 2 Kindle Fire HDX 7" Motherboard Replacement: paso 4, imagen 2 de 2
    • Wedge opening picks around the perimeter between the display and back case.

    • Work the opening picks around the perimeter until the two halves disengage from each other.

    • Don't completely separate as the display ribbon cable still connects the two.

  5. Kindle Fire HDX 7" Motherboard Replacement: paso 5, imagen 1 de 1
    • Use the flat end of a spudger to pry up and disconnect the rear panel press-fit connector from the motherboard.

    • There may be a glue strip between the battery and the outside case. Gently pry the case open and use the flat end of a spudger to separate the glue strip.

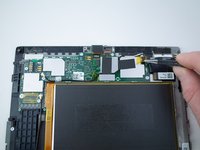
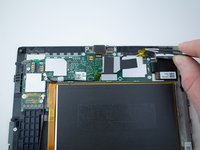
  6. Kindle Fire HDX 7" Motherboard Replacement, Motherboard: paso 7, imagen 1 de 2 Kindle Fire HDX 7" Motherboard Replacement, Motherboard: paso 7, imagen 2 de 2
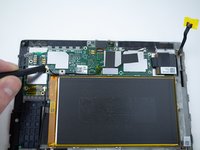
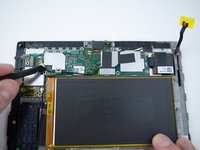
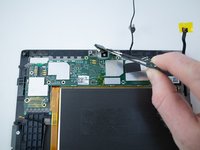
    • Grab the yellow tape with a pair of tweezers and pull upwards to disconnect the press-fit connector.

  7. Kindle Fire HDX 7" Motherboard Replacement: paso 8, imagen 1 de 1
    • Use the flat end of a spudger to disconnect the front camera press-fit connector from the motherboard.

  8. Kindle Fire HDX 7" Motherboard Replacement: paso 9, imagen 1 de 1
    • Remove the nine 3mm T6 Torx screws from the motherboard.

  9. Kindle Fire HDX 7" Motherboard Replacement: paso 10, imagen 1 de 3 Kindle Fire HDX 7" Motherboard Replacement: paso 10, imagen 2 de 3 Kindle Fire HDX 7" Motherboard Replacement: paso 10, imagen 3 de 3
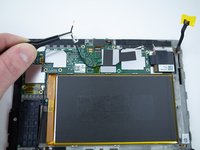
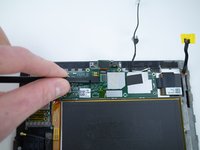
    • Use a spudger to pry up and disconnect the antenna cable from the motherboard.

    • Pull the antenna cable up and off of the motherboard.

    • Don't remove completely as it's soldered to the frame.

  10. Kindle Fire HDX 7" Motherboard Replacement: paso 11, imagen 1 de 1
    • Use a spudger to disconnect the second antenna cable from the motherboard.

  11. Kindle Fire HDX 7" Motherboard Replacement: paso 12, imagen 1 de 2 Kindle Fire HDX 7" Motherboard Replacement: paso 12, imagen 2 de 2
    • Use the flat end of a spudger to pry up and disconnect the front camera press-fit connector from the motherboard.

    • Remove the front camera.

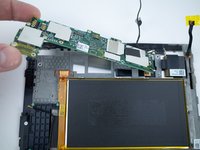
  12. Kindle Fire HDX 7" Motherboard Replacement: paso 13, imagen 1 de 2 Kindle Fire HDX 7" Motherboard Replacement: paso 13, imagen 2 de 2
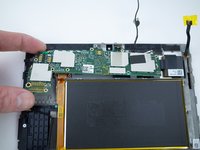
    • Remove the motherboard from the tablet.

Conclusión

To reassemble your device, follow these instructions in reverse order.

Una persona más ha completado esta guía.

Blake Klein

Miembro Desde 01/29/17

70,356 Reputación

50 Guías creadas

2 comentarios

This is a good tutorial but there is no mention of the bottom two connectors attached to the motherboard and some tips on reattaching these, i.e. the connector cables can be extended and then pulled back to normal to make reattachment possible

Harry Hofmeister - Contestar

Exactly! Followed this tutorial today, wanted to replace motherboard, and almost ripped off the lcd/touch connectors and flat cables because didn’t know they are there. It’s a bit difficult to put them back, be careful.

Neb Sek -

Agregar Comentario

Ver Estadísticas:

Ultimas 24 horas: 0

Ultimos 7 días: 2

Ultimos 30 días: 12

Todo El Tiempo: 1,197