Saltar al contenido principal

Kindle Fire Front Glass Panel Replacement

Qué necesitas

  1. Kindle Fire Front Glass Panel Replacement, Back Case: paso 1, imagen 1 de 3 Kindle Fire Front Glass Panel Replacement, Back Case: paso 1, imagen 2 de 3 Kindle Fire Front Glass Panel Replacement, Back Case: paso 1, imagen 3 de 3
    • Wedge a plastic opening tool into the lower right corner of the Kindle Fire.

    • Pry the case apart and run the plastic opening tool along the perimeter of the Kindle Fire to release the clips securing the case halves to each other.

    • If you are having extreme difficulty inserting the plastic opening tool, carefully use a metal spudger to undo the first clip, then switch back to the opening tool to avoid scratching your case.

    • It is helpful to pry the bottom of the Kindle Fire away (and out from the side) from the top part. Exerting too much force attempting to split the two without pulling away can cause the tabs on the inside to crack.

  2. Kindle Fire Front Glass Panel Replacement: paso 2, imagen 1 de 1
    • Once you have freed all the plastic clips, pull the back case off the Kindle Fire.

  3. Kindle Fire Front Glass Panel Replacement, Battery: paso 3, imagen 1 de 3 Kindle Fire Front Glass Panel Replacement, Battery: paso 3, imagen 2 de 3 Kindle Fire Front Glass Panel Replacement, Battery: paso 3, imagen 3 de 3
    • Fit the tip of the plastic opening tool between the right battery cell and the Kindle Fire's frame.

    • Lever the battery up and work the plastic opening tool down along its edge to release the glue securing it to the frame.

  4. Kindle Fire Front Glass Panel Replacement: paso 4, imagen 1 de 1
    • Repeat the process from the previous step to free the left battery cell.

  5. Kindle Fire Front Glass Panel Replacement: paso 5, imagen 1 de 2 Kindle Fire Front Glass Panel Replacement: paso 5, imagen 2 de 2
    • Lift the back of the battery up to relieve any tension in the battery connector and simultaneously use a spudger to push the battery connector out of its socket.

    • Pull the battery out of the Kindle Fire.

  6. Kindle Fire Front Glass Panel Replacement, Speaker Assembly: paso 6, imagen 1 de 3 Kindle Fire Front Glass Panel Replacement, Speaker Assembly: paso 6, imagen 2 de 3 Kindle Fire Front Glass Panel Replacement, Speaker Assembly: paso 6, imagen 3 de 3
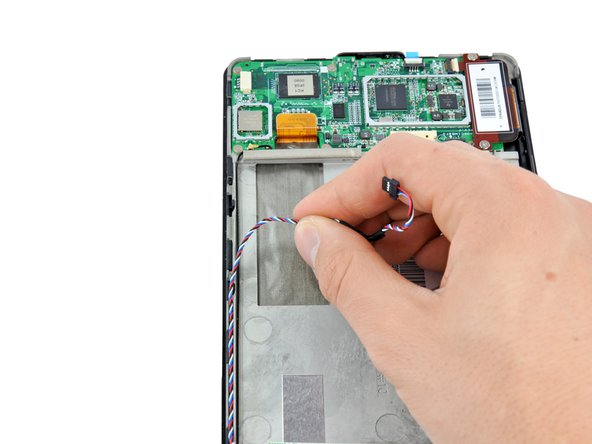
    • Peel the tape on the upper-left IC that is securing the speaker cable.

    • Use the flat end of a spudger to push the speaker connector out of its socket.

    • Deroute the speaker cable.

  7. Kindle Fire Front Glass Panel Replacement: paso 7, imagen 1 de 2 Kindle Fire Front Glass Panel Replacement: paso 7, imagen 2 de 2
    • Remove the two 3.3 mm Phillips #00 screws securing the speakers to the Kindle Fire.

    • Lift the speakers out of the Kindle Fire.

  8. Kindle Fire Front Glass Panel Replacement, Motherboard: paso 8, imagen 1 de 3 Kindle Fire Front Glass Panel Replacement, Motherboard: paso 8, imagen 2 de 3 Kindle Fire Front Glass Panel Replacement, Motherboard: paso 8, imagen 3 de 3
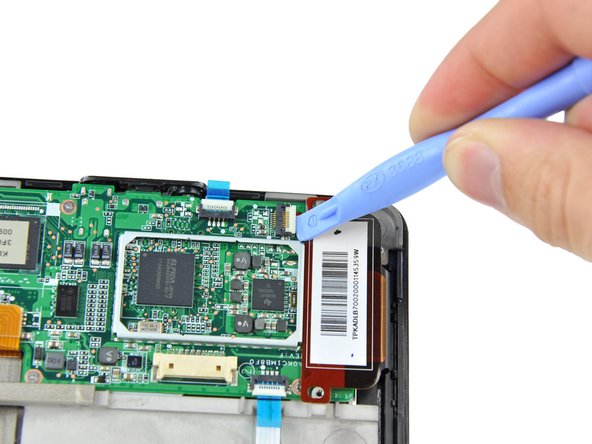
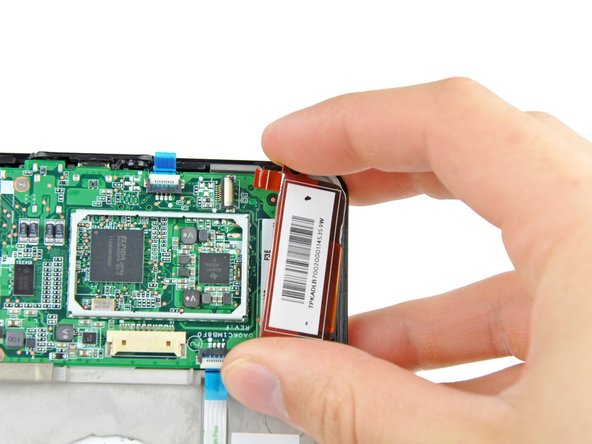
    • Remove the two 2.3 mm Phillips #00 screws from the touchscreen controller.

    • Use a plastic opening tool to release the touchscreen controller connector.

    • Gently remove the touchscreen controller by lifting it up and to the right.

    • Be careful not to rip the ribbon cable in doing so.

  9. Kindle Fire Front Glass Panel Replacement: paso 9, imagen 1 de 3 Kindle Fire Front Glass Panel Replacement: paso 9, imagen 2 de 3 Kindle Fire Front Glass Panel Replacement: paso 9, imagen 3 de 3
    • Use a plastic opening tool to flip open the power button ZIF connector.

    • This connector will not be removed until the motherboard is free.

    • Flip open the ambient light sensor ZIF socket with a plastic opening tool.

    • Use a pair of tweezers to pull the blue tab on the ambient light sensor cable to remove it from its socket.

  10. Kindle Fire Front Glass Panel Replacement: paso 10, imagen 1 de 3 Kindle Fire Front Glass Panel Replacement: paso 10, imagen 2 de 3 Kindle Fire Front Glass Panel Replacement: paso 10, imagen 3 de 3
    • Use a plastic opening tool to lift up and disconnect the display data cable.

    • Lift up on the antenna connector with a plastic opening tool to disconnect it.

    • De-route the antenna cable.

  11. Kindle Fire Front Glass Panel Replacement: paso 11, imagen 1 de 1
    • Remove the six 2.6 mm Phillips #00 screws securing the motherboard to the frame.

  12. Kindle Fire Front Glass Panel Replacement: paso 12, imagen 1 de 3 Kindle Fire Front Glass Panel Replacement: paso 12, imagen 2 de 3 Kindle Fire Front Glass Panel Replacement: paso 12, imagen 3 de 3
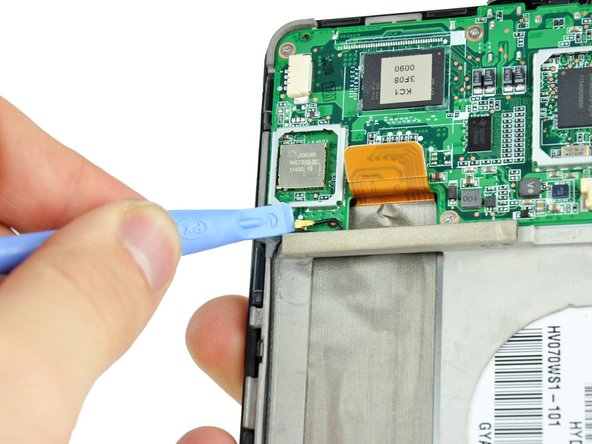
    • Use a plastic opening tool to gently lever up the bottom side of the motherboard to free from the adhesive on its underside.

    • Lever the top side of the motherboard up with a plastic opening tool until it comes free.

    • Lift the motherboard out of the Kindle Fire, making sure that the power button cable from step 8 comes free from its connector.

  13. Kindle Fire Front Glass Panel Replacement, Power Button Board: paso 13, imagen 1 de 2 Kindle Fire Front Glass Panel Replacement, Power Button Board: paso 13, imagen 2 de 2
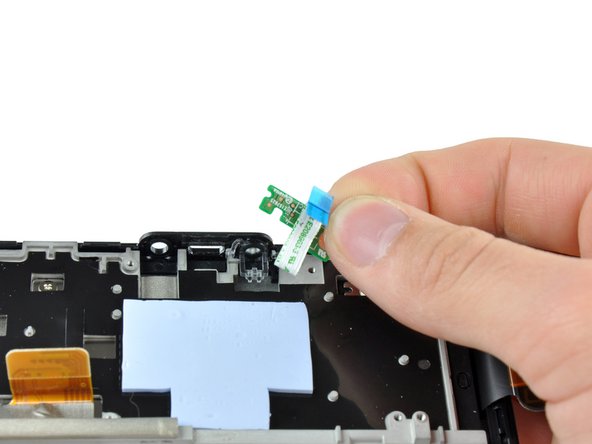
    • Remove the 2.5 mm Phillips #00 scew securing the power button board to the Kindle Fire.

    • Lift the power button board out of the Kindle Fire.

  14. Kindle Fire Front Glass Panel Replacement, Frame Loosening: paso 14, imagen 1 de 3 Kindle Fire Front Glass Panel Replacement, Frame Loosening: paso 14, imagen 2 de 3 Kindle Fire Front Glass Panel Replacement, Frame Loosening: paso 14, imagen 3 de 3
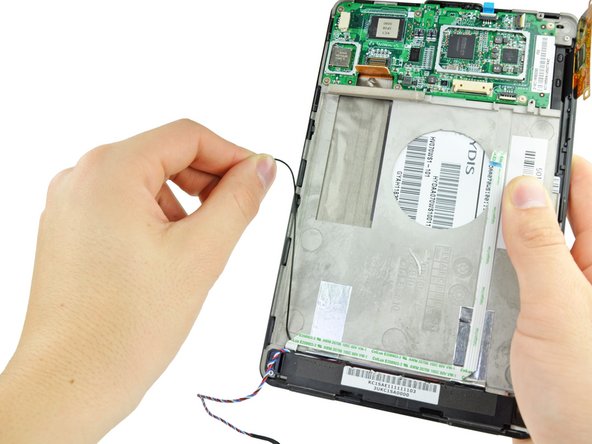
    • Use the flat end of a spudger to peel the ambient light sensor cable off of the frame.

    • You will need to peel up the silver tape in the cable's lower right bend. The silver tape under the lower left bend of the cable does not need to come up with it.

  15. Kindle Fire Front Glass Panel Replacement: paso 15, imagen 1 de 1
    • Use the flat end of a spudger to peel up the silver tape securing the antenna cable.

  16. Kindle Fire Front Glass Panel Replacement: paso 16, imagen 1 de 1
    • Remove the five 3.6 mm Phillips #00 screws securing the frame and ambient light sensor.

  17. Kindle Fire Front Glass Panel Replacement, Ambient Light Sensor: paso 17, imagen 1 de 1
    • Slide the ambient light sensor out from under the frame and remove it from the Kindle Fire.

    • If the ambient light sensor will not easily come out, slightly lift the frame with a plastic opening tool to allow it to come free.

  18. Kindle Fire Front Glass Panel Replacement, Frame: paso 18, imagen 1 de 3 Kindle Fire Front Glass Panel Replacement, Frame: paso 18, imagen 2 de 3 Kindle Fire Front Glass Panel Replacement, Frame: paso 18, imagen 3 de 3
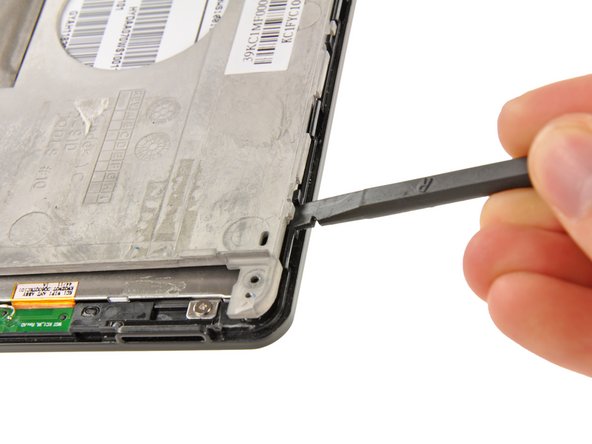
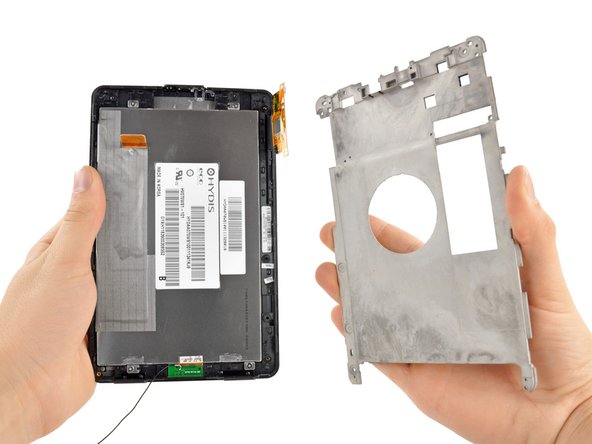
    • Use the flat end of a spudger to lever the frame away from the display assembly until you can grab it with your hand.

    • Lift near the retaining tabs marked by red rectangles in the first picture.

    • Remove the frame from the display assembly.

    • While removing the frame there may be sticky residue that will generate some resistance to the detachment of the top half of the frame.

  19. Kindle Fire Front Glass Panel Replacement, LCD: paso 19, imagen 1 de 3 Kindle Fire Front Glass Panel Replacement, LCD: paso 19, imagen 2 de 3 Kindle Fire Front Glass Panel Replacement, LCD: paso 19, imagen 3 de 3
    • Remove the four 2.4 mm Phillips #00 screws attaching the LCD to the front glass panel.

    • Rotate the top of the LCD 90 degrees away from the front glass panel as shown in the second picture.

    • Rotate the LCD and front glass panel slowly so you don't damage the antenna on the bottom of the LCD.

    • Separate the LCD and front glass panel.

Conclusión

To reassemble your device, follow these instructions in reverse order.

85 personas más completaron esta guía.

Phillip Takahashi

Miembro Desde 08/22/11

86,617 Reputación

87 Guías creadas

25 comentarios

How long does this take?

Dan Joyce - Contestar

How does that tell you how to fix the screen you are just putting the screen on so it sill cracked so how are you going to fix it now?

Morgan Gregory -

This took me about an hour from start to finish - taking my time to mark all the screws etc. but it may take longer if you don't have the correct tools. I agree that there should be a photo of separating the front glass digitizer from the front bezel as the true last step - it can be tricky, and the replacements I have seen don't include the front bezel. I used a razor/hobby knife to slowly peel and separate the digitizer working slowly and carefully from the inside bottom (around and behind the power button cutout) - some goo-gone or lighter fluid will be necessary to clean any old adhesive residue from the bezel as well. The front bezel has a rubberized gasket that should not be remover, so take care to see that you are not peeling that off. My last suggestion is to wear latex or nitrile gloves to prevent getting smudges on the LCD or digitizer during replacement; put them on for step 18, and until you have the frame back in place - care to keep dust out from in between during reassembly is a must!

revere521 - Contestar

I agree this was difficult, I used 3 different explanations/videos and this was the easiest to follow due to still frame. Thanks for sharing. It took longer than I expected but I did it

kasey - Contestar

How do I know which part I need?? Do I need the lcd screen and/or the digitizer?? What's the difference?? My kindle was dropped unfortunately and I am trying to find the part to replace it with. PLEASE HELP!! People are trying to charge me 100$ to replace the screen alone, excluding labor.

stefani - Contestar

Agregar Comentario

Ver Estadísticas:

Ultimas 24 horas: 2

Ultimos 7 días: 21

Ultimos 30 días: 103

Todo El Tiempo: 224,770