Saltar al contenido principal

Kids Digital Watch Battery Replacement

Qué necesitas

  1. Kids Digital Watch Battery Replacement, Remove Watch Bands: paso 1, imagen 1 de 2 Kids Digital Watch Battery Replacement, Remove Watch Bands: paso 1, imagen 2 de 2
    • Using a twisting and pulling motion, remove the straps from the watch.

  2. Kids Digital Watch Battery Replacement, Unscrew Backplate: paso 2, imagen 1 de 1
    • Remove the four (4) screws on the backside of the watch with the small Philips head screwdriver.

  3. Kids Digital Watch Battery Replacement, Remove Backplate: paso 3, imagen 1 de 1
    • Remove the backplate carefully using your hands.

  4. Kids Digital Watch Battery Replacement, Remove Circuit Protector Plate: paso 4, imagen 1 de 1
    Herramienta utilizada en este paso:
    Tweezers
    $4.99
    Comprar
    • Remove using tweezers the circuit protector plate that is uncovered once the backplate is removed.

  5. Kids Digital Watch Battery Replacement, Removing Screw Near the Blue Component: paso 5, imagen 1 de 2 Kids Digital Watch Battery Replacement, Removing Screw Near the Blue Component: paso 5, imagen 2 de 2
    • With the tiny Philips head screwdriver, unscrew and remove the screw closest to the blue component.

  6. Kids Digital Watch Battery Replacement, Removing Screw Near the Yellow Component: paso 6, imagen 1 de 1
    • Now remove the screw on the other side of the battery near the yellow circuit component.

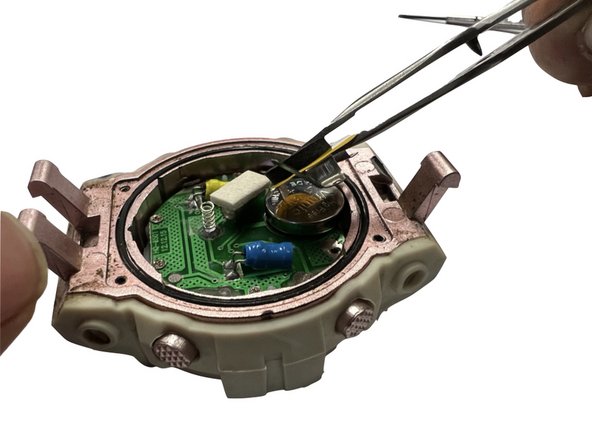
  7. Kids Digital Watch Battery Replacement, Remove the Battery Protector Plate: paso 7, imagen 1 de 2 Kids Digital Watch Battery Replacement, Remove the Battery Protector Plate: paso 7, imagen 2 de 2
    • Using tweezers carefully remove the battery protector plate.

  8. Kids Digital Watch Battery Replacement, Remove Battery: paso 8, imagen 1 de 1
    • Remove the old battery from your watch.

  9. Kids Digital Watch Battery Replacement, Insert New Battery: paso 9, imagen 1 de 1
    • Insert your new battery onto the circular component with your tweezers.

    • Ensure the positive and negative sides of your battery are oriented correctly.

Conclusión

To reassemble your device, follow these instructions in reverse order.

Una persona más ha completado esta guía.

Amelia S

Miembro Desde 03/14/23

194 Reputación

1 Guía escrita

Equipo

ENGR_COMM_FIXERS Miembro de ENGR_COMM_FIXERS

Community

3 Miembros

1 Guía escrita

0 comentarios

Agregar Comentario

Ver Estadísticas:

Ultimas 24 horas: 1

Ultimos 7 días: 8

Ultimos 30 días: 66

Todo El Tiempo: 710