Saltar al contenido principal

Keyboard replacement on a why! W253EU

Qué necesitas

  1. Keyboard replacement on a why! W253EU, Battery from why! Remove W253EU: paso 1, imagen 1 de 3 Keyboard replacement on a why! W253EU, Battery from why! Remove W253EU: paso 1, imagen 2 de 3 Keyboard replacement on a why! W253EU, Battery from why! Remove W253EU: paso 1, imagen 3 de 3
    • Turn off the computer.

    • Before each operation it is important to start with the removal of the accumulator.

    • Take the slide unlocked into position, remove the battery.

  2. Keyboard replacement on a why! W253EU, Keyboard: paso 2, imagen 1 de 3 Keyboard replacement on a why! W253EU, Keyboard: paso 2, imagen 2 de 3 Keyboard replacement on a why! W253EU, Keyboard: paso 2, imagen 3 de 3
    • Use a Phillips # 1 screwdriver to remove the two screws located in the slot of the accumulator.

    • Insert a standard screwdriver into the slot in the cover above the keyboard.

    • Lift the cover with the usual care.

  3. Keyboard replacement on a why! W253EU: paso 3, imagen 1 de 3 Keyboard replacement on a why! W253EU: paso 3, imagen 2 de 3 Keyboard replacement on a why! W253EU: paso 3, imagen 3 de 3
    • Use a Phillips # 1 screwdriver to remove the four screws securing the keyboard in the upper part.

  4. Keyboard replacement on a why! W253EU: paso 4, imagen 1 de 2 Keyboard replacement on a why! W253EU: paso 4, imagen 2 de 2
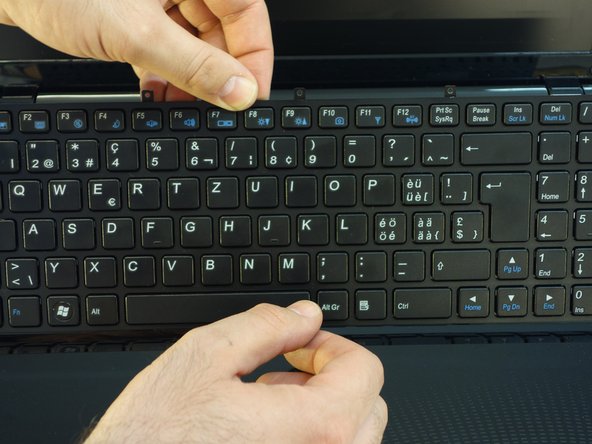
    • Turn the keyboard towards the screen.

    • Carefully remove the connection cable in the direction of the plug axis.

Conclusión

For reassembly, follow the instructions in reverse order.

Un agradecimiento especial a estos traductores:

de en

100%

Estos traductores nos están ayudando a reparar el mundo! ¿Quieres contribuir?
Empezar a traducir ›

Felice Suglia

Miembro Desde 06/15/13

30,884 Reputación

263 Guías creadas

0 comentarios

Agregar Comentario

Ver Estadísticas:

Ultimas 24 horas: 0

Ultimos 7 días: 2

Ultimos 30 días: 2

Todo El Tiempo: 450