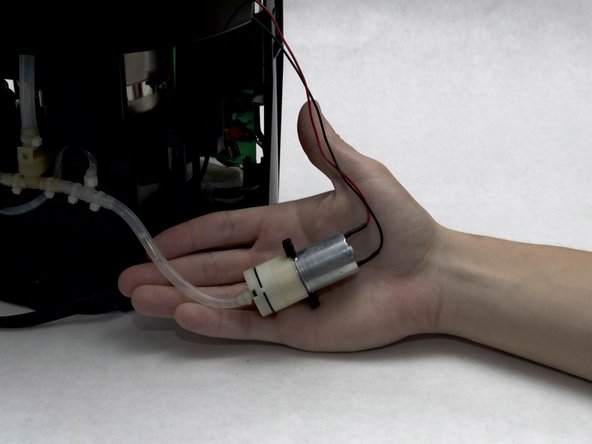
Saltar al contenido principal

Keurig 2.0-400 Mini Pump Replacement

Qué necesitas

  1. Keurig 2.0-400 Mini Pump Replacement, Water Reservoir: paso 1, imagen 1 de 1
    • Locate and grab the Water Reservoir with your hands.

  2. Keurig 2.0-400 Mini Pump Replacement: paso 2, imagen 1 de 3 Keurig 2.0-400 Mini Pump Replacement: paso 2, imagen 2 de 3 Keurig 2.0-400 Mini Pump Replacement: paso 2, imagen 3 de 3
    • Lift the Water Reservoir up. It should be easy to separate it from the main part of the brewer.

  3. Keurig 2.0-400 Mini Pump Replacement, Circuit Board: paso 3, imagen 1 de 2 Keurig 2.0-400 Mini Pump Replacement, Circuit Board: paso 3, imagen 2 de 2
    • Remove the Drip Tray by pulling it out of the device.

    • This Drip Tray is the detachable bottom part of the Keurig machine where you place a cup or mug.

  4. Keurig 2.0-400 Mini Pump Replacement: paso 4, imagen 1 de 1
    • Using the Phillips #1 screwdriver, remove the six 140mm screws from the bottom of the Keurig machine.

    • If it is hard to unscrew using only the Phillips #1 screw head, insert the 60mm Shaft Extension into the back end of the screwdriver to help you.

  5. Keurig 2.0-400 Mini Pump Replacement: paso 5, imagen 1 de 3 Keurig 2.0-400 Mini Pump Replacement: paso 5, imagen 2 de 3 Keurig 2.0-400 Mini Pump Replacement: paso 5, imagen 3 de 3
    • Use the metal spudger to separate the silver panel on the right side of the Keurig machine.

    • Tilt the brewer upside down and grab the bottom of the silver panel

    • Using your hands, peel off the silver panel from the Keurig machine.

  6. Keurig 2.0-400 Mini Pump Replacement: paso 6, imagen 1 de 2 Keurig 2.0-400 Mini Pump Replacement: paso 6, imagen 2 de 2
    • With one hand, place one finger inside the frame where the silver panel was attached and hold the base.

    • With the other hand, pull down to pop out the front housing of the Keurig machine.

    • You should now be able to see the components inside the Keurig machine.

  7. Keurig 2.0-400 Mini Pump Replacement: paso 7, imagen 1 de 2 Keurig 2.0-400 Mini Pump Replacement: paso 7, imagen 2 de 2
    • Using your hands, pry the back exterior of the brewer from the right side of the Keurig.

    • Use the blue opening tool to separate the top right silver panel from the back exterior.

  8. Keurig 2.0-400 Mini Pump Replacement: paso 8, imagen 1 de 2 Keurig 2.0-400 Mini Pump Replacement: paso 8, imagen 2 de 2
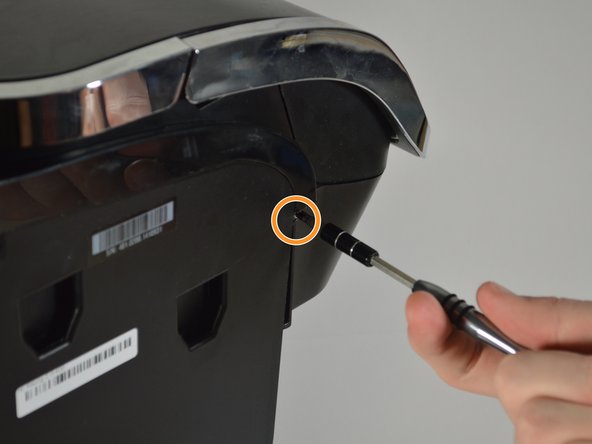
    • Use the Phillips #1 screwdriver to remove the 120mm screw located on the top left corner from the side of the brewer where the water reservoir was.

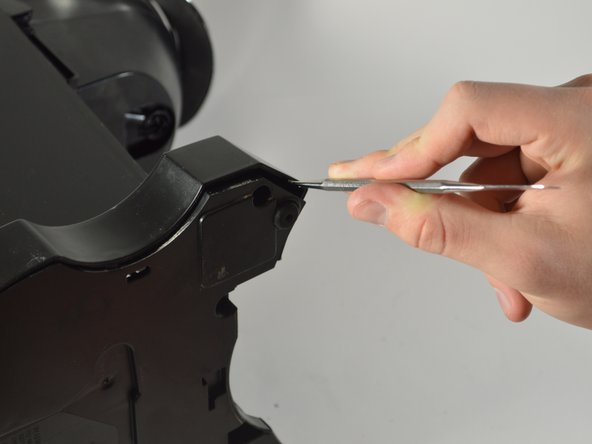
    • Use the Phillips #1 screwdriver to remove another 120mm screw located under the end of the empty slot running across the left side of the Keurig.

  9. Keurig 2.0-400 Mini Pump Replacement: paso 9, imagen 1 de 2 Keurig 2.0-400 Mini Pump Replacement: paso 9, imagen 2 de 2
    • Separate the side panel from the top frame of the brewer, using the blue opening tool for help if necessary.

  10. Keurig 2.0-400 Mini Pump Replacement: paso 10, imagen 1 de 2 Keurig 2.0-400 Mini Pump Replacement: paso 10, imagen 2 de 2
    • Place the brewer on its side as shown in the picture

    • Using the metal spudger, pry away the housing surrounding the sides of the Keurig machine from the bottom.

    • Work your way around the perimeter of the base.

  11. Keurig 2.0-400 Mini Pump Replacement: paso 11, imagen 1 de 2 Keurig 2.0-400 Mini Pump Replacement: paso 11, imagen 2 de 2
    • Remove the entire back exterior surrounding the Keurig by removing the latches connecting the back exterior to the silver frame on top. To do this, use the metal spudger to lift the latches up and out.

    • The inside of the Keurig should now be exposed.

  12. Keurig 2.0-400 Mini Pump Replacement: paso 12, imagen 1 de 3 Keurig 2.0-400 Mini Pump Replacement: paso 12, imagen 2 de 3 Keurig 2.0-400 Mini Pump Replacement: paso 12, imagen 3 de 3
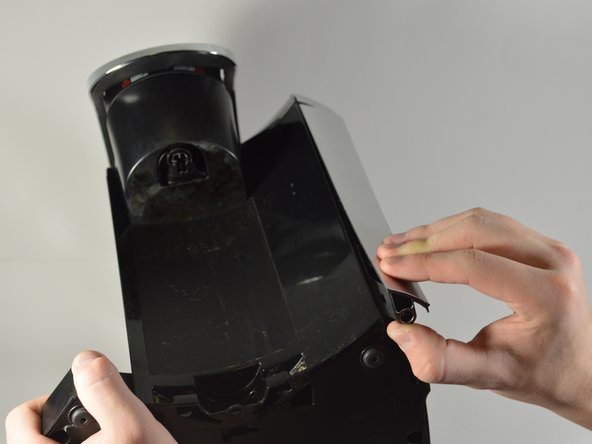
    • Reorient the brewer as shown in the picture.

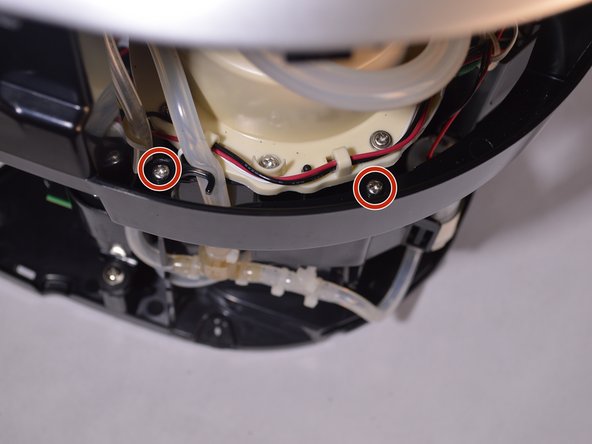
    • Locate the four 140mm screws holding the top frame of the Keurig in place. Remove these screws using the Phillips #1 screwdriver.

    • Two of the screws are on the inside of the frame close to the water heater.

    • You may need to decrease the size of the screwdriver in order for it to fit inside the frame. Do this by taking out the bit extender.

    • The other two screws are located on the outside of the frame.

  13. Keurig 2.0-400 Mini Pump Replacement: paso 13, imagen 1 de 1
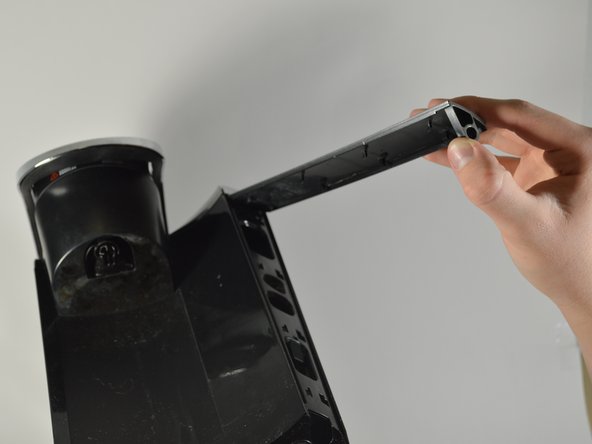
    • Remove the top of the framing that encases the circuit board.

    • Remove the wires that are connected to the top of the circuit board.

    • Pull out the multicolored wires by their bases.

    • The bundle with black wires and one red wire is connected to the very top of the circuit board. To remove these wires, squeeze in the white tabs as you pull them out.

  14. Keurig 2.0-400 Mini Pump Replacement: paso 14, imagen 1 de 1
    • Using the metal spudger, snap the circuit board out of the latches on the bottom of the board.

  15. Keurig 2.0-400 Mini Pump Replacement: paso 15, imagen 1 de 2 Keurig 2.0-400 Mini Pump Replacement: paso 15, imagen 2 de 2
    • Unplug the rest of the wires connecting to the circuit board by pulling them out by their bases.

    • In order to free the circuit board completely, you have to desolder the connections that restrain it. Use our How to Solder and Desolder Connections Guide to properly and safely conduct this procedure.

    • Remove the circuit board from the device.

  16. Keurig 2.0-400 Mini Pump Replacement, Mini Pump: paso 16, imagen 1 de 2 Keurig 2.0-400 Mini Pump Replacement, Mini Pump: paso 16, imagen 2 de 2
    • Pry it out from the frame by using the metal spudger.

  17. Keurig 2.0-400 Mini Pump Replacement: paso 17, imagen 1 de 1
    • Lift the Mini Pump up and out of the frame using your hands.

  18. Keurig 2.0-400 Mini Pump Replacement: paso 18, imagen 1 de 2 Keurig 2.0-400 Mini Pump Replacement: paso 18, imagen 2 de 2
    • Remove the wires connecting the Mini Pump to the Keurig, including the air tube.

    • The Mini Pump is should now be free from the brewer.

Conclusión

To reassemble your device, follow these instructions in reverse order.

7 personas más completaron esta guía.

Alec Jamosmos

Miembro Desde 04/22/18

936 Reputación

5 Guías creadas

Equipo

Cal Poly, Team S24-G8, Maness Spring 2018 Miembro de Cal Poly, Team S24-G8, Maness Spring 2018

CPSU-MANESS-S18S24G8

4 Miembros

5 Guías creadas

5 comentarios

Why remove the circuit board?

Mel Jenkins - Contestar

Exactly my question ;)

John Armstrong - Contestar

Link to a new pump please

Spencer Long - Contestar

I agree. Why take out the circuit board. On the older Keurig models it was necessary to obtain access to the minipump, but for the 2.0 once the casing is completely removed access to the minipump is simple. However, if due to the failure of the minipump the pressure sensor ended up getting wet, then there might be a reason: to replace the sensor. There are videos claiming that 0V (0mV in this case) is the right output for the sensor. Not so, the correct output should be around 40mV when the pressure is zero. To test this, attach a voltmeter across pins 1 (-) & 3 (+) on the circuit board (pin 1 is above where the tube goes into the circuit board on the upper left side, 3 is upper right side, pins 4, 5, 6 on the bottom. Spec sheet for that device (FPN-07PG) is at https://www.fujikura.co.jp/eng/resource/.... With the tube disconnected, it will read ~.040 V. If it doesn't, try adding or subtracting pressure using a syringe--the voltage output should change.

JustJackAtlanta - Contestar

Agregar Comentario

Ver Estadísticas:

Ultimas 24 horas: 1

Ultimos 7 días: 22

Ultimos 30 días: 99

Todo El Tiempo: 11,267