Esta versión puede contener ediciones incorrectas. Cambie a la última instantánea verificada.
Qué necesitas
-
Este paso está sin traducir. Ayuda a traducirlo
-
Take off the plexiglass top.
-
Remove the white milk spinner from the inside of the foamer.
-
-
Este paso está sin traducir. Ayuda a traducirlo
-
Remove the 12mm Torx screws (x3) from the bottom of the foamer using a Torx TR10 screwdriver.
-
-
Este paso está sin traducir. Ayuda a traducirlo
-
Take out the grey and white power cables by pulling out the slide connectors from the base.
-
-
Este paso está sin traducir. Ayuda a traducirlo
-
Remove the 16mm Torx screw in the middle of the base using a Torx TR20 screwdriver.
-
Take off the black bottom from the main body.
-
-
-
Este paso está sin traducir. Ayuda a traducirlo
-
Grab the power connector in the centre of the black bottom with a monkey wrench.
-
Twist the connector clockwise to remove the center power socket.
-
-
Este paso está sin traducir. Ayuda a traducirlo
-
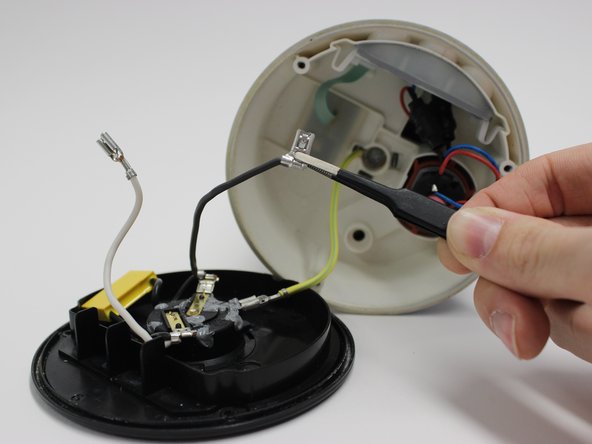
Remove the electromotor-plug using tweezers.
-
Make sure to squeeze the small tab on the side of the plug to release it easily.
-
-
Este paso está sin traducir. Ayuda a traducirlo
-
Remove the rubber housing from the electromotor.
-
Remove the small rubber cap from the other end of the electromotor.
-
-
Este paso está sin traducir. Ayuda a traducirlo
-
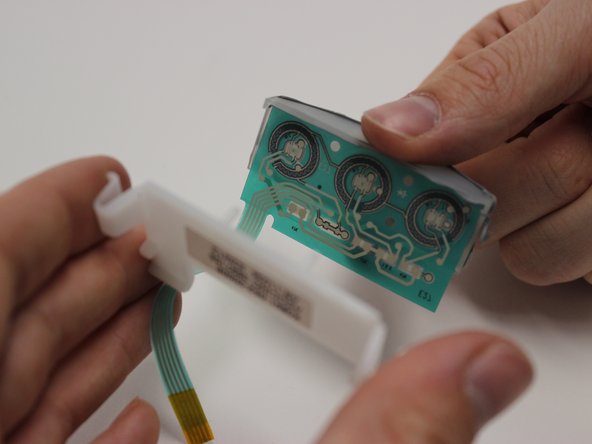
Press on the two white clips to release the button case.
-
-
Este paso está sin traducir. Ayuda a traducirlo
-
Pull out the green ribbon cable through the rubber cover.
-
-
Este paso está sin traducir. Ayuda a traducirlo
-
Pull off the rubber button caps from the button case.
-
-
Este paso está sin traducir. Ayuda a traducirlo
-
Using tweezers, pull off the rubber cover from the base.
-
-
Este paso está sin traducir. Ayuda a traducirlo
-
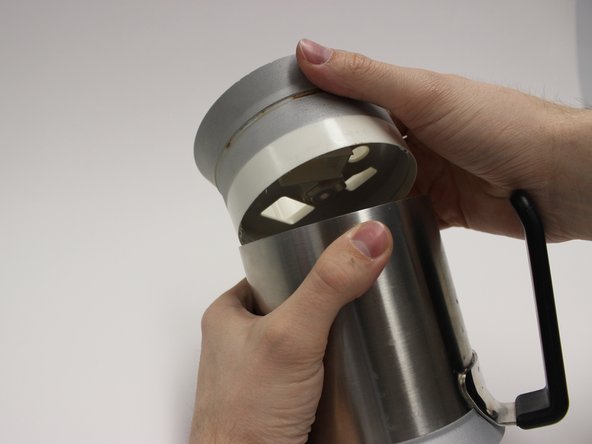
Using your thumbs, push off the bottom plastic cover from the body.
-


Cancelar: No complete esta guía.
Una persona más ha completado esta guía.
Equipo

Delft University of Technology, Team S1-G1, Flipsen Winter 2018 Miembro de Delft University of Technology, Team S1-G1, Flipsen Winter 2018
TUD-FLIPSEN-W18S1G1
4 Miembros
1 Guía escrita