Saltar al contenido principal

K-Gro PowerPro Lawnmower Drive Cable Replacement Guide

Qué necesitas

  1. K-Gro PowerPro Lawnmower Drive Cable Replacement Guide, Drive Engagement Cable: paso 1, imagen 1 de 2 K-Gro PowerPro Lawnmower Drive Cable Replacement Guide, Drive Engagement Cable: paso 1, imagen 2 de 2
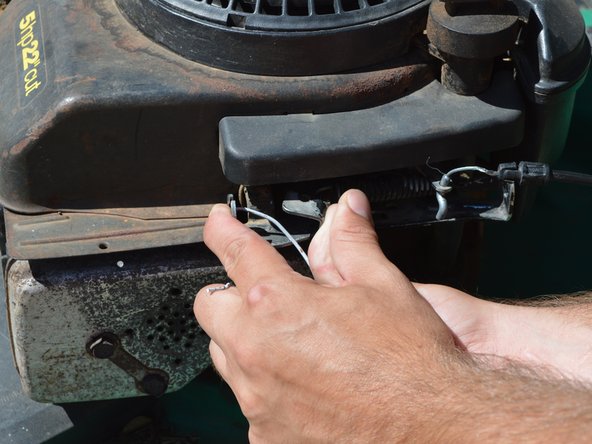
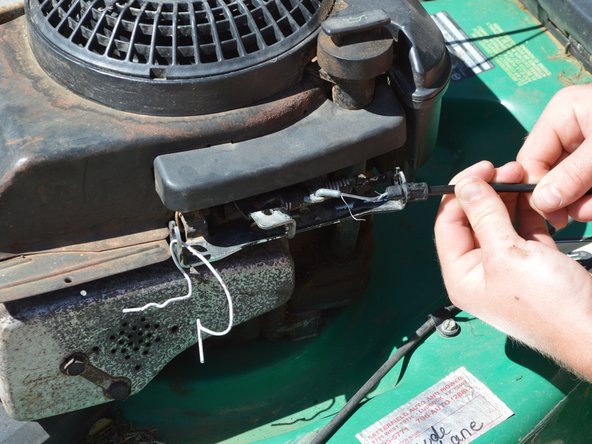
    • Locate the throttle assembly on your mower on the right side of the push bar.

  2. K-Gro PowerPro Lawnmower Drive Cable Replacement Guide: paso 2, imagen 1 de 3 K-Gro PowerPro Lawnmower Drive Cable Replacement Guide: paso 2, imagen 2 de 3 K-Gro PowerPro Lawnmower Drive Cable Replacement Guide: paso 2, imagen 3 de 3
    • The throttle assembly is attached to the push bar with a 7/16" bolt and nut.

    • Using a 3/8" drive rachet wrench with a 7/16" socket and a 7/16" combination wrench, remove the nut.

    • Pull the plastic cable connection away from the framework.

  3. K-Gro PowerPro Lawnmower Drive Cable Replacement Guide: paso 3, imagen 1 de 2 K-Gro PowerPro Lawnmower Drive Cable Replacement Guide: paso 3, imagen 2 de 2
    • After disconnecting the plastic connector plate from the main body, you can see that the cable is hooked and looped around the orange handle.

    • Pull the cable towards the handle to allow the wire to become loose. This will give you enough room to remove the hook.

  4. K-Gro PowerPro Lawnmower Drive Cable Replacement Guide: paso 4, imagen 1 de 3 K-Gro PowerPro Lawnmower Drive Cable Replacement Guide: paso 4, imagen 2 de 3 K-Gro PowerPro Lawnmower Drive Cable Replacement Guide: paso 4, imagen 3 de 3
    • Following the cable down to the engine, you see that a zip tie holds the cable to the main handle.

    • Use a box cutter, sharp pocket knife, or cutting pliers to cut the zip tie.

    • Use gloves to prevent cutting yourself.

  5. K-Gro PowerPro Lawnmower Drive Cable Replacement Guide: paso 5, imagen 1 de 2 K-Gro PowerPro Lawnmower Drive Cable Replacement Guide: paso 5, imagen 2 de 2
    • Locate the plastic fitting hooked to the steel housing of the engine.

    • To the left of the fitting, you will see a steel sliding mechanism connected by a spring.

    • Squeeze the mechanism together to allow for slack in the cable wire.

    • You might need to use pliers or clamps in order to squeeze the plates together.

  6. K-Gro PowerPro Lawnmower Drive Cable Replacement Guide: paso 6, imagen 1 de 3 K-Gro PowerPro Lawnmower Drive Cable Replacement Guide: paso 6, imagen 2 de 3 K-Gro PowerPro Lawnmower Drive Cable Replacement Guide: paso 6, imagen 3 de 3
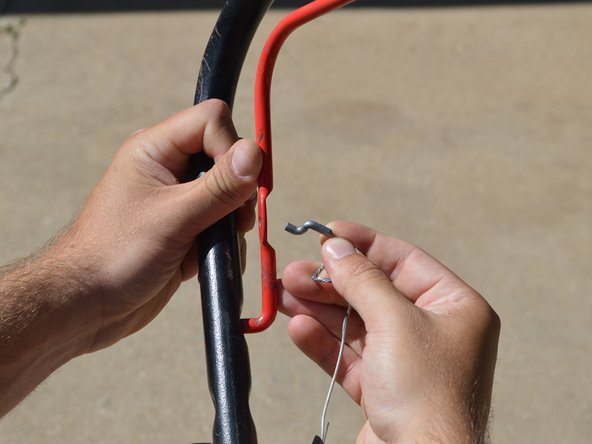
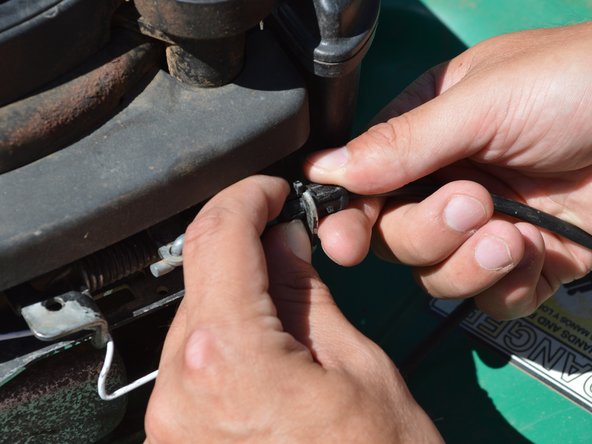
    • On close inspection of the plastic fitting, you can see that there are two "wings" that can be pinched together.

    • With the sliding mechanism squeezed and the wire slack, pinch the plastic wings together and push the fitting to the right out of the hole in the housing.

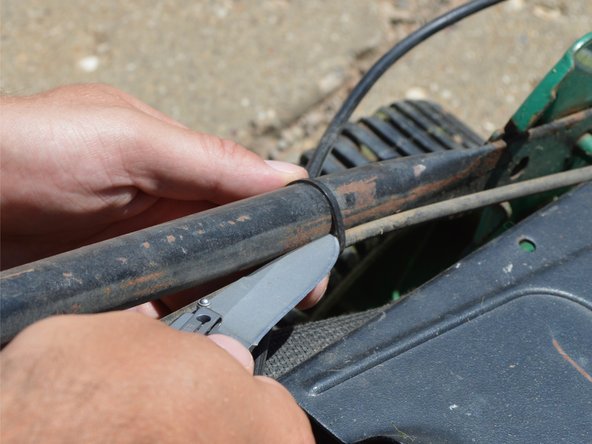
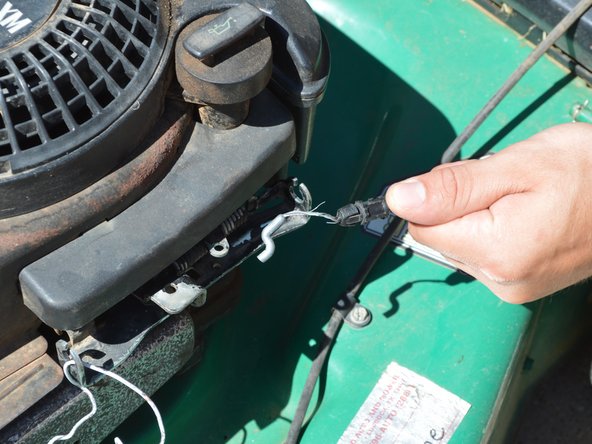
    • The loose wire can then be slid up through the groove in the steel.

  7. K-Gro PowerPro Lawnmower Drive Cable Replacement Guide: paso 7, imagen 1 de 2 K-Gro PowerPro Lawnmower Drive Cable Replacement Guide: paso 7, imagen 2 de 2
    • You can see that the only thing still holding the cable on is a hook attached to a spring loaded lever.

    • Remove the hook.

Conclusión

To reassemble your device, follow these instructions in reverse order.

Una persona más ha completado esta guía.

Julio Acosta

Miembro Desde 06/09/16

125 Reputación

1 Guía escrita

Equipo

Texas Tech, Team 3-6, Rauch SU 2016 Miembro de Texas Tech, Team 3-6, Rauch SU 2016

TTU-RAUCH-SU16S3G6

3 Miembros

1 Guía escrita

0 comentarios

Agregar Comentario

Ver Estadísticas:

Ultimas 24 horas: 2

Ultimos 7 días: 6

Ultimos 30 días: 24

Todo El Tiempo: 1,737