Saltar al contenido principal

Jazz Digi-Stix JDC11 Capture Button Replacement

Qué necesitas

  1. Jazz Digi-Stix JDC11 Capture Button Replacement, Battery: paso 1, imagen 1 de 2 Jazz Digi-Stix JDC11 Capture Button Replacement, Battery: paso 1, imagen 2 de 2
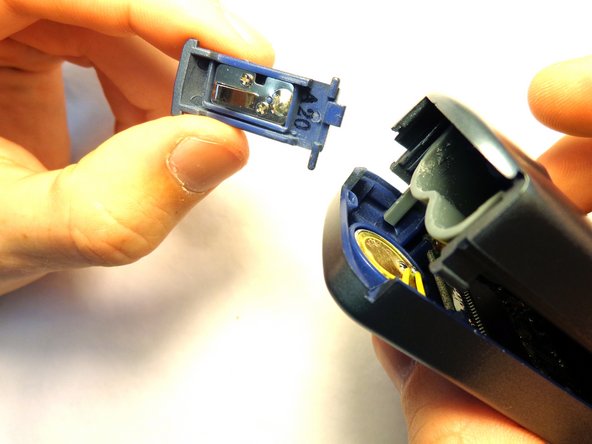
    • Flip the device so that the bottom is facing upwards. Using thumb, push the tab on the bottom in the direction indicated by the arrow and then lift the unhinged part of the tab.

  2. Jazz Digi-Stix JDC11 Capture Button Replacement: paso 2, imagen 1 de 1
    • Tilt device so that batteries slide out.

  3. Jazz Digi-Stix JDC11 Capture Button Replacement, Capture Button: paso 3, imagen 1 de 3 Jazz Digi-Stix JDC11 Capture Button Replacement, Capture Button: paso 3, imagen 2 de 3 Jazz Digi-Stix JDC11 Capture Button Replacement, Capture Button: paso 3, imagen 3 de 3
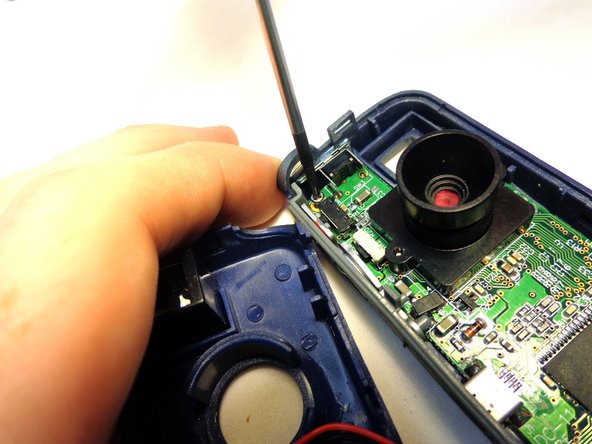
    • Carefully insert the flat end of the spudger into the seam on the top side of the device. Carefully twist the spudger to open the device. Repeat this step at incremental locations around the seam of the device until the two case halves separate.

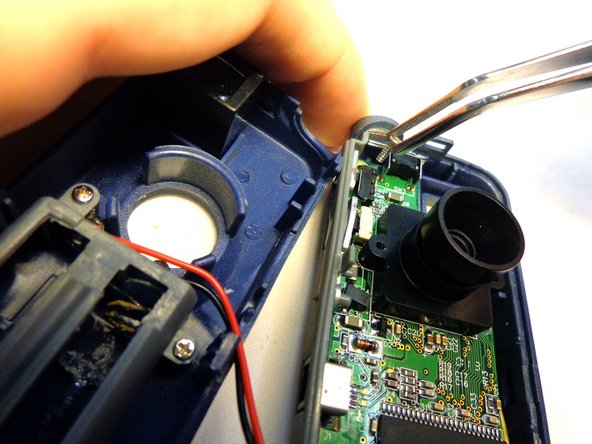
    • Before completely separating the two halves, separate the case from the battery compartment cover, pulling the case apart. Take care not to break the plastic hinge as the battery compartment cover is removed.

  4. Jazz Digi-Stix JDC11 Capture Button Replacement: paso 4, imagen 1 de 3 Jazz Digi-Stix JDC11 Capture Button Replacement: paso 4, imagen 2 de 3 Jazz Digi-Stix JDC11 Capture Button Replacement: paso 4, imagen 3 de 3
    • There are two wires (one red and one black) that could get disconnected from the motherboard when prying the case apart.

    • Gently seperate the two halves of the device.

    • To remove the circuit board from the right section of the device, unscrew the two 5.6 mm Phillips #00 screws.

    • When the screws have been fully unscrewed, use the tweezers to remove them from the device.

  5. Jazz Digi-Stix JDC11 Capture Button Replacement: paso 5, imagen 1 de 1
    • Carefully separate the grey side bar from the case and set it aside.

  6. Jazz Digi-Stix JDC11 Capture Button Replacement: paso 6, imagen 1 de 1
    • Use the tweezers to grasp the bottom of the capture button. Pull the capture button away from the case and set it aside.

Conclusión

To reassemble your device, follow these instructions in reverse order.

Katelyn Fry

Miembro Desde 03/11/13

1 Reputación

7 Guías creadas

Equipo

Clemson, Team 12-3, Benson Spring 2013 Miembro de Clemson, Team 12-3, Benson Spring 2013

CLEM-BENSON-S13S12G3

3 Miembros

7 Guías creadas

0 comentarios

Agregar Comentario

Ver Estadísticas:

Ultimas 24 horas: 0

Ultimos 7 días: 0

Ultimos 30 días: 0

Todo El Tiempo: 191