Saltar al contenido principal

Jam Voice Speaker Replacement

Qué necesitas

  1. Jam Voice Speaker Replacement, Hard Mesh Cover: paso 1, imagen 1 de 2 Jam Voice Speaker Replacement, Hard Mesh Cover: paso 1, imagen 2 de 2
    • Insert the plastic opening tool underneath the mesh top.

    • Pry the cover open.

    • To reattach the cover, simply align the round posts on the bottom of the cover into the holes.

  2. Jam Voice Speaker Replacement, Motherboard: paso 2, imagen 1 de 1
    • Remove the four 7mm Phillips screws from the plastic cover.

  3. Jam Voice Speaker Replacement: paso 3, imagen 1 de 2 Jam Voice Speaker Replacement: paso 3, imagen 2 de 2
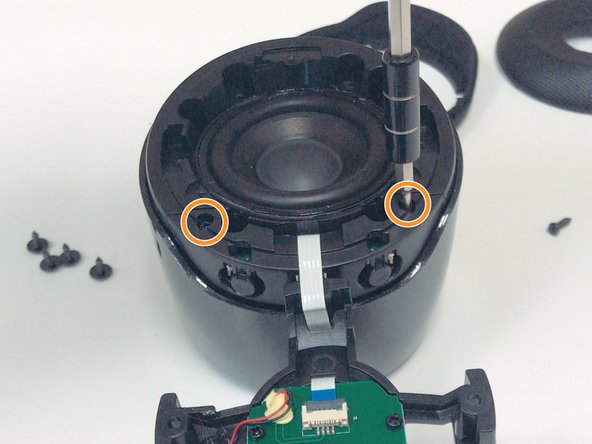
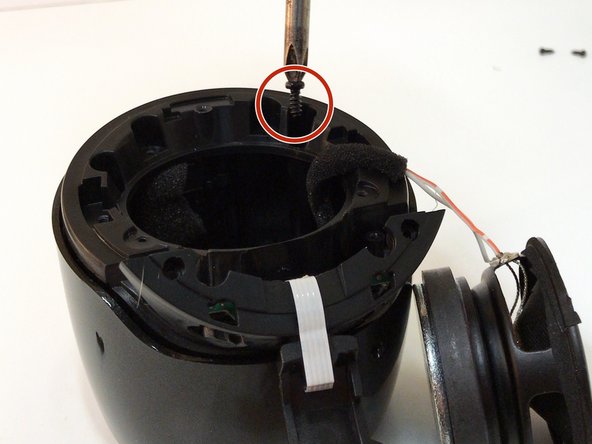
    • Remove the four 5mm Phillips screws that hold down the speaker in place.

    • Remove the two 6mm Phillips screws that hold down the plastic casing.

  4. Jam Voice Speaker Replacement: paso 4, imagen 1 de 1
    • Once all six screws are removed, use a Halberd Spudger or similar tool to lift up the speaker.

    • Pull the speaker up and out.

  5. Jam Voice Speaker Replacement: paso 5, imagen 1 de 3 Jam Voice Speaker Replacement: paso 5, imagen 2 de 3 Jam Voice Speaker Replacement: paso 5, imagen 3 de 3
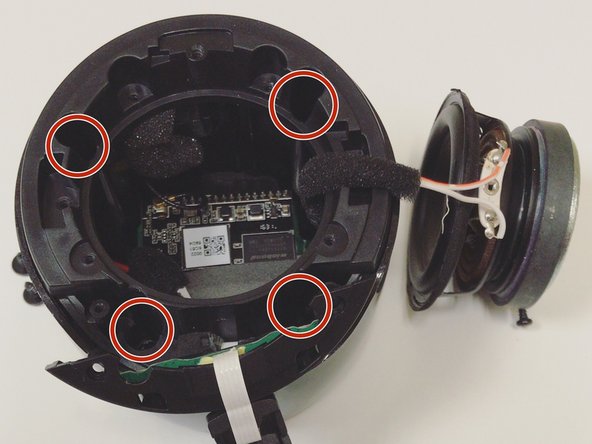
    • Remove the four 7mm Phillips screws to expose the motherboard.

  6. Jam Voice Speaker Replacement: paso 6, imagen 1 de 1
    • After removing all of the screws from the plastic cover, remove it by pulling up and out.

    • Be careful not to pull and damage any of the wires.

  7. Jam Voice Speaker Replacement: paso 7, imagen 1 de 2 Jam Voice Speaker Replacement: paso 7, imagen 2 de 2
    • Remove the three 5mm Phillips screws that hold the motherboard in place.

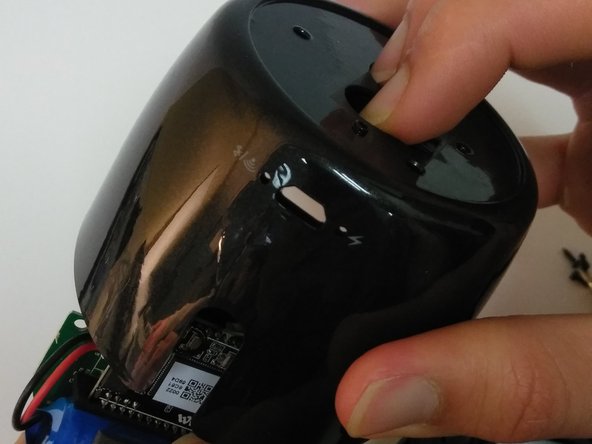
    • After the screws are removed, place two fingers on the power button and Bluetooth button to push the motherboard out.

  8. Jam Voice Speaker Replacement, Speaker: paso 8, imagen 1 de 1
    • Use tweezers to pull out the speaker's wire from the motherboard.

    • Use tweezers to pull out the battery's wire from the motherboard.

    • The speaker's connection point is opposite the battery's connection point.

Conclusión

To reassemble your device, follow these instructions in reverse order.

Una persona más ha completado esta guía.

Alexander Buck

Miembro Desde 04/05/18

358 Reputación

2 Guías creadas

0 comentarios

Agregar Comentario

Ver Estadísticas:

Ultimas 24 horas: 1

Ultimos 7 días: 4

Ultimos 30 días: 6

Todo El Tiempo: 425