Saltar al contenido principal

JVC Adixxion GC-XA1BU Battery Cover Replacement

Qué necesitas

  1. JVC Adixxion GC-XA1BU Battery Cover Replacement, Battery: paso 1, imagen 1 de 1
    • Find the side of the camera that looks like this.

  2. JVC Adixxion GC-XA1BU Battery Cover Replacement: paso 2, imagen 1 de 1
    • Push down on the black switch.

  3. JVC Adixxion GC-XA1BU Battery Cover Replacement: paso 3, imagen 1 de 1
    • While still pushing down on the black switch, slide back the battery cover (see photo for direction).

  4. JVC Adixxion GC-XA1BU Battery Cover Replacement: paso 4, imagen 1 de 2 JVC Adixxion GC-XA1BU Battery Cover Replacement: paso 4, imagen 2 de 2
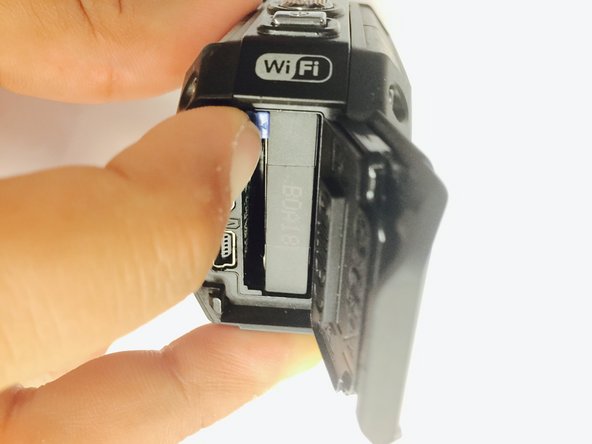
    • Push the cover up to open the battery compartment, and then push the blue battery release switch.

  5. JVC Adixxion GC-XA1BU Battery Cover Replacement: paso 5, imagen 1 de 1
    • You can now take the battery out of the camera.

  6. JVC Adixxion GC-XA1BU Battery Cover Replacement, Battery Cover: paso 6, imagen 1 de 1
    • After removing the battery, take out the two Phillips screws (4mm headsize x 3mm length) screws. You can now remove the battery cover.

Conclusión

To reassemble your device, follow these instructions in reverse order.

Una persona más ha completado esta guía.

Equipo

USF Tampa, Team 1-2, Tanski Winter 2015 Miembro de USF Tampa, Team 1-2, Tanski Winter 2015

USFT-TANSKI-W15S1G2

4 Miembros

8 Guías creadas

0 comentarios

Agregar Comentario

Ver Estadísticas:

Ultimas 24 horas: 0

Ultimos 7 días: 3

Ultimos 30 días: 4

Todo El Tiempo: 1,255