Saltar al contenido principal

JIAYU F1 Motherboard Replacement

Qué necesitas

  1. JIAYU F1 Motherboard Replacement, Turn Off the Phone: paso 1, imagen 1 de 1
    • Turn the phone off by holding down the power button located on the top of the phone.

  2. JIAYU F1 Motherboard Replacement, Remove the Back Case: paso 2, imagen 1 de 3 JIAYU F1 Motherboard Replacement, Remove the Back Case: paso 2, imagen 2 de 3 JIAYU F1 Motherboard Replacement, Remove the Back Case: paso 2, imagen 3 de 3
    • Find the small indentation at the bottom right of the phone and pry open the back case of the phone using your fingernail or small plastic opening tool.

    • Gently remove the back case completely from the phone.

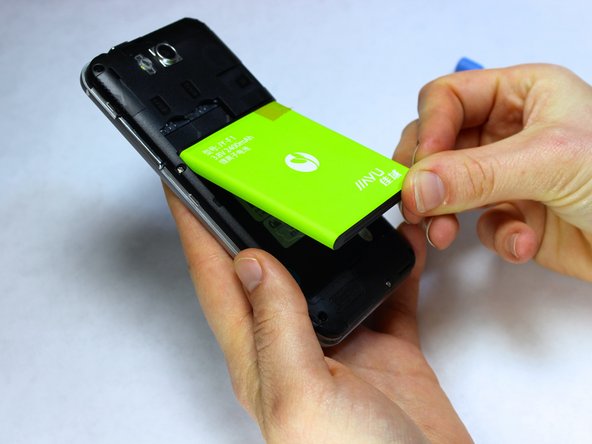
  3. JIAYU F1 Motherboard Replacement, Remove the Battery: paso 3, imagen 1 de 3 JIAYU F1 Motherboard Replacement, Remove the Battery: paso 3, imagen 2 de 3 JIAYU F1 Motherboard Replacement, Remove the Battery: paso 3, imagen 3 de 3
    • Insert a fingernail or the small plastic opening tool into the recess in the bottom center of the battery and lift upward.

    • Remove the battery from the phone.

    • When replacing the battery, align the copper ports on the top right of the battery with the corresponding ports in the battery cavity.

  4. JIAYU F1 Motherboard Replacement, Remove the Interior Midframe Assembly: paso 4, imagen 1 de 3 JIAYU F1 Motherboard Replacement, Remove the Interior Midframe Assembly: paso 4, imagen 2 de 3 JIAYU F1 Motherboard Replacement, Remove the Interior Midframe Assembly: paso 4, imagen 3 de 3
    • With the phone lying face down, remove the nine 3 mm Phillips #00 screws from the midframe.

    • Gently run a plastic opening tool down along the left and right sides of the phone to separate the black midframe assembly from the silver display casing.

    • Carefully remove the midframe assembly from the display casing by pulling up and away from the phone.

    • The motherboard is housed between the screen/display casing and the midframe assembly. Removal of the screen is not necessary to access the motherboard.

  5. JIAYU F1 Motherboard Replacement, Motherboard Assembly: paso 5, imagen 1 de 2 JIAYU F1 Motherboard Replacement, Motherboard Assembly: paso 5, imagen 2 de 2
    • Using a precision tweezer, remove the protective stickers from the connectors.

    • Using a precision tweezer or spudger, carefully slide the indicated connectors out from their ports on the motherboard.

  6. JIAYU F1 Motherboard Replacement, Removing the Motherboard: paso 6, imagen 1 de 3 JIAYU F1 Motherboard Replacement, Removing the Motherboard: paso 6, imagen 2 de 3 JIAYU F1 Motherboard Replacement, Removing the Motherboard: paso 6, imagen 3 de 3
    • Locate the two white clips along the edge of the phone that hold the motherboard in place.

    • Using a finger or plastic opening tool, pull the clips away from the motherboard and hold the clips back.

    • Wedge a plastic credit card or opening pick underneath the motherboard to separate the motherboard away from the display casing.

    • Carefully lift the motherboard upward, making sure any remaining tape connectors are detached.

    • Tip: Use one finger to hold one clip open and a small plastic opening tool to hold the other clip open while simultaneously prying the motherboard from the display case (see photo 1)

Conclusión

To reassemble your device, follow these instructions in reverse order.

Delilah

Miembro Desde 10/08/14

198 Reputación

1 Guía escrita

Equipo

USF Tampa, Team 9-4, Leahy Fall 2014 Miembro de USF Tampa, Team 9-4, Leahy Fall 2014

USFT-LEAHY-F14S9G4

3 Miembros

10 Guías creadas

0 comentarios

Agregar Comentario

Ver Estadísticas:

Ultimas 24 horas: 0

Ultimos 7 días: 0

Ultimos 30 días: 0

Todo El Tiempo: 1,005