Introducción
If your JBL Go isn't producing quality sound, the woofer may be damaged. Use this guide to carefully remove and replace the faulty woofer.
Qué necesitas
-
-
Use an opening tool to scrape around the outside of the front cover to remove the glue attaching it to the surrounding rubber layer.
-
-
-
-
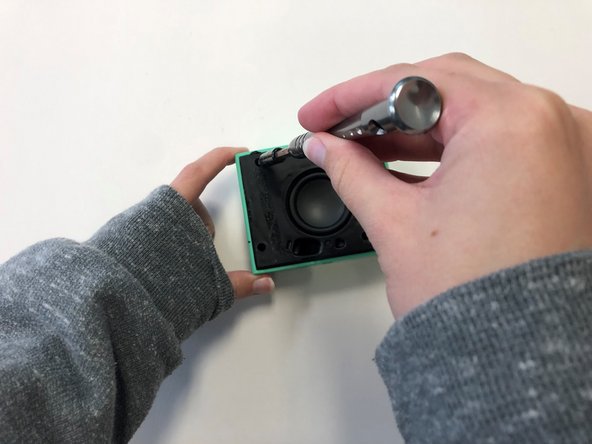
Once the front cover is removed, use a T6 screwdriver head to remove the four 9 mm screws on the black cover.
-


To reassemble your device, follow these instructions in reverse order.
To reassemble your device, follow these instructions in reverse order.
Cancelar: No complete esta guía.
2 personas más completaron esta guía.
Equipo

University of Alabama, Team 2-4, Bedsole Spring 2022 Miembro de University of Alabama, Team 2-4, Bedsole Spring 2022
UA-BEDSOLE-S22S2G4
3 Miembros
4 Guías creadas