Saltar al contenido principal

Iomega Z100S2 Case Replacement

Qué necesitas

  1. Iomega Z100S2 Case Replacement, Case: paso 1, imagen 1 de 2 Iomega Z100S2 Case Replacement, Case: paso 1, imagen 2 de 2
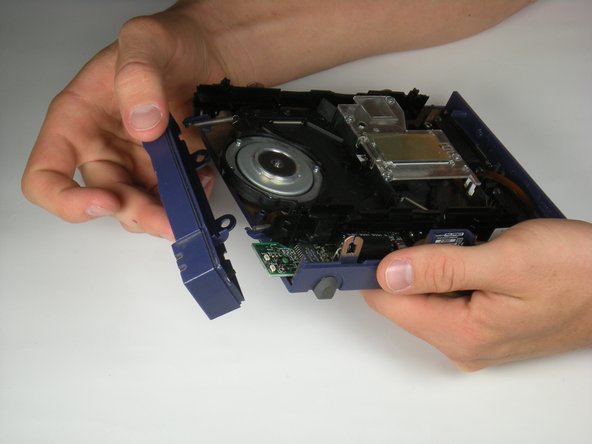
    • Push in the plastic tab that can be seen through cracks in the front left corner using a spudger.

  2. Iomega Z100S2 Case Replacement: paso 2, imagen 1 de 1
    • Move down the same side and push in the plastic tab.

  3. Iomega Z100S2 Case Replacement: paso 3, imagen 1 de 1
    • Move to the front right side and once again push in the plastic tab.

    • There is not a fourth tab to push in after this one.

  4. Iomega Z100S2 Case Replacement: paso 4, imagen 1 de 2 Iomega Z100S2 Case Replacement: paso 4, imagen 2 de 2
    • Grab the cover by the front side and pull upwards.

    • You might encounter some resistance. Pull firmly, but don't yank it.

  5. Iomega Z100S2 Case Replacement: paso 5, imagen 1 de 2 Iomega Z100S2 Case Replacement: paso 5, imagen 2 de 2
    • Tilt the front case down until the pegs detach from the bottom of the case.

    • Lift up and outward.

    • The motherboard will be loose at this point.

Conclusión

To reassemble your device, follow these instructions in reverse order.

5 personas más completaron esta guía.

Equipo

Cal Poly, Team 7-53, Amido Fall 2010 Miembro de Cal Poly, Team 7-53, Amido Fall 2010

CPSU-AMIDO-F10S7G53

4 Miembros

6 Guías creadas

0 comentarios

Agregar Comentario

Ver Estadísticas:

Ultimas 24 horas: 2

Ultimos 7 días: 6

Ultimos 30 días: 13

Todo El Tiempo: 4,131