Saltar al contenido principal

India Mark II Water Tank Replacement

Guía Archivada
Esta guía se mantiene únicamente para fines históricos. Utiliza la última versión de la guía para llevar a cabo tu reparación.

Qué necesitas

  1. India Mark II Water Tank Replacement, Cover Plate: paso 1, imagen 1 de 1
    • Use a wrench to remove the bolt on the top of the cover plate.

    • When replacing the cover plate, this bolt only needs to be hand tight.

  2. India Mark II Water Tank Replacement: paso 2, imagen 1 de 1
    • Remove the top cover by pulling it straight off the pump.

    • Store the top cover in a sanitary place, preferably above ground, to prevent contamination.

  3. India Mark II Water Tank Replacement, Head Section: paso 3, imagen 1 de 3 India Mark II Water Tank Replacement, Head Section: paso 3, imagen 2 de 3 India Mark II Water Tank Replacement, Head Section: paso 3, imagen 3 de 3
    • Pull the pump handle all the way down and hold it in this position, exposing the pump rod.

    • Place the spacer around the pump rod and under the chain attachment point.

    • Make sure the spacer is beveled side down, and flat side up.

    • Lift the pump lever until there is no tension in the chain and hold it in this position.

  4. India Mark II Water Tank Replacement: paso 4, imagen 1 de 2 India Mark II Water Tank Replacement: paso 4, imagen 2 de 2
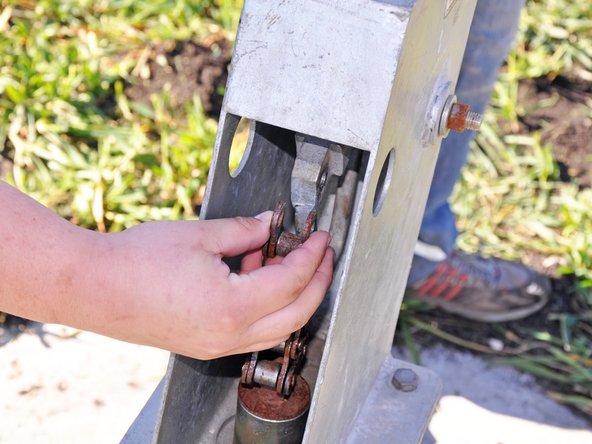
    • Remove the bolt connecting the chain to the pump handle.

    • Remove the chain from the handle.

  5. India Mark II Water Tank Replacement: paso 5, imagen 1 de 3 India Mark II Water Tank Replacement: paso 5, imagen 2 de 3 India Mark II Water Tank Replacement: paso 5, imagen 3 de 3
    • There are 4 bolts securing the head section to the water tank, located at the corners of head section base.

    • Continue supporting the pump handle so the pump head doesn't fall off when all the bolts are removed.

    • Remove the 4 bolts on the base of the water tank.

  6. India Mark II Water Tank Replacement: paso 6, imagen 1 de 1
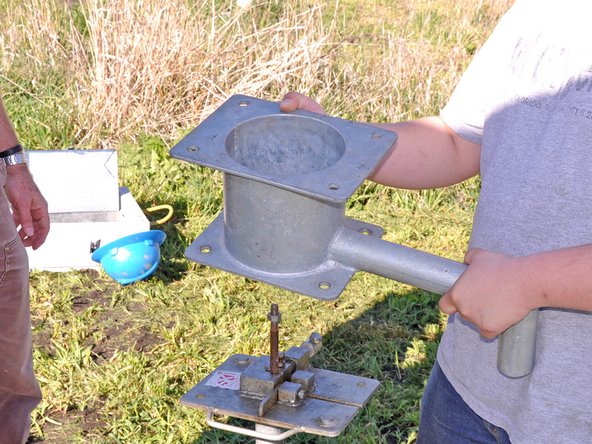
    • Lift the pump head off of the water tank and place in a sanitary place, preferably above ground, to prevent contamination.

  7. India Mark II Water Tank Replacement, Water Tank: paso 7, imagen 1 de 3 India Mark II Water Tank Replacement, Water Tank: paso 7, imagen 2 de 3 India Mark II Water Tank Replacement, Water Tank: paso 7, imagen 3 de 3
    • Lift the plunger assembly and separator plate and place a rod clamp below the separator plate.

    • Tighten the rod clamp and gently set the separator plate on top of it.

    • Remove the spacer.

  8. India Mark II Water Tank Replacement: paso 8, imagen 1 de 3 India Mark II Water Tank Replacement: paso 8, imagen 2 de 3 India Mark II Water Tank Replacement: paso 8, imagen 3 de 3
    • Hold the rod clamp steady while removing the chain from the pump rod. Check the chain for signs of damage.

    • Extend the chain sideways and use it as a lever as demonstrated in the first picture.

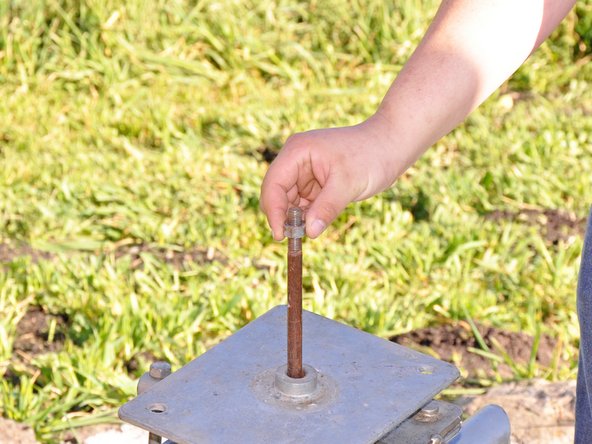
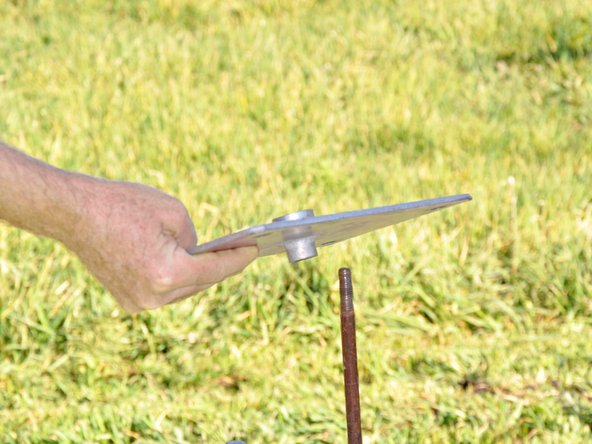
    • Remove the lock nut by turning it counterclockwise.

    • Remove the separator plate.

  9. India Mark II Water Tank Replacement: paso 9, imagen 1 de 2 India Mark II Water Tank Replacement: paso 9, imagen 2 de 2
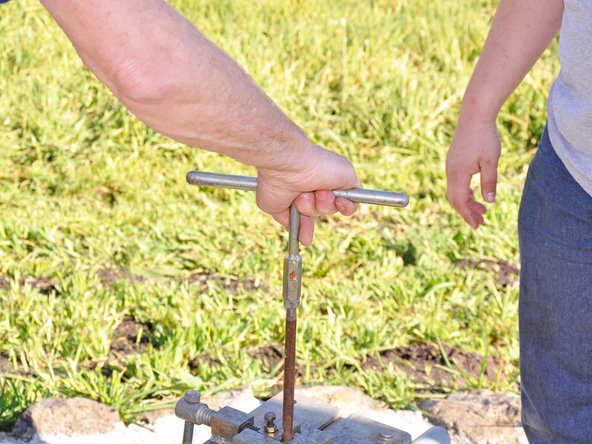
    • Reinstall the lock nut.

    • Install a T-handle, screwing it down against the lock nut.

  10. India Mark II Water Tank Replacement: paso 10, imagen 1 de 2 India Mark II Water Tank Replacement: paso 10, imagen 2 de 2
    • Lift up on the T-handle to take pressure off the rod clamp.

    • Remove the rod clamp and slowly lower the T-handle.

    • The pump rod will rest on the end cap, located below the cylinder of the pump. It is important to lower the T-handle slowly to prevent damage to the pump.

  11. India Mark II Water Tank Replacement: paso 11, imagen 1 de 1
    • There are 4 bolts securing the water tank to the pump base. They are located at the bottom corners of the water tank.

    • Remove the 4 bolts on the base of the water tank.

  12. India Mark II Water Tank Replacement: paso 12, imagen 1 de 3 India Mark II Water Tank Replacement: paso 12, imagen 2 de 3 India Mark II Water Tank Replacement: paso 12, imagen 3 de 3
    • Lift the water tank up approximately 1 foot.

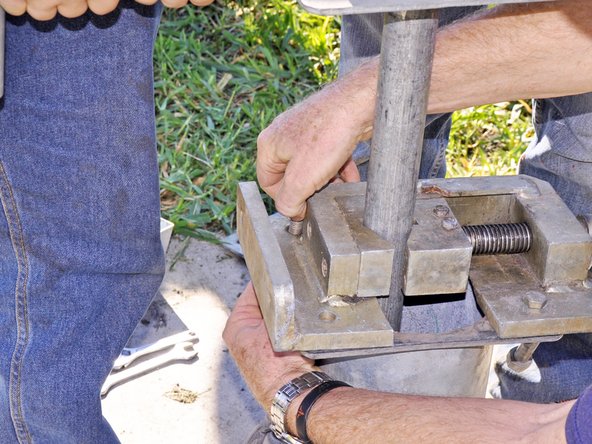
    • Place a base clamp around the exposed pipe and tighten it against the riser main.

  13. India Mark II Water Tank Replacement: paso 13, imagen 1 de 2 India Mark II Water Tank Replacement: paso 13, imagen 2 de 2
    • Secure the base clamp to the pump base with two bolt and nut sets installed on opposite sides of each other.

    • Hand tight will be sufficient for securing the base clamp.

    • Use the nuts and bolts removed from the water tank base or head section base.

  14. India Mark II Water Tank Replacement: paso 14, imagen 1 de 2 India Mark II Water Tank Replacement: paso 14, imagen 2 de 2
    • Turn the water tank counterclockwise until it comes free from the pipe.

    • Make sure to keep the tank level to prevent cross threading.

    • Lift the water tank up against the T-handle and secure the rod clamp to the pump rod.

  15. India Mark II Water Tank Replacement: paso 15, imagen 1 de 2 India Mark II Water Tank Replacement: paso 15, imagen 2 de 2
    • Remove the T-handle.

    • Remove the water tank and check for signs of blockage.

    • Store in a sanitary place to prevent contamination.

Conclusión

To reassemble your device, follow these instructions in reverse order.

Phillip Takahashi

Miembro Desde 08/22/11

86,704 Reputación

87 Guías creadas

0 comentarios

Agregar Comentario

Ver Estadísticas:

Ultimas 24 horas: 0

Ultimos 7 días: 0

Ultimos 30 días: 0

Todo El Tiempo: 1,020