Esta versión puede contener ediciones incorrectas. Cambie a la última instantánea verificada.
Qué necesitas
-
Este paso está sin traducir. Ayuda a traducirlo
-
Flip the ThinkPad upside down with the bottom facing you.
-
Slide the latch to the right into the unlock position.
-
While holding the latch in the unlock position, lift the battery out with your other hand.
-
-
Este paso está sin traducir. Ayuda a traducirlo
-
Locate the 4.8mm Phillips #0 screw on the far left of the ThinkPad, closest to the edge and above the battery, and unscrew it with a Phillips #0 screwdriver.
-
-
-
Este paso está sin traducir. Ayuda a traducirlo
-
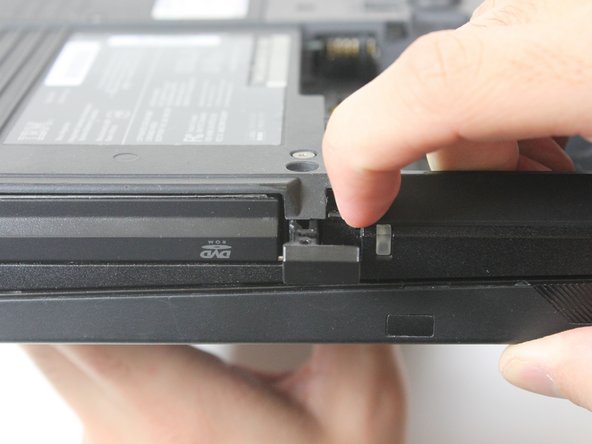
On the side of the ThinkPad, locate a lock next to the optical drive. Use your fingernail to slide the lock to the right.
-
-
Este paso está sin traducir. Ayuda a traducirlo
-
Once it is unlocked, a small tab will pop out. Pull on the tab with your fingers.
-
The optical drive will easily slide out. Remove the optical drive.
-


Cancelar: No complete esta guía.
Una persona más ha completado esta guía.
Equipo

Cal Poly, Team 3-20, Amido Fall 2012 Miembro de Cal Poly, Team 3-20, Amido Fall 2012
CPSU-AMIDO-F12S3G20
3 Miembros
16 Guías creadas