Saltar al contenido principal

IBM ThinkPad R40 Hard Drive Replacement

Qué necesitas

  1. IBM ThinkPad R40 Hard Drive Replacement, Remove the battery: paso 1, imagen 1 de 2 IBM ThinkPad R40 Hard Drive Replacement, Remove the battery: paso 1, imagen 2 de 2
    • To remove the battery, slide the battery lock lever right, while pulling on the battery tab.

  2. IBM ThinkPad R40 Hard Drive Replacement, Remove the hard drive holder.: paso 2, imagen 1 de 2 IBM ThinkPad R40 Hard Drive Replacement, Remove the hard drive holder.: paso 2, imagen 2 de 2
    • Remove the Phillips #1 screw from the bottom of the laptop.

    • Pull on the small rise in the plastic to remove the hard drive holder.

    • Don't be afraid to use some force, it requires quite a bit of pressure to remove.

  3. IBM ThinkPad R40 Hard Drive Replacement, Remove the hard drive holder.: paso 3, imagen 1 de 3 IBM ThinkPad R40 Hard Drive Replacement, Remove the hard drive holder.: paso 3, imagen 2 de 3 IBM ThinkPad R40 Hard Drive Replacement, Remove the hard drive holder.: paso 3, imagen 3 de 3
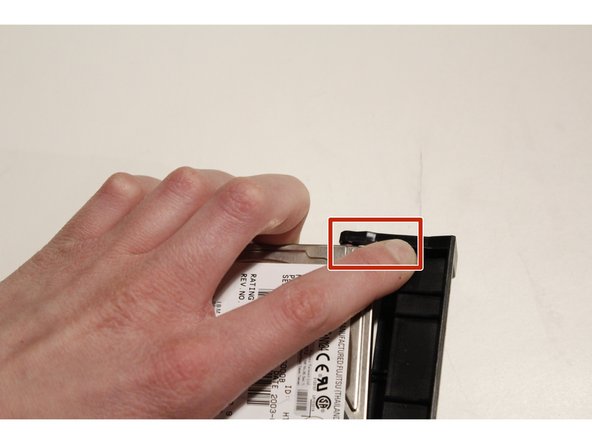
    • Remove the hard drive holder completely from the computer.

    • Push on the plastic, and the hard drive will pop out.

  4. IBM ThinkPad R40 Hard Drive Replacement, Remove the hard drive.: paso 4, imagen 1 de 1
    • Remove the four Phillips #1 screws.

Conclusión

To reassemble your device, follow these instructions in reverse order.

2 personas más completaron esta guía.

Alec M

Miembro Desde 12/26/15

82 Reputación

2 Guías creadas

0 comentarios

Agregar Comentario

Ver Estadísticas:

Ultimas 24 horas: 1

Ultimos 7 días: 5

Ultimos 30 días: 17

Todo El Tiempo: 4,949