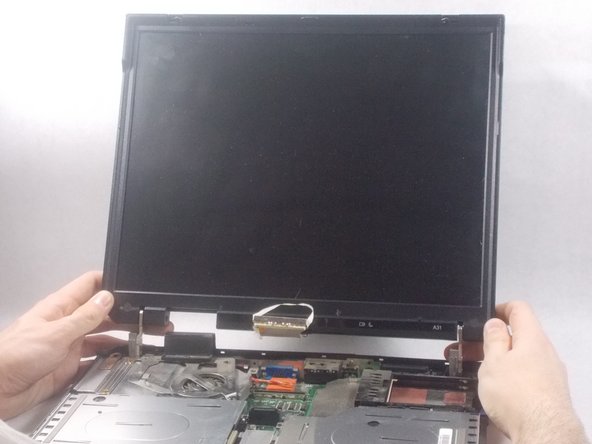
Saltar al contenido principal

IBM ThinkPad A31 Display Replacement

Qué necesitas

  1. IBM ThinkPad A31 Display Replacement, Keyboard: paso 1, imagen 1 de 3 IBM ThinkPad A31 Display Replacement, Keyboard: paso 1, imagen 2 de 3 IBM ThinkPad A31 Display Replacement, Keyboard: paso 1, imagen 3 de 3
    • The sticker is to keep the warranty on the laptop so once removed the warranty is void

    • Peel the sticker and remove the 15mm screw

    • Remove all 6 of the 16mm screws

  2. IBM ThinkPad A31 Display Replacement: paso 2, imagen 1 de 2 IBM ThinkPad A31 Display Replacement: paso 2, imagen 2 de 2
    • use a prying tool and insert it on the cracks on the sides of the keyboard and lift gently until you here a click

    • repeat this step on all sides of the keyboard until the keyboard is completely detached from the laptop

  3. IBM ThinkPad A31 Display Replacement: paso 3, imagen 1 de 3 IBM ThinkPad A31 Display Replacement: paso 3, imagen 2 de 3 IBM ThinkPad A31 Display Replacement: paso 3, imagen 3 de 3
    • Lift the keyboard and remove the keyboard ribbon cable from the laptop

  4. IBM ThinkPad A31 Display Replacement, Display: paso 4, imagen 1 de 2 IBM ThinkPad A31 Display Replacement, Display: paso 4, imagen 2 de 2
    • Remove the one 21mm screw

    • Remove the 6mm screw

  5. IBM ThinkPad A31 Display Replacement: paso 5, imagen 1 de 2 IBM ThinkPad A31 Display Replacement: paso 5, imagen 2 de 2
    • Take the tool and run it under the black case.

  6. IBM ThinkPad A31 Display Replacement: paso 6, imagen 1 de 3 IBM ThinkPad A31 Display Replacement: paso 6, imagen 2 de 3 IBM ThinkPad A31 Display Replacement: paso 6, imagen 3 de 3
    • Unscrew the 2 (17mm) screws

    • Unscrew the 6mm screw

  7. IBM ThinkPad A31 Display Replacement: paso 7, imagen 1 de 2 IBM ThinkPad A31 Display Replacement: paso 7, imagen 2 de 2
    • Gently disconnect the white display ribbon cable

    • Pulling on the ribbon cable too hard could result in worse or faulty connection.

  8. IBM ThinkPad A31 Display Replacement: paso 8, imagen 1 de 3 IBM ThinkPad A31 Display Replacement: paso 8, imagen 2 de 3 IBM ThinkPad A31 Display Replacement: paso 8, imagen 3 de 3
    • Unscrew 4 (6mm) screws

    • Lift screen straight up

    • If not lifted straight up the screen could get damaged

Conclusión

To reassemble your device, follow these instructions in reverse order.

Sean Tocci

Miembro Desde 03/19/18

293 Reputación

2 Guías creadas

Equipo

Un comentario

i have that but display is

not work

Ahmed Elwy - Contestar

Agregar Comentario

Ver Estadísticas:

Ultimas 24 horas: 2

Ultimos 7 días: 5

Ultimos 30 días: 10

Todo El Tiempo: 484