Esta versión puede contener ediciones incorrectas. Cambie a la última instantánea verificada.
Qué necesitas
-
Este paso está sin traducir. Ayuda a traducirlo
-
Depress the top of the battery cover, and pull downwards towards the base of the phone.
-
-
Este paso está sin traducir. Ayuda a traducirlo
-
Remove the battery by levering the battery out, using the cut just below the camera.
-
-
Este paso está sin traducir. Ayuda a traducirlo
-
Use the opening tool to start prying the camera and speaker cover, starting from the battery side.
-
Work the opening tool around the border of the camera and speaker cover, until it comes loose.
-
-
-
Este paso está sin traducir. Ayuda a traducirlo
-
Using the T5 Torx screwdriver, remove the six 6mm screws.
-
-
Este paso está sin traducir. Ayuda a traducirlo
-
Using the opening tool, pry the back panel from the front panel.
-
Work your way around the phone until the panels separate evenly.
-
-
Este paso está sin traducir. Ayuda a traducirlo
-
Using the opening tool, start prying out the motherboard from the front panel along the border.
-
When the motherboard seems separated from the front panel, pull it outwards.
-
-
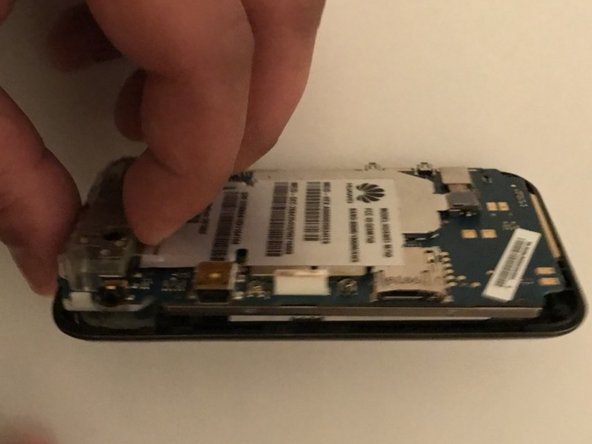
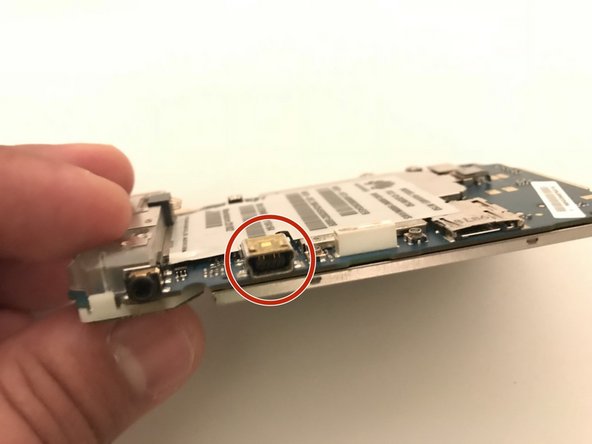
Este paso está sin traducir. Ayuda a traducirlo
-
The charging port is soldered to the motherboard, use this guide to do the replacement.
-


Cancelar: No complete esta guía.
Una persona más ha completado esta guía.
Equipo

University of North Texas, Team S1-G6, Thompson Spring 2018 Miembro de University of North Texas, Team S1-G6, Thompson Spring 2018
UNT-THOMPSON-S18S1G6
3 Miembros
15 Guías creadas