Esta versión puede contener ediciones incorrectas. Cambie a la última instantánea verificada.
Qué necesitas
-
Este paso está sin traducir. Ayuda a traducirlo
-
Loosen the screws using Phillips #01 screwdriver with the extension attached.
-
-
Este paso está sin traducir. Ayuda a traducirlo
-
After removing the two screws securing the Hard Drive to the bottom case, remove the panel to reveal the hard drive.
-
-
Este paso está sin traducir. Ayuda a traducirlo
-
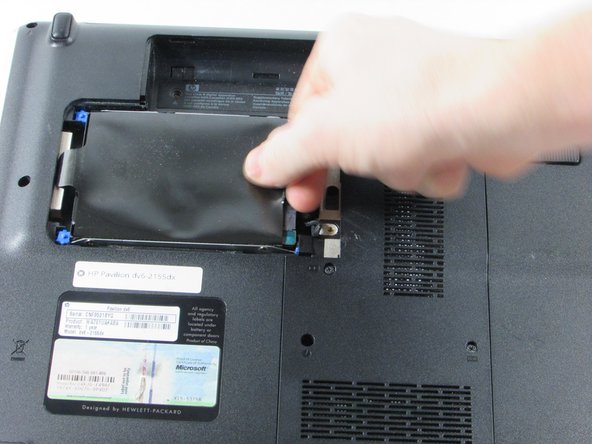
Locate the tab of the black Mylar film on the right hand side of the hard drive.
-
Gently grip it with your thumb and index finger.
-
-
Este paso está sin traducir. Ayuda a traducirlo
-
Pull the Hard Drive to the right to loosen the it from the frame.
-
The left side of the hard drive will pop up and should slide out freely until you see the black connector on it's right side, connecting it to the computer.
-
-
-
Este paso está sin traducir. Ayuda a traducirlo
-
Turn the Hard Drive over and grasp the Hard Drive with one hand as you grip the connector with the other hand to remove the connector from the hard drive.
-
-
Este paso está sin traducir. Ayuda a traducirlo
-
Remove the six screws. Four are marked with a keyboard icons, two are located on the top corner.
-
Remove the three screws located in the battery port.
-
-
Este paso está sin traducir. Ayuda a traducirlo
-
Use a plastic spudger to gently un-clip the top panel above keyboard.
-
-
Este paso está sin traducir. Ayuda a traducirlo
-
Once the top panel is propped open, remove the three 4mm silver screws located at the top of the keyboard with a Philips head screw driver, size #1.
-
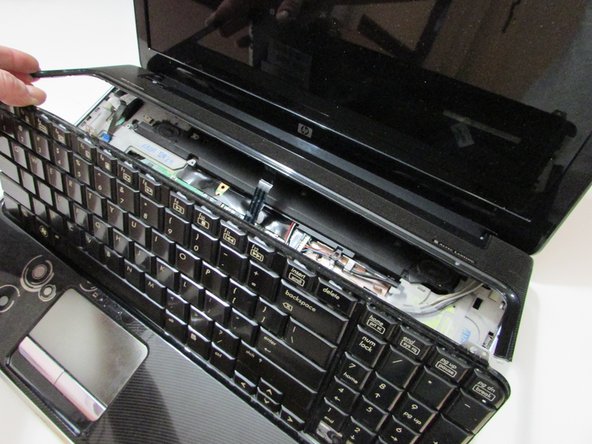
Flip keyboard forward and raise the keyboard off the frame.
-
-
Este paso está sin traducir. Ayuda a traducirlo
-
Once you have removed the three screws, gently lift the keyboard away from the laptop.
-
-
Este paso está sin traducir. Ayuda a traducirlo
-
Use plastic spudger to flip up the black strip on the ZIF connector that connects the ribbon cable to the motherboard.
-
-
Este paso está sin traducir. Ayuda a traducirlo
-
Remove the film from system board to then safely remove the keyboard.
-


Cancelar: No complete esta guía.
6 personas más completaron esta guía.
Equipo

UMass Dartmouth, Team 2-2, Isaacson Fall 2016 Miembro de UMass Dartmouth, Team 2-2, Isaacson Fall 2016
UMASSD-ISAACSON-F16S2G2
3 Miembros
5 Guías creadas