Introducción
This guide outlines the first steps necessary for internal repairs, such as: wheel, main board, sensor, and motor replacements. By the end of this, you will know how to disassemble bObsweep's cover completely.
Qué necesitas
-
-
Flip Bob over and remove the 7 screws around which hold the cover together.
-
Remove the main brush. Unscrew the holder, and lift the brush out. Reminder: Keep this screw separate from the others so you can use it later to reinstall.
-
-
-
-
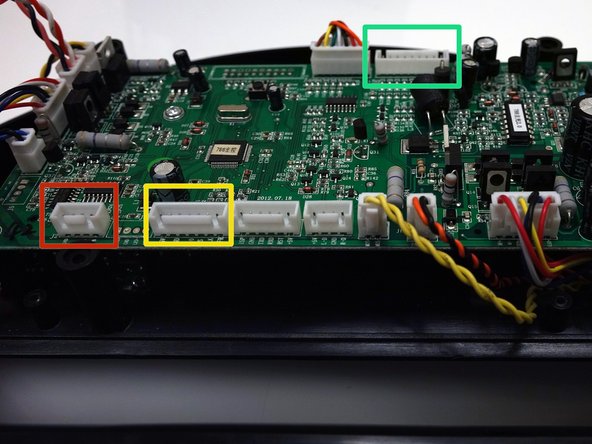
Remove three circuit plugs from the motherboard. Pinch the small white tab on the side of each circuit plug and pull straight up to release each from the motherboard.
-
1. On the bottom left corner: a small connector with red, black and white wires.
-
2. One thick white wire that attaches on the right side of the previous connector.
-
3. On the top edge of bOb’s motherboard: a wide multicoloured connector.
-
Place the cover aside and begin your repair.
-


To reassemble your bObsweep, follow these instructions in reverse order.
To reassemble your bObsweep, follow these instructions in reverse order.
Cancelar: No complete esta guía.
Una persona más ha completado esta guía.
Un comentario
Change battery, and still does what it did before. Battery life is one bar only, and the moment u push start it shuts right off. Even after charging all day. Please help