Saltar al contenido principal

How to Service the Makita Jack Hammer HM1203C 2010

Qué necesitas

  1. How to Service the Makita Jack Hammer HM1203C 2010, Remove the motor cover: paso 1, imagen 1 de 1
    • Make sure the hammer is disconnected from power before beginning any repair.

    • Use a Phillips #2 screwdriver to remove the three screws securing the motor cover.

  2. How to Service the Makita Jack Hammer HM1203C 2010: paso 2, imagen 1 de 2 How to Service the Makita Jack Hammer HM1203C 2010: paso 2, imagen 2 de 2
    • Remove the motor cover.

  3. How to Service the Makita Jack Hammer HM1203C 2010, Remove the brushes: paso 3, imagen 1 de 2 How to Service the Makita Jack Hammer HM1203C 2010, Remove the brushes: paso 3, imagen 2 de 2
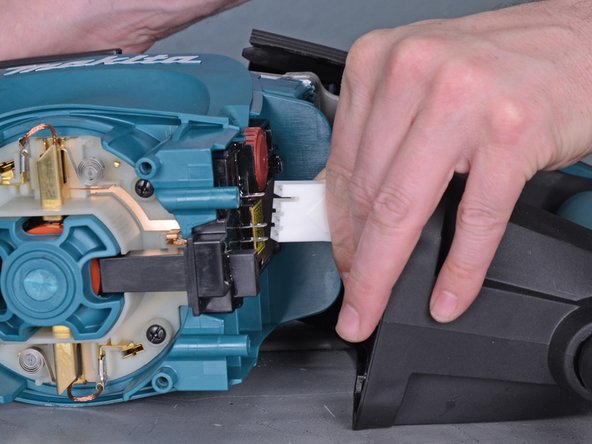
    • Pull the brush connector straight off of its spade to disconnect the brush.

  4. How to Service the Makita Jack Hammer HM1203C 2010: paso 4, imagen 1 de 2 How to Service the Makita Jack Hammer HM1203C 2010: paso 4, imagen 2 de 2
    • Use a pick or small flathead screwdriver to pull the brush retaining spring off of the brush.

  5. How to Service the Makita Jack Hammer HM1203C 2010: paso 5, imagen 1 de 1
    • Lift the brush out of its motor housing while holding the retaining spring out of the way.

    • Repeat the last three steps to remove the second brush.

  6. How to Service the Makita Jack Hammer HM1203C 2010, Remove the side handle: paso 6, imagen 1 de 1
    • Unscrew the knob securing the side handle.

  7. How to Service the Makita Jack Hammer HM1203C 2010: paso 7, imagen 1 de 2 How to Service the Makita Jack Hammer HM1203C 2010: paso 7, imagen 2 de 2
    • Remove the bolt securing the side handle.

    • Remove the side handle.

  8. How to Service the Makita Jack Hammer HM1203C 2010, Remove the handle assembly: paso 8, imagen 1 de 1
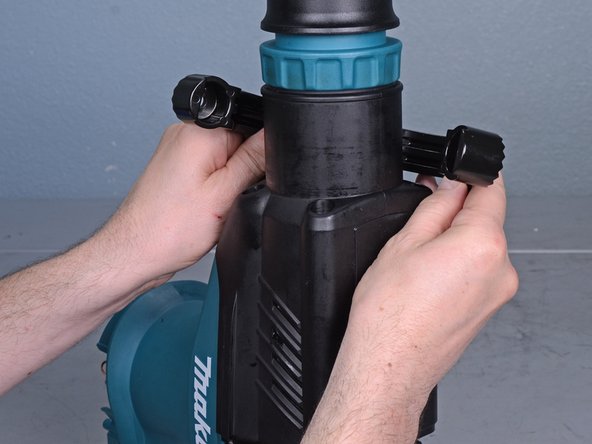
    • Use a Phillips #2 screwdriver to remove the six screws securing the handle assembly.

  9. How to Service the Makita Jack Hammer HM1203C 2010: paso 9, imagen 1 de 3 How to Service the Makita Jack Hammer HM1203C 2010: paso 9, imagen 2 de 3 How to Service the Makita Jack Hammer HM1203C 2010: paso 9, imagen 3 de 3
    • Pull the handle assembly away from the hammer, but do not completely remove it yet. It's still connected to the hammer by a power cable.

  10. How to Service the Makita Jack Hammer HM1203C 2010: paso 10, imagen 1 de 2 How to Service the Makita Jack Hammer HM1203C 2010: paso 10, imagen 2 de 2
    • Pull the power connector straight off of its plug.

    • Remove the handle assembly.

  11. How to Service the Makita Jack Hammer HM1203C 2010, Disassemble the front end: paso 11, imagen 1 de 3 How to Service the Makita Jack Hammer HM1203C 2010, Disassemble the front end: paso 11, imagen 2 de 3 How to Service the Makita Jack Hammer HM1203C 2010, Disassemble the front end: paso 11, imagen 3 de 3
    • Use a small pry bar or flathead screwdriver to pry the rubber front cap off of the hammer.

    • This can be replaced as part of a service kit.

  12. How to Service the Makita Jack Hammer HM1203C 2010: paso 12, imagen 1 de 2 How to Service the Makita Jack Hammer HM1203C 2010: paso 12, imagen 2 de 2
    • Use a pair of snap ring pliers to expand the snap ring on the front of the hammer.

    • Remove the snap ring.

  13. How to Service the Makita Jack Hammer HM1203C 2010: paso 13, imagen 1 de 1
    • Remove the washer on the front of the hammer.

  14. How to Service the Makita Jack Hammer HM1203C 2010: paso 14, imagen 1 de 1
    • Lift the front cover off of the front of the hammer.

  15. How to Service the Makita Jack Hammer HM1203C 2010: paso 15, imagen 1 de 1
    • Lift the rubber ring off of the front of the hammer.

  16. How to Service the Makita Jack Hammer HM1203C 2010: paso 16, imagen 1 de 1
    • Remove the inner front cover.

  17. How to Service the Makita Jack Hammer HM1203C 2010: paso 17, imagen 1 de 3 How to Service the Makita Jack Hammer HM1203C 2010: paso 17, imagen 2 de 3 How to Service the Makita Jack Hammer HM1203C 2010: paso 17, imagen 3 de 3
    • Compress the spring and hold it down while you pull the two retainers out of their slots and remove them.

  18. How to Service the Makita Jack Hammer HM1203C 2010: paso 18, imagen 1 de 2 How to Service the Makita Jack Hammer HM1203C 2010: paso 18, imagen 2 de 2
    • Remove the spring guide.

    • Remove the spring.

  19. How to Service the Makita Jack Hammer HM1203C 2010, Remove the barrel: paso 19, imagen 1 de 2 How to Service the Makita Jack Hammer HM1203C 2010, Remove the barrel: paso 19, imagen 2 de 2
    • Remove the front barrel cover.

  20. How to Service the Makita Jack Hammer HM1203C 2010: paso 20, imagen 1 de 1
    • Remove the 4 mm hex bolt securing the barrel cover.

  21. How to Service the Makita Jack Hammer HM1203C 2010: paso 21, imagen 1 de 2 How to Service the Makita Jack Hammer HM1203C 2010: paso 21, imagen 2 de 2
    • Lift the barrel cover straight up and remove it.

  22. How to Service the Makita Jack Hammer HM1203C 2010: paso 22, imagen 1 de 2 How to Service the Makita Jack Hammer HM1203C 2010: paso 22, imagen 2 de 2
    • Use a pair of snap ring pliers to expand the snap ring securing the bolt holder.

    • Remove the snap ring.

  23. How to Service the Makita Jack Hammer HM1203C 2010: paso 23, imagen 1 de 2 How to Service the Makita Jack Hammer HM1203C 2010: paso 23, imagen 2 de 2
    • Lift the washer off of the bolt holder and remove it.

  24. How to Service the Makita Jack Hammer HM1203C 2010: paso 24, imagen 1 de 1
    • Remove four 6 mm hex bolts securing the barrel.

  25. How to Service the Makita Jack Hammer HM1203C 2010: paso 25, imagen 1 de 2 How to Service the Makita Jack Hammer HM1203C 2010: paso 25, imagen 2 de 2
    • Lift the barrel straight up and remove it.

  26. How to Service the Makita Jack Hammer HM1203C 2010, Remove the rubber ring 39: paso 26, imagen 1 de 3 How to Service the Makita Jack Hammer HM1203C 2010, Remove the rubber ring 39: paso 26, imagen 2 de 3 How to Service the Makita Jack Hammer HM1203C 2010, Remove the rubber ring 39: paso 26, imagen 3 de 3
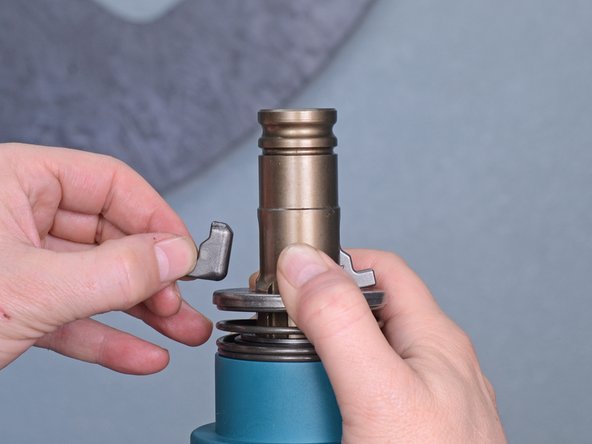
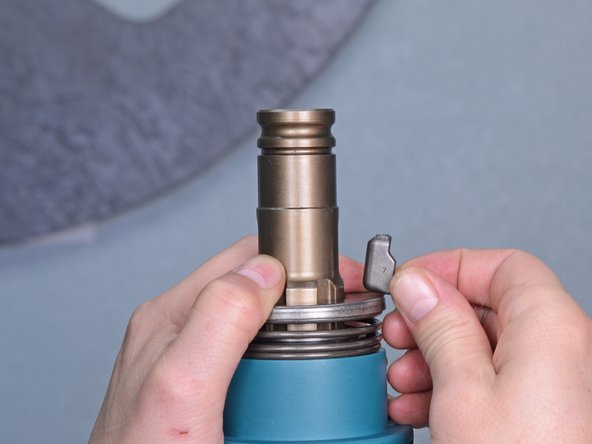
    • Use an angled pick to pull the washer and rubber ring 39 out of the barrel.

  27. How to Service the Makita Jack Hammer HM1203C 2010: paso 27, imagen 1 de 1
    • Remove the rubber ring 39.

    • This can be replaced as part of a service kit.

  28. How to Service the Makita Jack Hammer HM1203C 2010, Remove the bolt holder: paso 28, imagen 1 de 1
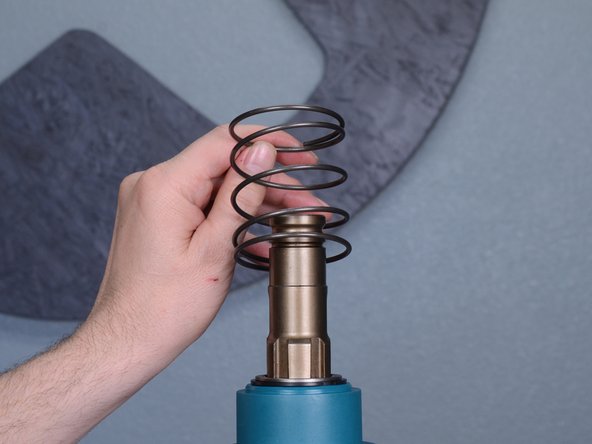
    • Lift the upper-most rubber ring straight up and remove it from the bolt holder.

  29. How to Service the Makita Jack Hammer HM1203C 2010: paso 29, imagen 1 de 1
    • Lift the upper-most washer straight up and off of the bolt holder.

  30. How to Service the Makita Jack Hammer HM1203C 2010: paso 30, imagen 1 de 2 How to Service the Makita Jack Hammer HM1203C 2010: paso 30, imagen 2 de 2
    • Grasp the bolt holder, rubber ring 24, and the two metal sleeves below it, and lift it off of the cylinder.

  31. How to Service the Makita Jack Hammer HM1203C 2010, Remove rubber ring 24: paso 31, imagen 1 de 2 How to Service the Makita Jack Hammer HM1203C 2010, Remove rubber ring 24: paso 31, imagen 2 de 2
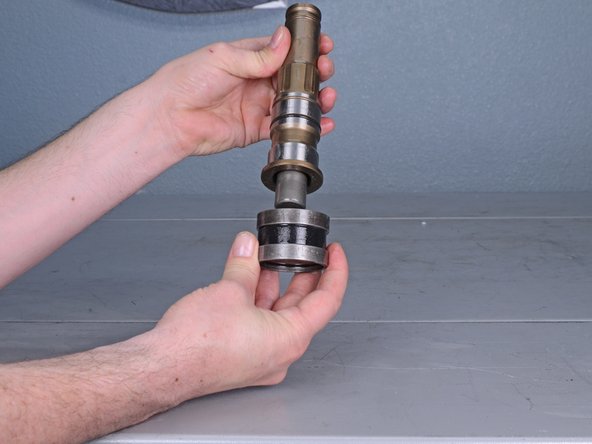
    • Separate the rubber ring 24 and the two metal sleeves from the bolt holder.

  32. How to Service the Makita Jack Hammer HM1203C 2010: paso 32, imagen 1 de 2 How to Service the Makita Jack Hammer HM1203C 2010: paso 32, imagen 2 de 2
    • Separate the rubber ring 24 from the two metal sleeves.

    • Remove the rubber ring 24.

    • This can be replaced as part of a service kit.

  33. How to Service the Makita Jack Hammer HM1203C 2010, Remove the O-ring 35.5: paso 33, imagen 1 de 2 How to Service the Makita Jack Hammer HM1203C 2010, Remove the O-ring 35.5: paso 33, imagen 2 de 2
    • Use an angled pick to lift the O-ring 35.5 out of its groove on the bolt holder.

    • Remove the O-ring 35.5.

    • This can be replaced as part of a service kit.

  34. How to Service the Makita Jack Hammer HM1203C 2010, Remove the bolt: paso 34, imagen 1 de 2 How to Service the Makita Jack Hammer HM1203C 2010, Remove the bolt: paso 34, imagen 2 de 2
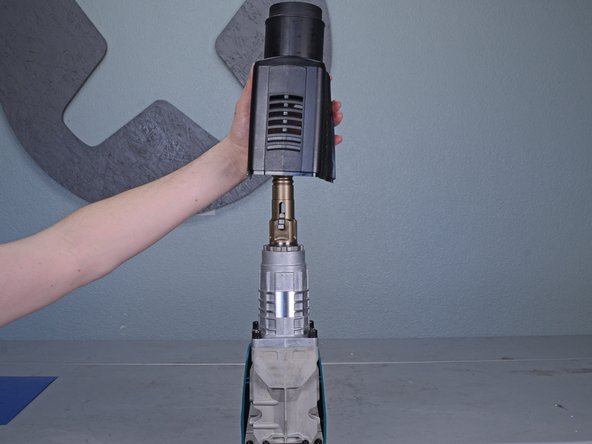
    • Use a long punch, long flathead screwdriver, or a thin, long bar to push the bolt out of the bolt holder.

    • Remove the bolt.

    • During reassembly, make sure all the seals on the bolt stay seated properly while you slide the bolt back into the holder.

  35. How to Service the Makita Jack Hammer HM1203C 2010, Remove the X-ring 21: paso 35, imagen 1 de 2 How to Service the Makita Jack Hammer HM1203C 2010, Remove the X-ring 21: paso 35, imagen 2 de 2
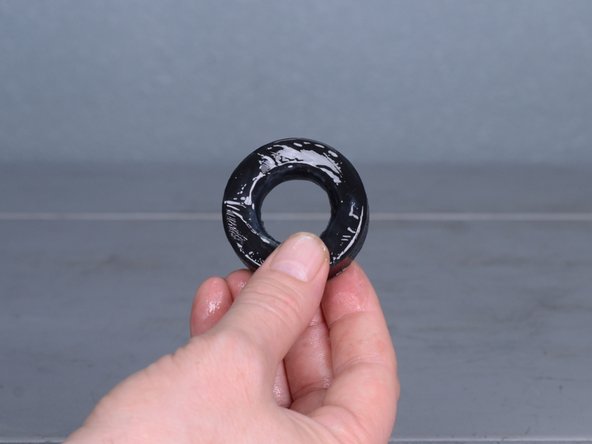
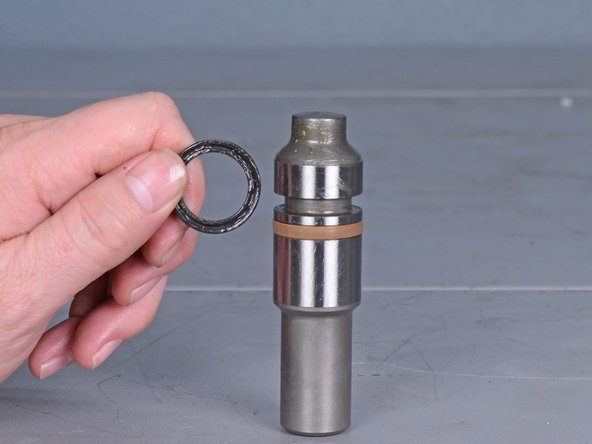
    • Use an angled pick to pry the X-ring 21 out of its groove in the bolt.

    • Remove the X-ring 21.

    • This can be replaced as part of a service kit.

  36. How to Service the Makita Jack Hammer HM1203C 2010, Remove the fluoride ring 28: paso 36, imagen 1 de 2 How to Service the Makita Jack Hammer HM1203C 2010, Remove the fluoride ring 28: paso 36, imagen 2 de 2
    • Use an angled pick to pry the fluoride ring 28 out of its groove in the bolt.

    • Remove the fluoride ring 28.

    • This can be replaced as part of a service kit.

  37. How to Service the Makita Jack Hammer HM1203C 2010, Remove the O-ring 23: paso 37, imagen 1 de 2 How to Service the Makita Jack Hammer HM1203C 2010, Remove the O-ring 23: paso 37, imagen 2 de 2
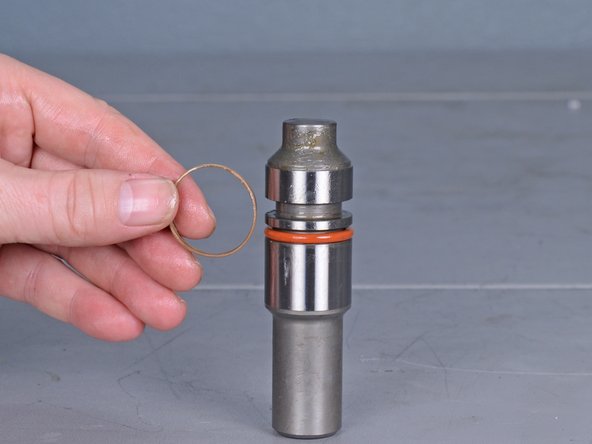
    • Use an angled pick to pry the O-ring 23 out of its groove in the bolt.

    • Remove the O-ring 23.

    • This can be replaced as part of a service kit.

  38. How to Service the Makita Jack Hammer HM1203C 2010, Remove the cylinder: paso 38, imagen 1 de 2 How to Service the Makita Jack Hammer HM1203C 2010, Remove the cylinder: paso 38, imagen 2 de 2
    • Lift the cylinder straight out of the aluminum housing.

    • During reassembly, the cylinder will have to slide over the piston, which is sitting in the bottom of the aluminum housing. Make sure the piston is centered and pointing straight up so that it slides all the way into the cylinder.

  39. How to Service the Makita Jack Hammer HM1203C 2010, Remove the striker: paso 39, imagen 1 de 2 How to Service the Makita Jack Hammer HM1203C 2010, Remove the striker: paso 39, imagen 2 de 2
    • Pull the striker out of the cylinder.

    • You may need to shake the cylinder until the striker slides out of the bottom of the cylinder.

    • During reassembly, install the cylinder first, then push the striker in through the top, as seen in the second photo. Make sure the cylinder is seated all the way down into the housing before inserting the striker.

  40. How to Service the Makita Jack Hammer HM1203C 2010, Remove the striker O-ring 31.5: paso 40, imagen 1 de 2 How to Service the Makita Jack Hammer HM1203C 2010, Remove the striker O-ring 31.5: paso 40, imagen 2 de 2
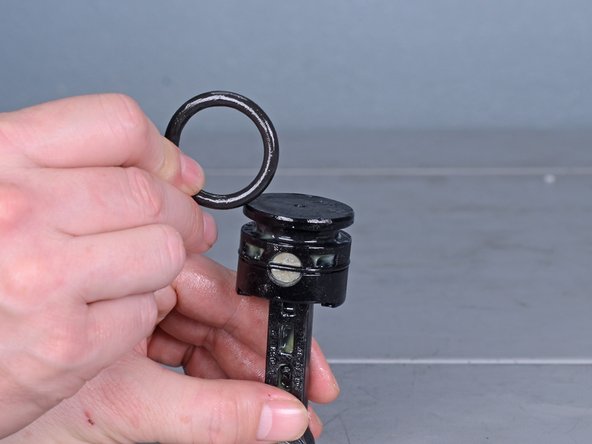
    • Use a pick to pry the striker O-ring 31.5 out of its groove on the striker.

    • Remove the striker O-ring 31.5.

    • This can be replaced as part of a service kit.

  41. How to Service the Makita Jack Hammer HM1203C 2010, Remove the housing: paso 41, imagen 1 de 1
    • Use a 5 mm hex key to remove the six screws securing the aluminum housing.

  42. How to Service the Makita Jack Hammer HM1203C 2010: paso 42, imagen 1 de 1
    • Separate the aluminum housing from the rest of the hammer.

  43. How to Service the Makita Jack Hammer HM1203C 2010: paso 43, imagen 1 de 2 How to Service the Makita Jack Hammer HM1203C 2010: paso 43, imagen 2 de 2
    • Slide the fix guides and the rubber plate out of their slots on the housing and remove them.

  44. How to Service the Makita Jack Hammer HM1203C 2010, Remove the piston: paso 44, imagen 1 de 1
    • Use a Phillips #2 screwdriver to remove the four screws securing the piston cover.

  45. How to Service the Makita Jack Hammer HM1203C 2010: paso 45, imagen 1 de 1
    • Remove the piston cover.

  46. How to Service the Makita Jack Hammer HM1203C 2010: paso 46, imagen 1 de 2 How to Service the Makita Jack Hammer HM1203C 2010: paso 46, imagen 2 de 2
    • Rotate the crank shaft and the connecting rod so that the rod is vertical and the end is at the very bottom of the housing.

    • This lines the crank shaft up with the housing cutout so that it can slide through the housing in the next steps.

  47. How to Service the Makita Jack Hammer HM1203C 2010: paso 47, imagen 1 de 3 How to Service the Makita Jack Hammer HM1203C 2010: paso 47, imagen 2 de 3 How to Service the Makita Jack Hammer HM1203C 2010: paso 47, imagen 3 de 3
    • Use an arbor press and a custom punch to carefully press the crank shaft, bearing, and gear assembly out of the housing.

    • If you don't have access to a press or custom tool, use a punch and a hammer to tap the crank shaft until the whole crank shaft, bearing, and gear assembly starts to slide out.

    • It may also be necessary to use a smaller punch to tap on the edges of the bearing through the small holes in the aluminum housing on either side of the crank shaft.

    • During reassembly, make sure the bearing and gear are lined up with the hole in the aluminum housing before pressing them back in. Make sure the shaft is lined up with the cutout before reinstalling the assembly.

  48. How to Service the Makita Jack Hammer HM1203C 2010: paso 48, imagen 1 de 1
    • Pull the connecting rod and the piston out of the housing.

  49. How to Service the Makita Jack Hammer HM1203C 2010, Remove the piston O-ring 31.5: paso 49, imagen 1 de 2 How to Service the Makita Jack Hammer HM1203C 2010, Remove the piston O-ring 31.5: paso 49, imagen 2 de 2
    • Use a pick to pry the piston O-ring 31.5 out of its groove in the piston.

    • Remove the piston O-ring 31.5.

    • This can be replaced as part of a service kit.

  50. How to Service the Makita Jack Hammer HM1203C 2010, Remove the O-ring 35: paso 50, imagen 1 de 3 How to Service the Makita Jack Hammer HM1203C 2010, Remove the O-ring 35: paso 50, imagen 2 de 3 How to Service the Makita Jack Hammer HM1203C 2010, Remove the O-ring 35: paso 50, imagen 3 de 3
    • Use a pick to pry the O-ring 35 out of its groove in the piston.

    • Remove the O-ring 35.

    • This can be replaced as part of a service kit.

Conclusión

To reassemble your device, follow these instructions in reverse order.

8 personas más completaron esta guía.

Adam O'Camb

Miembro Desde 04/11/15

196,215 Reputación

416 Guías creadas

Un comentario

I have been having a hard time with the furthermost forward snap rings. Removing and reinstalling. Is your set of snap ring pliers modified in any way? Drew, HD tech store 6381.

DREW - Contestar

Agregar Comentario

Ver Estadísticas:

Ultimas 24 horas: 2

Ultimos 7 días: 6

Ultimos 30 días: 68

Todo El Tiempo: 3,897