Saltar al contenido principal

How to Restuff a Plushie

Qué necesitas

  1. How to Restuff a Plushie, Stuffing: paso 1, imagen 1 de 1
    • Choose an area to open the seam of the plushie.

    • Choose an area where the new stitches will not be as noticeable, such as on an underside or another area that will not be seen.

  2. How to Restuff a Plushie: paso 2, imagen 1 de 3 How to Restuff a Plushie: paso 2, imagen 2 de 3 How to Restuff a Plushie: paso 2, imagen 3 de 3
    • Partially unpick the seam using a seam ripper or pair of scissors (about 2 inches).

    • Be sure to place hands carefully and away from the path of the seam ripper to ensure no injures.

  3. How to Restuff a Plushie: paso 3, imagen 1 de 2 How to Restuff a Plushie: paso 3, imagen 2 de 2
    • Remove all of the old stuffing from the plushie.

  4. How to Restuff a Plushie: paso 4, imagen 1 de 3 How to Restuff a Plushie: paso 4, imagen 2 de 3 How to Restuff a Plushie: paso 4, imagen 3 de 3
    • Fill a sink or bowl with warm water and light detergent.

    • Gently hand wash your plushie.

    • Drain and replace the container with clean and warm water.

    • Rinse off the plushie and wring it until it is no longer dripping.

  5. How to Restuff a Plushie: paso 5, imagen 1 de 1
    • Hang dry the plushie using a hanger or clothesline until completely dry.

    • Machine drying can damage or burn the fabric of the plushie

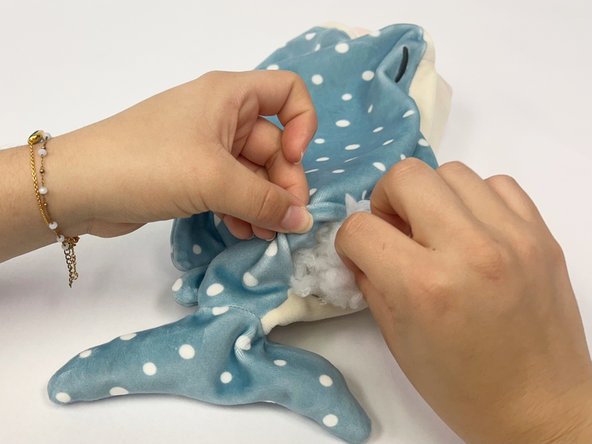
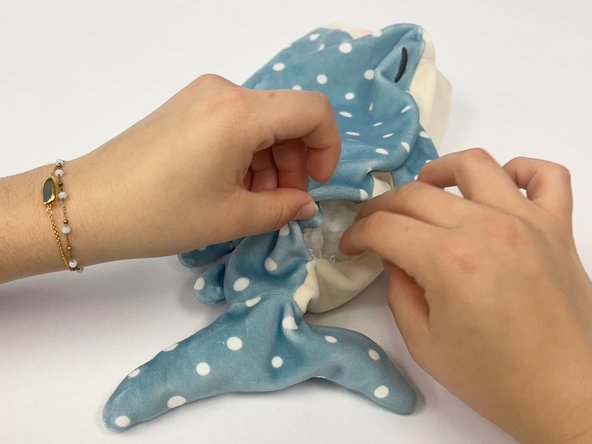
  6. How to Restuff a Plushie: paso 6, imagen 1 de 3 How to Restuff a Plushie: paso 6, imagen 2 de 3 How to Restuff a Plushie: paso 6, imagen 3 de 3
    • Once dry, fill the plushie with new stuffing.

    • Stuffing the plushie little by little ensures the whole plushie gets re-stuffed properly and evenly.

  7. How to Restuff a Plushie: paso 7, imagen 1 de 3 How to Restuff a Plushie: paso 7, imagen 2 de 3 How to Restuff a Plushie: paso 7, imagen 3 de 3
    • Pull the thread through the eye of the needle.

    • Create a knot at the end of the thread.

  8. How to Restuff a Plushie: paso 8, imagen 1 de 1
    • Fold the fabric of the opening (about 1 cm) inward to create two folds.

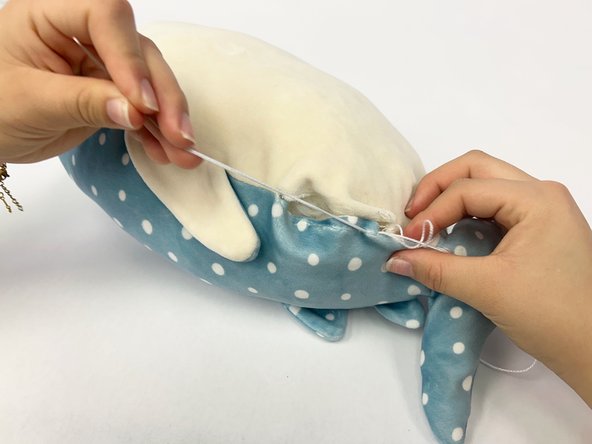
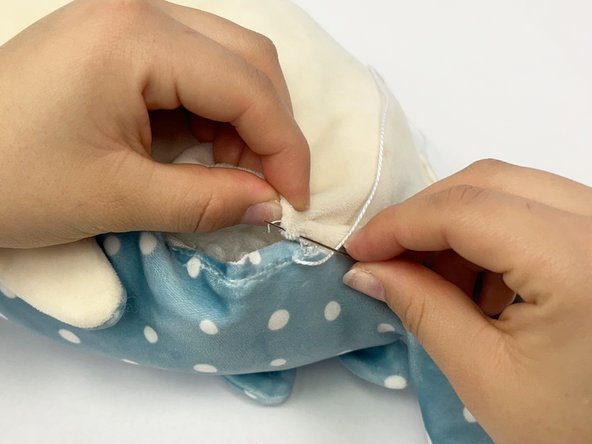
  9. How to Restuff a Plushie: paso 9, imagen 1 de 3 How to Restuff a Plushie: paso 9, imagen 2 de 3 How to Restuff a Plushie: paso 9, imagen 3 de 3
    • Insert the needle through the inside edge of the folded fabric

    • Make a stitch in the inside fold and pull the thread through.

    • Insert the needle on the other fold and make a stitch

    • Pull the thread through and alternate stitches until you reach the other side of the opening.

    • Take your time and carefully place your hands in a safe position when inserting the needle into the fabric. This can prevent injures.

  10. How to Restuff a Plushie: paso 10, imagen 1 de 3 How to Restuff a Plushie: paso 10, imagen 2 de 3 How to Restuff a Plushie: paso 10, imagen 3 de 3
    • Thread the needle through the inside stitches to loop and knot the end of the thread.

    • Repeat several times to secure the stitch.

  11. How to Restuff a Plushie: paso 11, imagen 1 de 2 How to Restuff a Plushie: paso 11, imagen 2 de 2
    • Cut the excess thread with scissors.

  12. How to Restuff a Plushie: paso 12, imagen 1 de 1
    • Enjoy your renewed plushie!

Conclusión

Your plushie is now looking almost brand new!

Sally Lee

Miembro Desde 02/01/24

205 Reputación

1 Guía escrita

Equipo

UC Davis, Team 2-4, Andersen Winter 2024 Miembro de UC Davis, Team 2-4, Andersen Winter 2024

UCD-ANDERSEN-W24S2G4

3 Miembros

1 Guía escrita

0 comentarios

Agregar Comentario

Ver Estadísticas:

Ultimas 24 horas: 3

Ultimos 7 días: 6

Ultimos 30 días: 28

Todo El Tiempo: 122