Saltar al contenido principal

How to Replace the Screen Adhesive for Your Google Pixel 7

Qué necesitas

  1. How to Replace the Screen Adhesive for Your Google Pixel 7, Clean the frame: paso 1, imagen 1 de 3 How to Replace the Screen Adhesive for Your Google Pixel 7, Clean the frame: paso 1, imagen 2 de 3 How to Replace the Screen Adhesive for Your Google Pixel 7, Clean the frame: paso 1, imagen 3 de 3
    Herramienta utilizada en este paso:
    Microfiber Cleaning Cloths
    $3.99
    Comprar
    • Any residual adhesive or debris will prevent your screen from sealing properly.

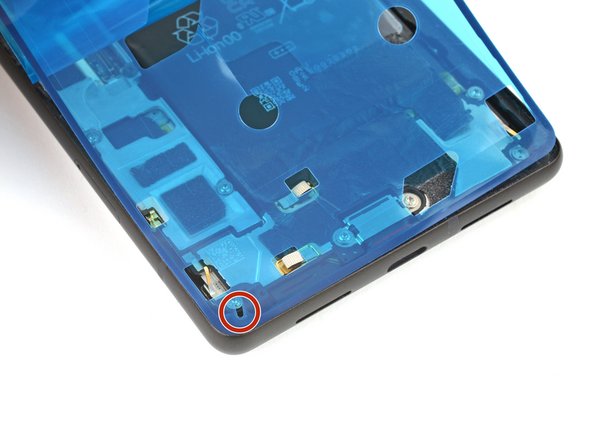
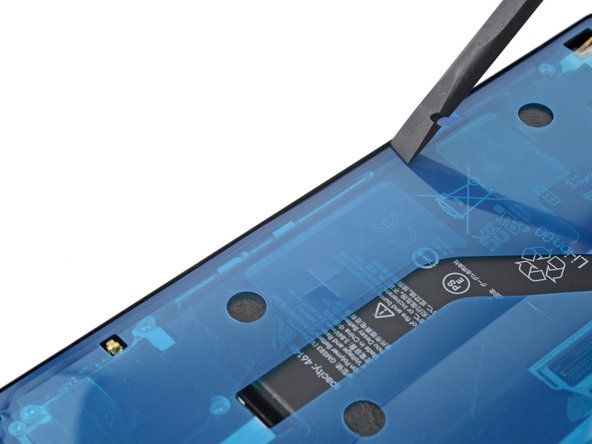
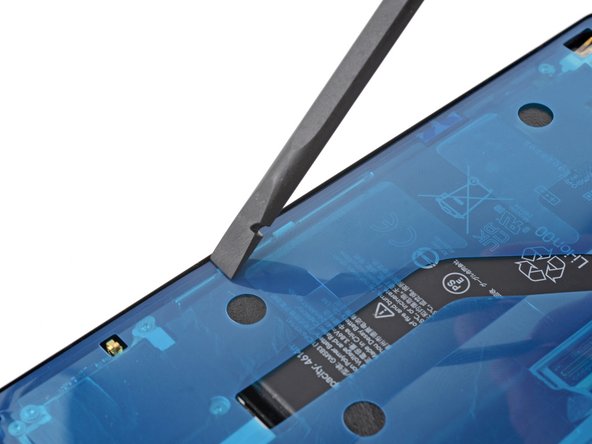
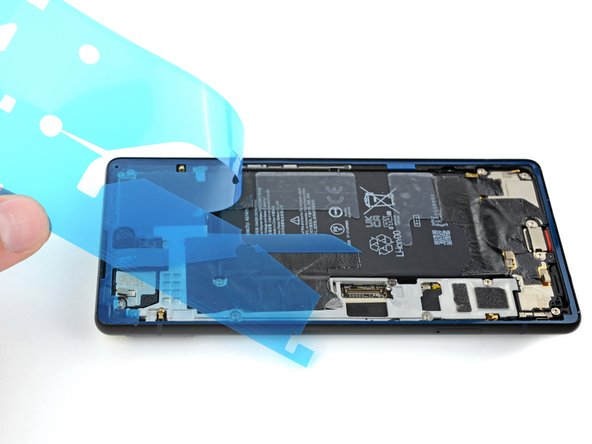
    • Use the flat end of your spudger to scrape off as much adhesive as you can.

    • Use caution not to damage the spring connectors near the perimeter of the frame.

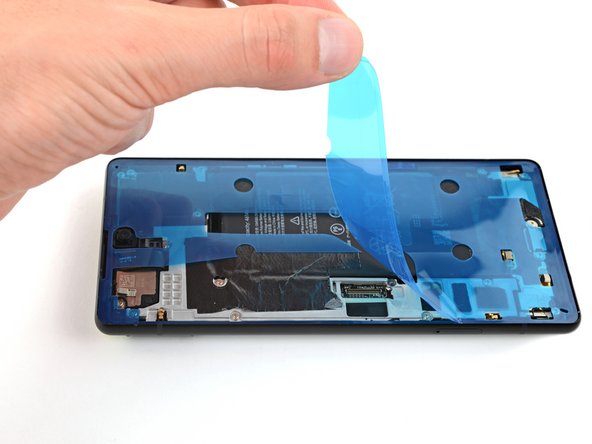
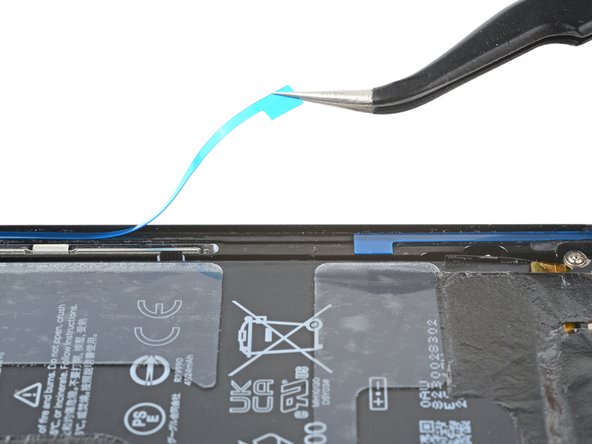
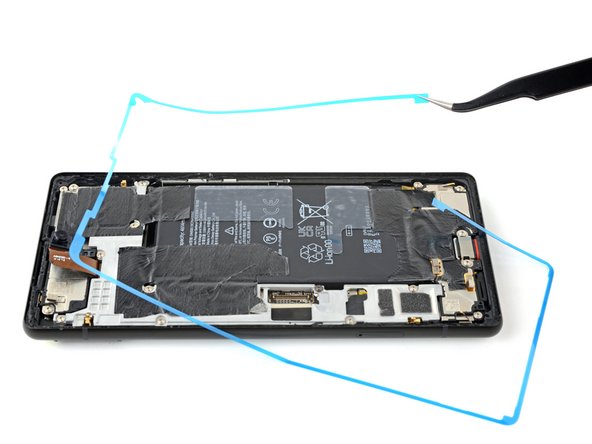
    • Use tweezers or your fingers to peel and remove any remaining adhesive.

    • Clean the perimeter of the frame with a small amount of highly-concentrated isopropyl alcohol (over 90%) and a lint-free or microfiber cloth.

  2. How to Replace the Screen Adhesive for Your Google Pixel 7, Clean the screen: paso 2, imagen 1 de 3 How to Replace the Screen Adhesive for Your Google Pixel 7, Clean the screen: paso 2, imagen 2 de 3 How to Replace the Screen Adhesive for Your Google Pixel 7, Clean the screen: paso 2, imagen 3 de 3
    • If you're reusing your screen, clean it as you did for the frame.

  3. How to Replace the Screen Adhesive for Your Google Pixel 7, Orient the adhesive: paso 3, imagen 1 de 2 How to Replace the Screen Adhesive for Your Google Pixel 7, Orient the adhesive: paso 3, imagen 2 de 2
    • Before applying the new adhesive, lay it over the frame to find its proper orientation.

    • Use features such as the upper loudspeaker cutout, lower left hole, and upper right hole to orient the adhesive.

  4. How to Replace the Screen Adhesive for Your Google Pixel 7, Remove the adhesive backing: paso 4, imagen 1 de 1
    • Use the pull tab on the top of the adhesive to remove the protective backing.

    • This will expose the adhesive that sticks to the frame.

  5. How to Replace the Screen Adhesive for Your Google Pixel 7, Apply the adhesive: paso 5, imagen 1 de 3 How to Replace the Screen Adhesive for Your Google Pixel 7, Apply the adhesive: paso 5, imagen 2 de 3 How to Replace the Screen Adhesive for Your Google Pixel 7, Apply the adhesive: paso 5, imagen 3 de 3
    • Be very careful during this step! The adhesive is very sticky and can't be repositioned once it sticks. Misaligned adhesive can lead to an improper seal.

    • Lay the adhesive onto the frame, starting with the bottom or top edge. Make small corrections as you go.

    • There are holes in the bottom left and top right corners to help align the adhesive.

  6. How to Replace the Screen Adhesive for Your Google Pixel 7: paso 6, imagen 1 de 3 How to Replace the Screen Adhesive for Your Google Pixel 7: paso 6, imagen 2 de 3 How to Replace the Screen Adhesive for Your Google Pixel 7: paso 6, imagen 3 de 3
    • Use a spudger or your fingers to firmly press along the perimeter of the adhesive and adhere it to the frame.

    • Be careful not to damage the spring connectors near the perimeter of the frame.

  7. How to Replace the Screen Adhesive for Your Google Pixel 7, Remove the liners: paso 7, imagen 1 de 3 How to Replace the Screen Adhesive for Your Google Pixel 7, Remove the liners: paso 7, imagen 2 de 3 How to Replace the Screen Adhesive for Your Google Pixel 7, Remove the liners: paso 7, imagen 3 de 3
    • Grab the pull tab on the upper left of the frame and peel off the main liner.

  8. How to Replace the Screen Adhesive for Your Google Pixel 7, Check for liners: paso 8, imagen 1 de 1
    • If you replaced the screen, check the front-facing camera hole and sensor cutout on the replacement screen and remove any remaining protective liners in it.

  9. How to Replace the Screen Adhesive for Your Google Pixel 7, Continue reassembly: paso 9, imagen 1 de 1
    • Return to your phone's guide and continue reassembly.

    • Remember to reinstall the screen connector bracket.

    • Finish this guide when your screen is installed and you're ready to seal the phone up.

  10. How to Replace the Screen Adhesive for Your Google Pixel 7, Remove the final liner: paso 10, imagen 1 de 3 How to Replace the Screen Adhesive for Your Google Pixel 7, Remove the final liner: paso 10, imagen 2 de 3 How to Replace the Screen Adhesive for Your Google Pixel 7, Remove the final liner: paso 10, imagen 3 de 3
    • Take care not to puncture the battery with your tweezers—a punctured battery may leak dangerous chemicals or cause a fire.

    • Grab the pull tab on the lower right of the frame and peel off the liner covering the perimeter adhesive.

    • Make sure the adhesive doesn't peel up with the liner.

  11. How to Replace the Screen Adhesive for Your Google Pixel 7, Install the screen: paso 11, imagen 1 de 2 How to Replace the Screen Adhesive for Your Google Pixel 7, Install the screen: paso 11, imagen 2 de 2
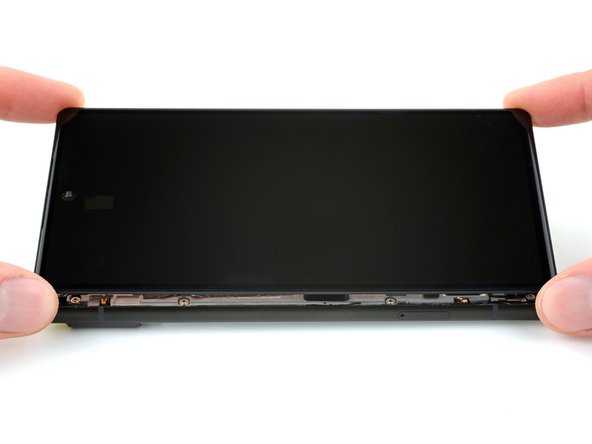
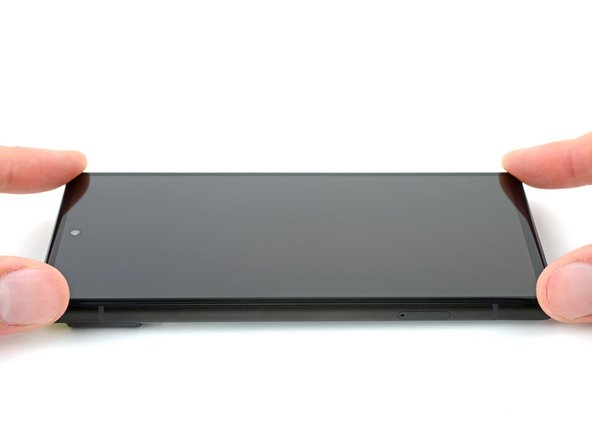
    • Flip the screen over and lay it onto the frame.

    • Press along the perimeter of the screen to secure it.

  12. How to Replace the Screen Adhesive for Your Google Pixel 7, Strengthen the adhesive bond: paso 12, imagen 1 de 3 How to Replace the Screen Adhesive for Your Google Pixel 7, Strengthen the adhesive bond: paso 12, imagen 2 de 3 How to Replace the Screen Adhesive for Your Google Pixel 7, Strengthen the adhesive bond: paso 12, imagen 3 de 3
    Herramienta utilizada en este paso:
    Screen Vise Clamps 6-Pack
    $15.99
    Comprar
    • To evenly compress your Pixel and strengthen the bond of the screen to the frame, you need to account for the camera bar.

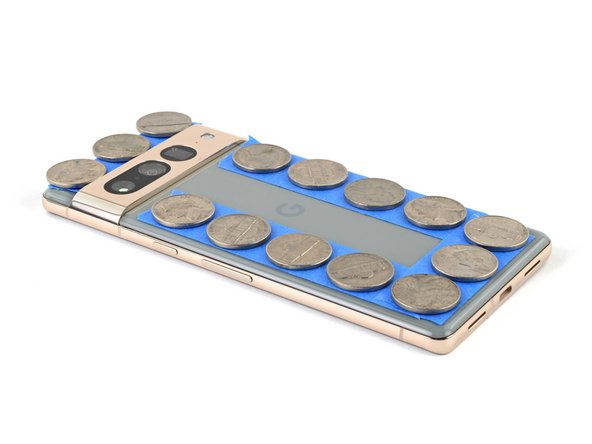
    • If you have screen vise clamps, you can work around the camera bar. Secure the clamps to the perimeter of the device.

    • Apply tape to the perimeter of your rear glass to protect its finish.

    • Place coins or similarly thick objects along the edges of the rear glass. Make sure they're as thick or thicker than the camera bar.

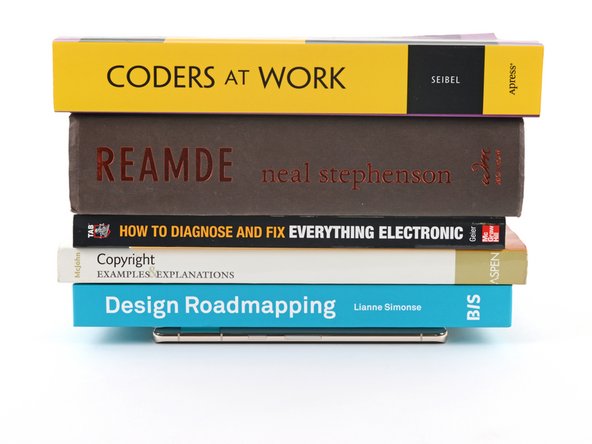
    • Stack multiple books or other heavy objects on your phone. Leave them in place for thirty minutes or longer. Ideally, leave them stacked overnight.

Linea de Meta

12 personas más completaron esta guía.

Arthur Shi

Miembro Desde 01/03/18

249,876 Reputación

503 Guías creadas

Equipo

iFixit Miembro de iFixit

Staff

135 Miembros

16,732 Guías creadas

2 comentarios

Fantastic guide. Read through it first. Go slowly and re-read each section as you do it. Get the iFixit tools. They are invaluable.

msqualls - Contestar

Agregar Comentario

Ver Estadísticas:

Ultimas 24 horas: 16

Ultimos 7 días: 109

Ultimos 30 días: 420

Todo El Tiempo: 5,771