Saltar al contenido principal
Únete a la Comunidad de Reparación - Crear Cuenta

How to Replace a Beaded Bracelet String

Qué necesitas

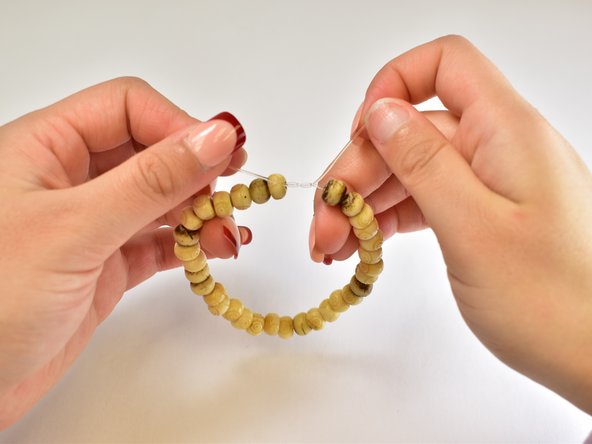
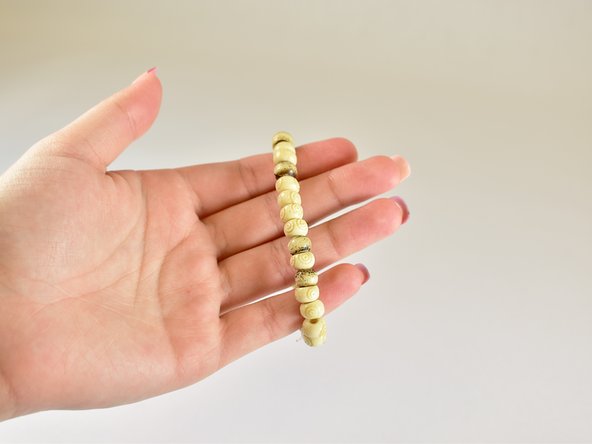
    1. How to Replace a Beaded Bracelet String, String: paso 1, imagen 1 de 2 How to Replace a Beaded Bracelet String, String: paso 1, imagen 2 de 2
      • Test your bracelet by wearing it on your wrist.

      • If it is loose, sagging (as pictured), or fully snapped, this is a sign that you may need to replace the string.

      Pregunta a FixBot

      Agregar Comentario

    2. How to Replace a Beaded Bracelet String: paso 2, imagen 1 de 1
      • Cut the old string using scissors.

      Pregunta a FixBot

      Agregar Comentario

    3. How to Replace a Beaded Bracelet String: paso 3, imagen 1 de 1
      • Separate the beads from the old string.

      Pregunta a FixBot

      Agregar Comentario

    4. How to Replace a Beaded Bracelet String: paso 4, imagen 1 de 1
      • Measure the new string by wrapping it 1.5 times around your wrist.

      • If you want a loose fit, add extra slack, otherwise pull it flush against skin.

      • Make sure to leave at least 2 in (5.1cm) of excess string for the knot.

      Pregunta a FixBot

      Agregar Comentario

    5. How to Replace a Beaded Bracelet String: paso 5, imagen 1 de 1
      • Cut the new string at the desired length using scissors.

      Pregunta a FixBot

      Agregar Comentario

    6. How to Replace a Beaded Bracelet String: paso 6, imagen 1 de 1
      • Thread the beads onto the new string one at a time.

      • You can use tweezers to hold the beads as you thread.

      Pregunta a FixBot

      Agregar Comentario

    7. How to Replace a Beaded Bracelet String: paso 7, imagen 1 de 2 How to Replace a Beaded Bracelet String: paso 7, imagen 2 de 2
      • Tie a square knot to secure the bracelet.

      • Cross both ends to form an "X" shape.

      • Loop one end of the string over the other to form a simple knot.

      • Tie another simple knot, but this time, loop in the opposite direction. If you initially looped the right side over the left, loop the left side over the right, and vice versa.

      • Pull tight to form a square knot.

      Pregunta a FixBot

      Agregar Comentario

    8. How to Replace a Beaded Bracelet String: paso 8, imagen 1 de 1
      • As an optional step, apply a dot of super glue to the knot.

      • Wait until the super glue fully dries before moving on, otherwise the knot may come undone.

      Pregunta a FixBot

      Agregar Comentario

    9. How to Replace a Beaded Bracelet String: paso 9, imagen 1 de 1
      • Trim the excess string.

      • Make sure to leave at least 1/2 in (1.3cm) of excess string for the knot.

      Pregunta a FixBot

      Agregar Comentario

    10. How to Replace a Beaded Bracelet String: paso 10, imagen 1 de 2 How to Replace a Beaded Bracelet String: paso 10, imagen 2 de 2
      • Test your bracelet by wearing it again. It should have a tighter fit.

      Pregunta a FixBot

      Agregar Comentario

Conclusión

To reassemble your device, follow these instructions in reverse order.

Cancelar: No complete esta guía.

Una persona más ha completado esta guía.

Lucas Wang

Miembro Desde 01/30/24

193 Reputación

1 Guía escrita

Equipo

UC Davis, Team 2-5, Andersen Winter 2024 Miembro de UC Davis, Team 2-5, Andersen Winter 2024

UCD-ANDERSEN-W24S2G5

Miembros de 3

9 Guías creadas

0Guía Comentarios

Agregar Comentario

Ver Estadísticas:

Ultimas 24 horas: 5

Ultimos 7 días: 41

Ultimos 30 días: 185

Todo El Tiempo: 2,509