Saltar al contenido principal

How to Repair the Buttons on a Logitech Pebble Mouse

Qué necesitas

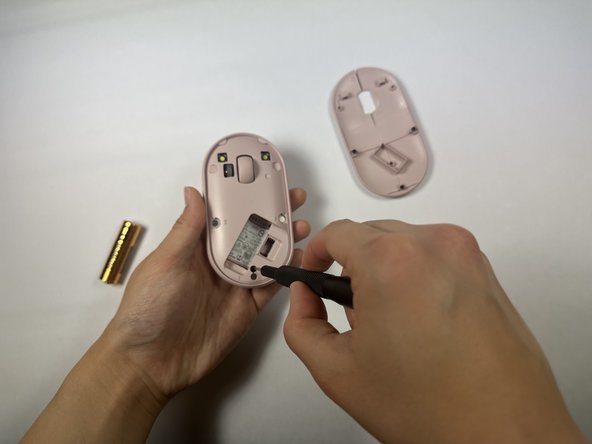
  1. How to Repair the Buttons on a Logitech Pebble Mouse, How to Repair the Buttons on a Logitech Pebble Mouse: paso 1, imagen 1 de 3 How to Repair the Buttons on a Logitech Pebble Mouse, How to Repair the Buttons on a Logitech Pebble Mouse: paso 1, imagen 2 de 3 How to Repair the Buttons on a Logitech Pebble Mouse, How to Repair the Buttons on a Logitech Pebble Mouse: paso 1, imagen 3 de 3
    • Use your hands to remove the magnetic top panel of the mouse.

  2. How to Repair the Buttons on a Logitech Pebble Mouse: paso 2, imagen 1 de 3 How to Repair the Buttons on a Logitech Pebble Mouse: paso 2, imagen 2 de 3 How to Repair the Buttons on a Logitech Pebble Mouse: paso 2, imagen 3 de 3
    • Remove the USB adaptor in the small rectangular hole on the lower right corner.

    • Remove the battery.

  3. How to Repair the Buttons on a Logitech Pebble Mouse: paso 3, imagen 1 de 2 How to Repair the Buttons on a Logitech Pebble Mouse: paso 3, imagen 2 de 2
    • Use a Phillips #000 screwdriver to remove one screw holding the inner panel in place.

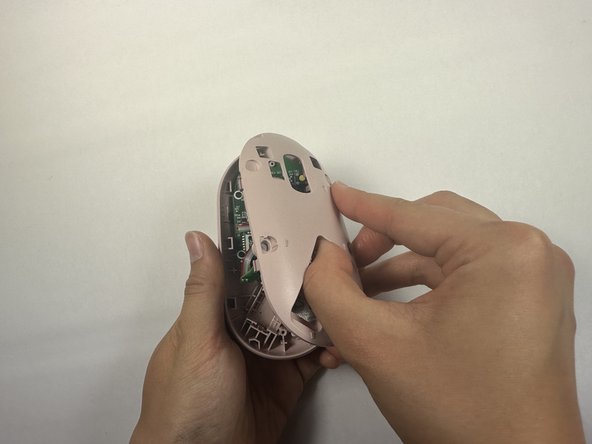
  4. How to Repair the Buttons on a Logitech Pebble Mouse: paso 4, imagen 1 de 3 How to Repair the Buttons on a Logitech Pebble Mouse: paso 4, imagen 2 de 3 How to Repair the Buttons on a Logitech Pebble Mouse: paso 4, imagen 3 de 3
    • Remove the the inner panel.

    • This may take a little bit of effort but it should come off fairly easily.

    • You can use the battery socket as leverage to remove the panel. To avoid breaking the panel, be gentle but firm.

  5. How to Repair the Buttons on a Logitech Pebble Mouse: paso 5, imagen 1 de 1
    • Use a fine-tipped object or a Q-tip and dip it in a small amount of oil.

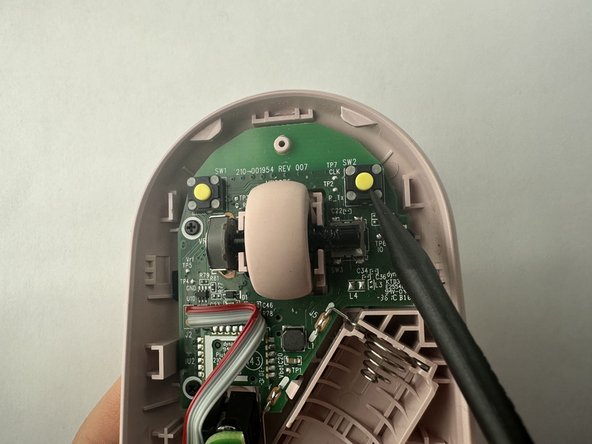
  6. How to Repair the Buttons on a Logitech Pebble Mouse: paso 6, imagen 1 de 3 How to Repair the Buttons on a Logitech Pebble Mouse: paso 6, imagen 2 de 3 How to Repair the Buttons on a Logitech Pebble Mouse: paso 6, imagen 3 de 3
    • Gently wipe the metal axle where the scroll wheel is mounted with a small amount of 3-in-1 oil.

    • Repeat for the left and right click buttons.

Conclusión

To reassemble your device, follow these instructions in reverse order.

Una persona más ha completado esta guía.

Emma Whitmer

Miembro Desde 04/19/23

151 Reputación

1 Guía escrita

Equipo

UC Davis, Team 2-6, Morris Spring 2023 Miembro de UC Davis, Team 2-6, Morris Spring 2023

UCD-MORRIS-S23S2G6

3 Miembros

1 Guía escrita

2 comentarios

At first i'm laugh about fixing button with oil, but then i tried it... and it worked like a charm!

Marat - Contestar

I didn't even disassemble (unscrew) my pebble. Just applied a drop of mineral oil to the button and it did help a lot! Thanks!

Tomek Luzak - Contestar

Agregar Comentario

Ver Estadísticas:

Ultimas 24 horas: 5

Ultimos 7 días: 37

Ultimos 30 días: 160

Todo El Tiempo: 1,580