Saltar al contenido principal

How to Repair a Hole in the Wall Using Spackle

Qué necesitas

  1. How to Repair a Hole in  the Wall Using Spackle, How to Repair a Hole in  the Wall Using Spackle: paso 1, imagen 1 de 3 How to Repair a Hole in  the Wall Using Spackle, How to Repair a Hole in  the Wall Using Spackle: paso 1, imagen 2 de 3 How to Repair a Hole in  the Wall Using Spackle, How to Repair a Hole in  the Wall Using Spackle: paso 1, imagen 3 de 3
    • Prepare the damaged surface by cleaning and removing all dust and debris.

    • If the surface has a wallpaper, remove it for a length more extensive than the mesh patch.

  2. How to Repair a Hole in  the Wall Using Spackle: paso 2, imagen 1 de 3 How to Repair a Hole in  the Wall Using Spackle: paso 2, imagen 2 de 3 How to Repair a Hole in  the Wall Using Spackle: paso 2, imagen 3 de 3
    • Apply the self-Adhesive patch by peeling back the paper liner from the patch and apply it over the hole.

    • Press patch firmly to ensure a strong bond to the wall.

  3. How to Repair a Hole in  the Wall Using Spackle: paso 3, imagen 1 de 3 How to Repair a Hole in  the Wall Using Spackle: paso 3, imagen 2 de 3 How to Repair a Hole in  the Wall Using Spackle: paso 3, imagen 3 de 3
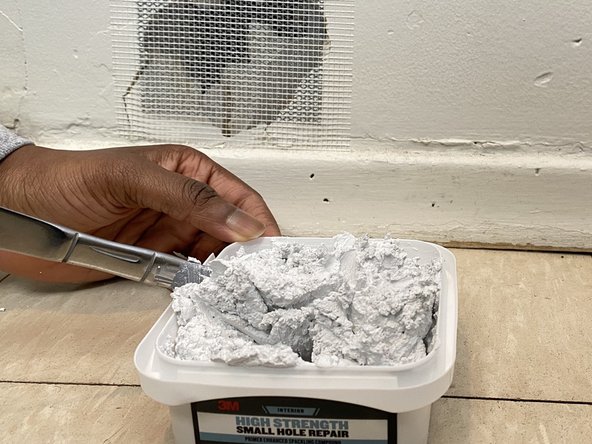
    • Open container and mix spackling compound before applying.

    • Mix thoroughly to have a smooth application.

  4. How to Repair a Hole in  the Wall Using Spackle: paso 4, imagen 1 de 3 How to Repair a Hole in  the Wall Using Spackle: paso 4, imagen 2 de 3 How to Repair a Hole in  the Wall Using Spackle: paso 4, imagen 3 de 3
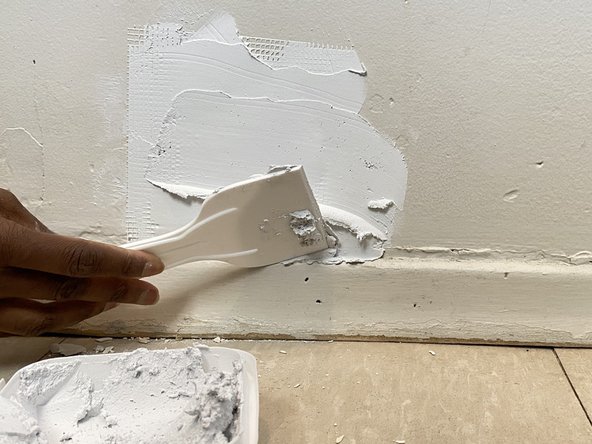
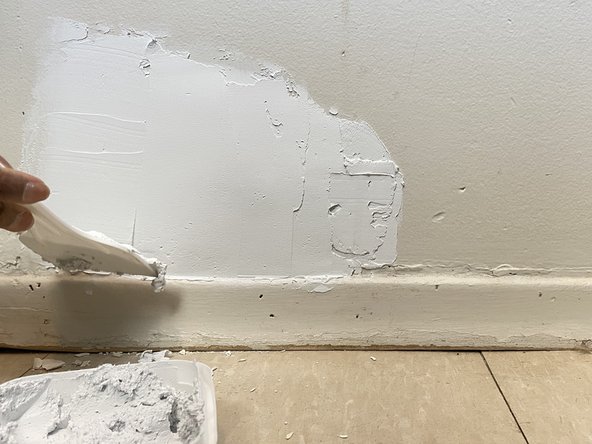
    • Use the putty knife to spread spackling compound evenly over the adhesive patch.

    • Spread the spackling mixture beyond the area intended to cover.

    • Apply thinner layers toward the edges of the patch, so the patched area blends with the wall.

  5. How to Repair a Hole in  the Wall Using Spackle: paso 5, imagen 1 de 2 How to Repair a Hole in  the Wall Using Spackle: paso 5, imagen 2 de 2
    • Allow the compound to dry completely before moving to the last step.

    • Depending on the hole's size and thickness of the layers applied, it might take a while to dry.

  6. How to Repair a Hole in  the Wall Using Spackle: paso 6, imagen 1 de 3 How to Repair a Hole in  the Wall Using Spackle: paso 6, imagen 2 de 3 How to Repair a Hole in  the Wall Using Spackle: paso 6, imagen 3 de 3
    • Once the spackling compound has dried, sand it lightly with a sand pad/sponge.

    • Smooth out any bumps on the surface.

    • Do not sand down to mesh patch.

    • Once the surface is smooth, paint, wallpaper, or apply any texture desire.

Conclusión

To reassemble your device, follow these instructions in reverse order.

Una persona más ha completado esta guía.

Kerticia Miller

Miembro Desde 01/17/21

160 Reputación

1 Guía escrita

0 comentarios

Agregar Comentario

Ver Estadísticas:

Ultimas 24 horas: 14

Ultimos 7 días: 40

Ultimos 30 días: 150

Todo El Tiempo: 3,254