Saltar al contenido principal

How to Repair a Hole in the Wall Using Spackle

Qué necesitas

  1. How to Repair a Hole in  the Wall Using Spackle, How to Repair a Hole in  the Wall Using Spackle: paso 1, imagen 1 de 3 How to Repair a Hole in  the Wall Using Spackle, How to Repair a Hole in  the Wall Using Spackle: paso 1, imagen 2 de 3 How to Repair a Hole in  the Wall Using Spackle, How to Repair a Hole in  the Wall Using Spackle: paso 1, imagen 3 de 3
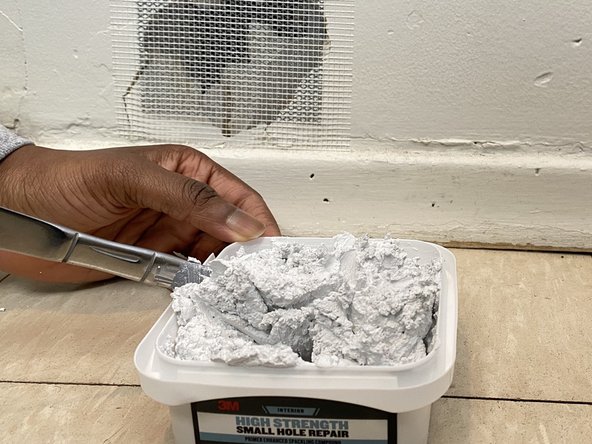
    • Prepare the damaged surface by cleaning and removing all dust and debris.

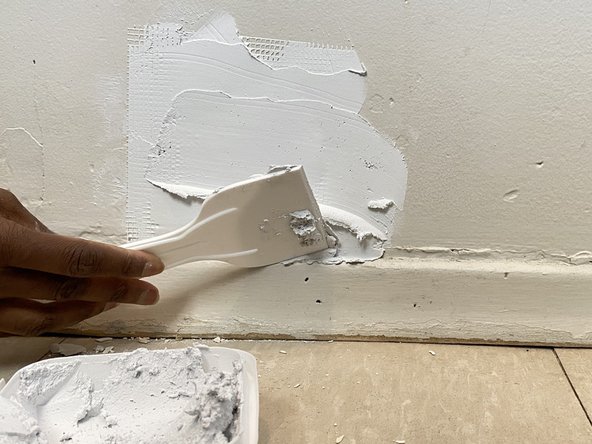
    • If the surface has a wallpaper, remove it for a length more extensive than the mesh patch.

  2. How to Repair a Hole in  the Wall Using Spackle: paso 2, imagen 1 de 3 How to Repair a Hole in  the Wall Using Spackle: paso 2, imagen 2 de 3 How to Repair a Hole in  the Wall Using Spackle: paso 2, imagen 3 de 3
    • Apply the self-Adhesive patch by peeling back the paper liner from the patch and apply it over the hole.

    • Press patch firmly to ensure a strong bond to the wall.

  3. How to Repair a Hole in  the Wall Using Spackle: paso 3, imagen 1 de 3 How to Repair a Hole in  the Wall Using Spackle: paso 3, imagen 2 de 3 How to Repair a Hole in  the Wall Using Spackle: paso 3, imagen 3 de 3
    • Open container and mix spackling compound before applying.

    • Mix thoroughly to have a smooth application.

  4. How to Repair a Hole in  the Wall Using Spackle: paso 4, imagen 1 de 3 How to Repair a Hole in  the Wall Using Spackle: paso 4, imagen 2 de 3 How to Repair a Hole in  the Wall Using Spackle: paso 4, imagen 3 de 3
    • Use the putty knife to spread spackling compound evenly over the adhesive patch.

    • Spread the spackling mixture beyond the area intended to cover.

    • Apply thinner layers toward the edges of the patch, so the patched area blends with the wall.

  5. How to Repair a Hole in  the Wall Using Spackle: paso 5, imagen 1 de 2 How to Repair a Hole in  the Wall Using Spackle: paso 5, imagen 2 de 2
    • Allow the compound to dry completely before moving to the last step.

    • Depending on the hole's size and thickness of the layers applied, it might take a while to dry.

  6. How to Repair a Hole in  the Wall Using Spackle: paso 6, imagen 1 de 3 How to Repair a Hole in  the Wall Using Spackle: paso 6, imagen 2 de 3 How to Repair a Hole in  the Wall Using Spackle: paso 6, imagen 3 de 3
    • Once the spackling compound has dried, sand it lightly with a sand pad/sponge.

    • Smooth out any bumps on the surface.

    • Do not sand down to mesh patch.

    • Once the surface is smooth, paint, wallpaper, or apply any texture desire.

Conclusión

To reassemble your device, follow these instructions in reverse order.

2 personas más completaron esta guía.

0 comentarios

Agregar Comentario

Ver Estadísticas:

Ultimas 24 horas: 10

Ultimos 7 días: 30

Ultimos 30 días: 189

Todo El Tiempo: 3,506